[Partner Name](partner website link)
- Broader Category
- Subcategory (can be the name of a kit when applicable)
This section of the README (especially the first paragraph) should grip a prospective user with the overarching purpose/flow of the protocol, but should not include fine details of the protocol steps themselves.
Example: This is a flexible protocol accommodating a wide range of commercial RNA extraction workflows for COVID-19 sample processing. The protocol is broken down into 5 main parts:
- binding buffer addition to samples
- bead wash 3x using magnetic module
- final elution to chilled PCR plate
Subsequent paragraphs can give some more insight into the details of the protocol, but a step-by-step description should be included in the 'Protocol Steps' section below.
Example: For sample traceability and consistency, samples are mapped directly from the magnetic extraction plate (magnetic module, slot 4) to the elution PCR plate (temperature module, slot 1). Magnetic extraction plate well A1 is transferred to elution PCR plate A1, extraction plate well B1 to elution plate B1, ..., D2 to D2, etc.
Results of the Opentrons Science team's internal testing of this protocol on the OT-2 are shown below:

Explanation of complex parameters below:
park tips: If set toyes(recommended), the protocol will conserve tips between reagent addition and removal. Tips will be stored in the wells of an empty rack corresponding to the well of the sample that they access (tip parked in A1 of the empty rack will only be used for sample A1, tip parked in B1 only used for sample B1, etc.). If set tono, tips will always be used only once, and the user will be prompted to manually refill tipracks mid-protocol for high throughput runs.input .csv file: Here, you should upload a .csv file formatted in the following way, being sure to include the header line:
source,dest,vol
A1,B1,4
- [Labware name](link to labware on shop.opentrons.com when applicable)
- Nick is working on auto-filling these sections from the protocol (3/28/2021)
- [Pipette name](link to pipette on shop.opentrons.com)
- Nick is working on auto-filling these sections from the protocol (3/28/2021)
- [kit name when applicable](link to kit)
- Nick is working on auto-filling these sections from the protocol (3/28/2021)
- If the deck layout of a particular protocol is more or less static, it is often helpful to attach a preview of the deck layout, most descriptively generated with Labware Creator. Example:
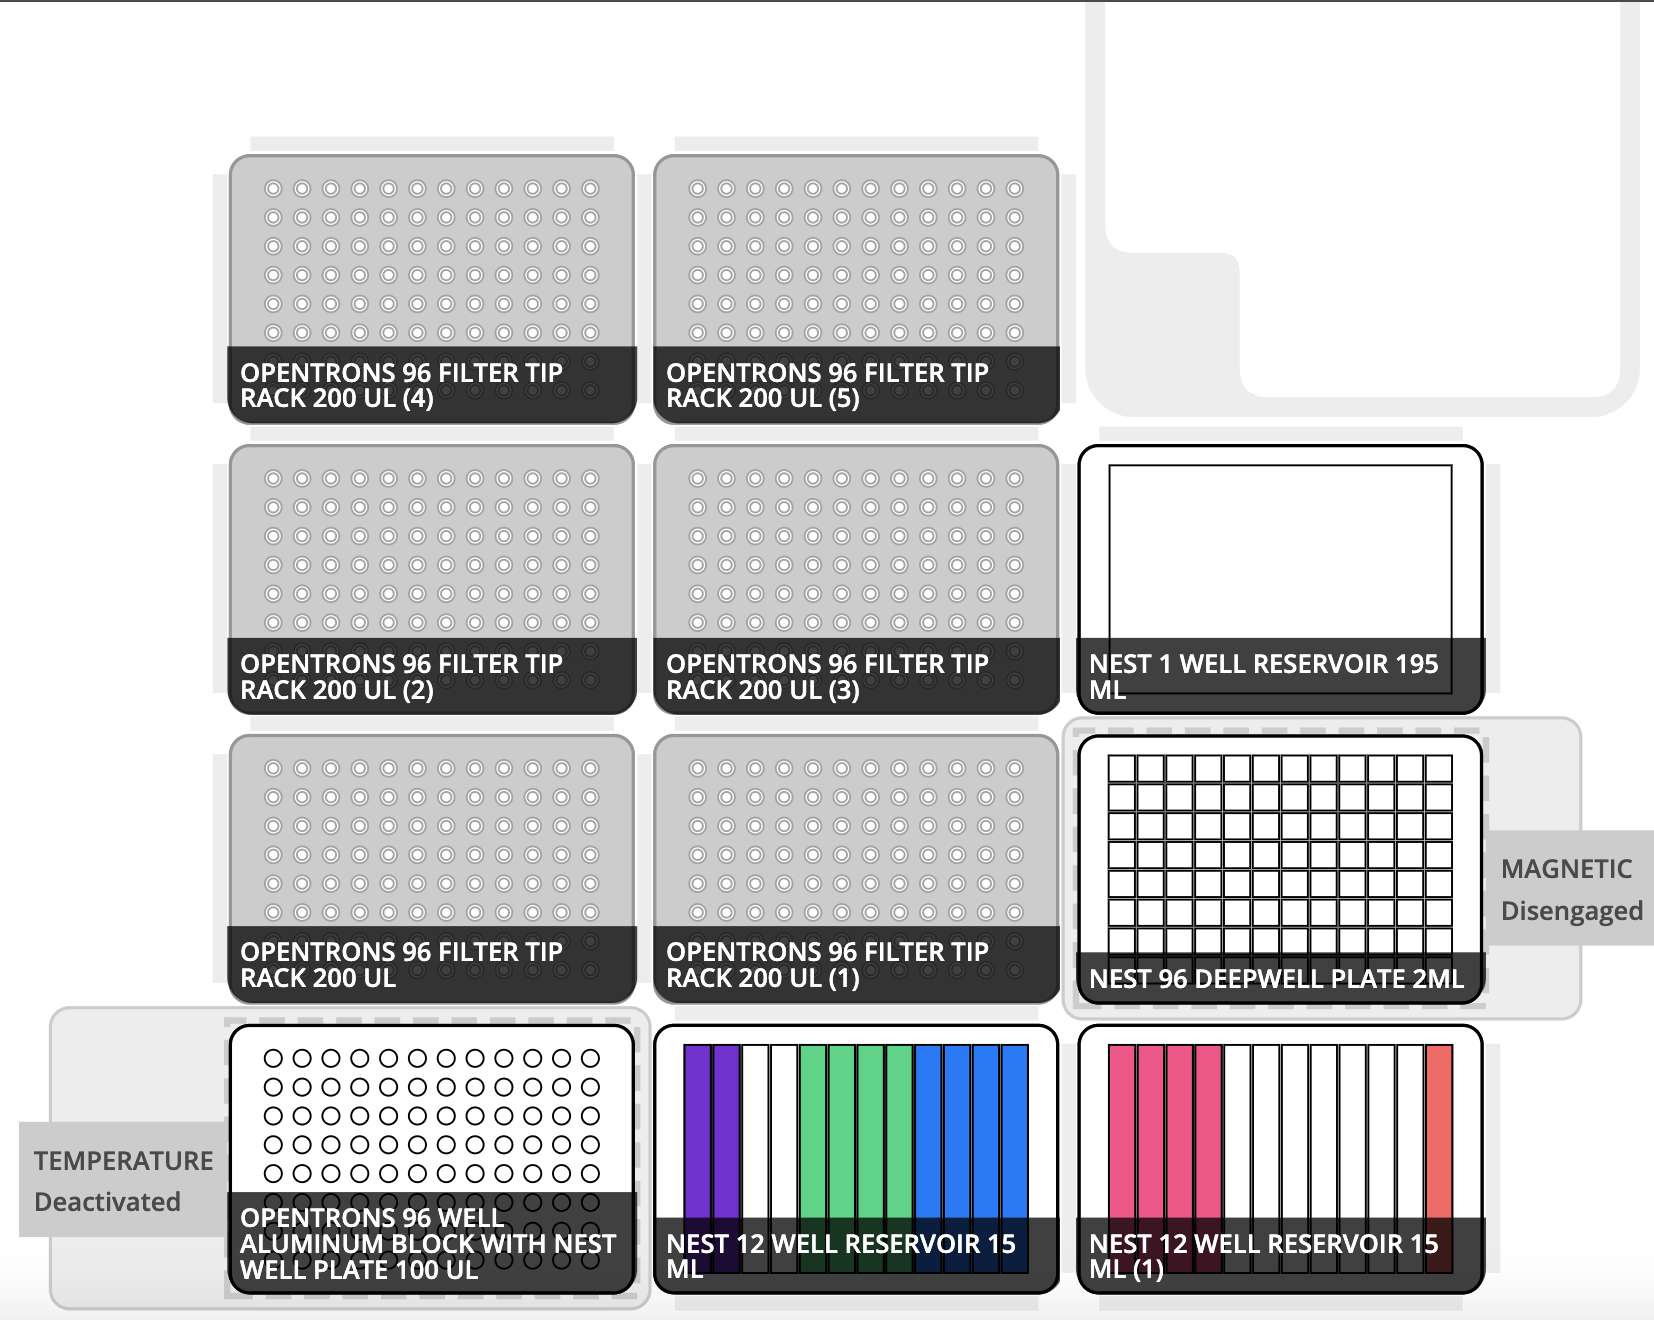
- This section can contain finer detail and images describing reagent volumes and positioning in their respective labware. Examples:
- Reservoir 1: slot 5
- Reservoir 2: slot 2


- This section should consist of a numerical outline of the protocol steps, somewhat analogous to the steps outlined by the user in their custom protocol submission.
- example step: Samples are transferred from the source tuberacks on slots 1-2 to the PCR plate on slot 3, down columns and then across rows.
- example step: Waste is removed from each sample on the magnetic module, ensuring the bead pellets are not contacted by the pipette tips.
- Input your protocol parameters above.
- Download your protocol and unzip if needed.
- Upload your custom labware to the OT App by navigating to
More>Custom Labware>Add Labware, and selecting your labware files (.json extensions) if needed. - Upload your protocol file (.py extension) to the OT App in the
Protocoltab. - Set up your deck according to the deck map.
- Calibrate your labware, tiprack and pipette using the OT App. For calibration tips, check out our support articles.
- Hit 'Run'.
If you have any questions about this protocol, please contact the Protocol Development Team by filling out the Troubleshooting Survey.
protocol-hex-code