The flutter_widget_from_html series of packages implement widget building logic with high testing coverage to ensure correctness. It tries to render an optimal tree by using RichText with specific TextStyle, merging text spans together, showing images in sized box, etc. The idea is to build a solid foundation for apps to customize.
There are two ways to alter the output widget tree.
- Use callbacks like
customStylesBuilderorcustomWidgetBuilderfor small changes - Use a custom
WidgetFactoryfor complete control of the rendering process
For text style changes like color, italic, etc., use customStylesBuilder to specify inline styles for each DOM element. Some common conditionals:
- If HTML tag is H1
element.localName == 'h1' - If the element has
fooCSS classelement.classes.contains('foo') - If an attribute has a specific value
element.attributes['x'] == 'y'
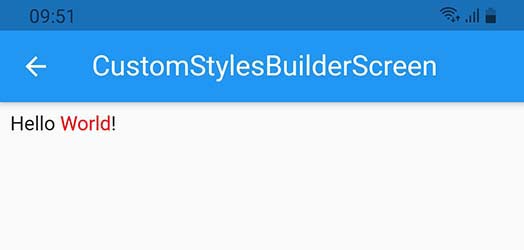
This example changes the color for a CSS class:
HtmlWidget(
  'Hello <span class="name">World</span>!',
  customStylesBuilder: (element) {
    if (element.classes.contains('name')) {
      return {'color': 'red'};
    }
    return null;
  },
), |
|
For fairly simple widget, use customWidgetBuilder. You will need to handle the DOM element and its children manually.
This example renders a carousel (live demo, try with fwfh.dev):
Notes:
- By default, the custom widget will take the full width
- Wrap it in
InlineCustomWidgetto inline with surrounding text
The HTML string is first parsed into DOM elements, and each element is traversed to construct the fwfh's build tree before being "flattened" into Flutter widgets. Central to this entire process is the WidgetFactory instance, which can be readily replaced with your own implementation.
class _MyWidgetFactory extends WidgetFactory {
  @override
  void parse(BuildTree tree) {
    // do something
    super.parse(tree);
  }
}

// somewhere in your app
HtmlWidget(
  'Hello <span class="name">World</span>!',
  factoryBuilder: () => _MyWidgetFactory(),
),
The most common integration point is WidgetFactory.parse, invoked individually for each element. Within this function, you have the option to adjust text styles using BuildTree.inherit or to register BuildOp for highly custom rendering.
flowchart TD
    _addBitsFromNode[/process DOM element/]
        --> ifIsText{plain\ntext?}
        -->|yes| bitOK( )

    ifIsText
        -->|no| ifCustomWidget{custom\nwidget?}
        -->|yes\n\ncustomWidgetBuilder| ifIsInlineCustomWidget{inline\nwidget?}
        --->|no| appendWidgetBitBlock[/render\nblock widget/]
        ---> bitOK

    ifIsInlineCustomWidget
        -->|yes\n\nInlineCustomWidget| flattener
        -->|onRenderInline| RichText[/render\nRichText/]
        --> bitOK

    ifCustomWidget
        -->|no| _parseEverything[parser]
        -->|WidgetFactory.parse\n\ndefaultStyles\n\ncustomStylesBuilder| _parseOK( )
        ~~~ _addBitsFromNodeOK

    _parseOK
        -.->|process children\nelements recursively| _addBitsFromNode
        -.->|onVisitChild| _addBitsFromNodeOK( )
        -->|onParsed| ifIsBlock{block\nelement?}
        -->|no| flattener

    ifIsBlock
        --->|yes\n\nonRenderBlock| appendBuiltSubTree[/render block/]
        ---> bitOK
You can modify inherited properties, including text styles, using the inherit function and registering your resolver callback to be invoked once the BuildContext is prepared. Here's how it works:
- Your callback will be supplied with two parameters.
- The first parameter is an immutable
InheritedPropertiesobject, calculated from the root to each element. To make changes, your callback must return a newInheritedPropertiesby callingcopyWith. If no changes are required, it's recommended to return the same object. - Additionally, you can pass a dynamic value when you call
inherit, and your callback will receive it as the second parameter during execution.
// simple resolver setting text color
tree.inherit(
  (resolving, _) => resolving.copyWith(
    style: resolving.style.copyWith(
      color: Colors.red,
    ),
  ),
);

// resolver uses the second param to set height
tree.inherit(
  (resolving, height) => resolving.copyWith(
    style: resolving.style.copyWith(
      height: height,
    ),
  ),
  2.0
);
Notes:
- Use the
resolving.copyWith<Foo>(value: foo)method to store various data types within the tree. Children elements can access this value throughresolved.get<Foo>().
Complex functionalities can be implemented using BuildOp or BuildOp.inline. Internally, all of the HTML tags are supported with the same architecture. This means that by adopting this method, your potential for customization is virtually limitless. If you encounter any obstacles while trying to create custom rendering, please don't hesitate to open a GitHub enhancement issue.
tree.register(BuildOp(
onParsed: (tree) {
// can be used to change text, inline contents, etc.
return tree..append(...);
},
onRenderBlock: (tree, child) {
// use this to render special widget, wrap it into something else, etc.
return MyCustomWidget(child: child);
},
// depending on the rendering logic, you may need to adjust the execution order to "jump the line"
priority: 9999,
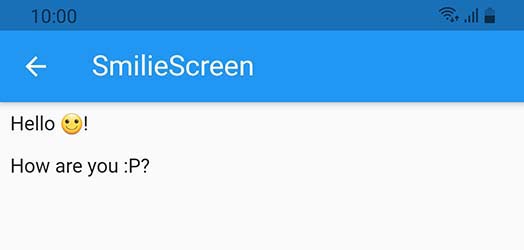
));The example below replaces smilie inline image with an emoji:
smilie.dart
const kHtml = """
<p>Hello <img class="smilie smilie-1" alt=":)" src="http://domain.com/sprites.png" />!</p>
<p>How are you <img class="smilie smilie-2" alt=":P" src="http://domain.com/sprites.png" />?
""";

const kSmilies = {':)': '🙂'};

class SmilieScreen extends StatelessWidget {
  @override
  Widget build(BuildContext context) => Scaffold(
        appBar: AppBar(
          title: Text('SmilieScreen'),
        ),
        body: Padding(
          padding: const EdgeInsets.all(8.0),
          child: HtmlWidget(
            kHtml,
            factoryBuilder: () => _SmiliesWidgetFactory(),
          ),
        ),
      );
}

class _SmiliesWidgetFactory extends WidgetFactory {
  final smilieOp = BuildOp(
    onParsed: (tree) {
      final alt = tree.element.attributes['alt'];
      return tree..addText(kSmilies[alt] ?? alt ?? '');
    },
  );

  @override
  void parse(BuildTree tree) {
    final e = tree.element;
    if (e.localName == 'img' &&
        e.classes.contains('smilie') &&
        e.attributes.containsKey('alt')) {
      tree.register(smilieOp);
      return;
    }

    return super.parse(tree);
  }
}