In this tutorial, we will see how to setup an edit/run/debug cycle on a local developper machine while testing against a DjaoDjin-hosted API server.
To do so we will add a form to login from the homepage directly.
Prerequisites:
- URL for a Website hosted on DjaoDjin (ex: livedemo.djaoapp.com) - Register
- API Key to connect the hosted Website (ex: ABC***123) - How do I get my API Keys?
On command line snipsets, lines starting with a $ character indicate
a shell prompt, or a command for you to type. Lines that do not start
with a $ character show a sample output from that command.
Example:
$ whoami
ec2-user
Text edits within source files are shown in universal diff format with lines preceded by a '-' sign to be removed and lines preceded by a '+' sign to be added. Example:
 def set_default_profile():     # This line for context, to be kept as-is
-    profile = 'abc'            # This line to be removed
+    profile = 'cde'            # This line to be added
     return profile             # This line for context, to be kept as-is
The full source code for this tutorial is available on GitHub.
You should be familiar with the steps to setup your development environment and download the default theme at this point. If it is not the case, I recommend you read the Create and test content locally tutorial first.
To have a basic theme to build on, we download the base.html, _generic_navbar.html and _form_fields.html theme templates, and download the base.css and djaodjin-menubar.css static assets.
$ djd download
$ unzip *livedemo*.zip
Then we start the local server. Note here that we have edited the local server and templates so we can pass the DjaoApp API endpoint on the command line.
$ DJAOAPP_API_BASE_URL="https://*livedemo*.djaoapp.com/api" uvicorn main:app --reloadThe Jinja2 template for the homepage is in "livedemo/templates/index.html". We will thus edit this file to add a login form to it.
+ <form method="post" action="/login/">
+   {% include "accounts/_login_form_fields.html" %}
+   <button type="submit">
+     Sign in
+   </button>
+ </form>
The input fields are defined in the partial template "livedemo/templates/accounts/_login_form_fields.html" as such
{% extends "_form_fields.html" %}

{% block form_block %}
<input type="hidden" name="csrfmiddlewaretoken" value="{{csrf_token}}">
{{text_input_field('text', "", label="Username", name="username")}}
{{text_input_field('password', "", label="Password", name="password")}}
{% endblock %}
We run the local HTTP server
$ export DJAOAPP_API_BASE_URL="http://*_subdomain_*.djaoapp.com/api"
$ uvicorn main:app --reload
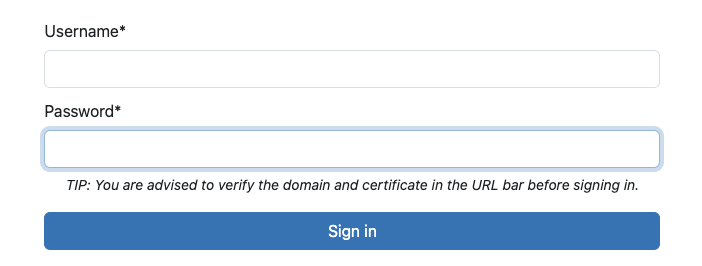
then open the home page (http://127.0.0.1:8000/) When the page loads properly
you will see something like the following screenshot.
Our login form is not functional at this point. We will create a Javascript function such that when a user clicks Sign in we pass the credentials to the DjaoDjin-hosted website and retrieves a JSON Web Token (JWT) to authenticate the user with the Website in further interaction.
Create a file livedemo/public/static/js/auth.js (full source) with the following function:
async function authUser(event) {
    // Prevents the form to be submitted to the server
    // through the `action` attribute.
    event.preventDefault();

    // Fetch the user credentials from the form input fields
    const username = event.target.querySelector('[name="username"]').value
    const password = event.target.querySelector('[name="password"]').value

    // Call the authentication API
    const data = {'username': username, 'password': password};
    const resp = await fetch(API_URL + "/auth", {
        method: "POST",
        headers: {'Content-Type': 'application/json'},
        body: JSON.stringify(data)
    })

    if( resp.status == 201 ) {
        // Extract the JWT and decode the user account information.
        const respData = await resp.json();
        const authToken = respData.token;

        sessionStorage.setItem('authToken', authToken);

        // Move on to the authenticated part of the application...
        const user = parseJWT(authToken);
        if( !user.username ) return 0;
        event.target.innerHTML = `Hello ${user.printable_name}!`;

    } else {
        document.querySelector('#messages-content').innerHTML =
            'Incorrect credentials';
    }

    return 0;
}
We will need the browser to load the script with the autentication function,
so we add a <script> element to the template that contains the login form.
 {% block bodyscripts %}
+<script type="text/javascript" src="/static/js/auth.js"></script>
 {% endblock %}
We will also need to call our authUser function when the user submits
the form so we add an onsubmit event on the login form in
"livedemo/templates/index.html"
   <form
+    onsubmit="authUser(event)"
     method="post" action=".{% if next %}/?next={{next}}{% endif %}">
We enable the Developer tools so we can see the console log and other things the browser does. Then we reload the page and click on the Sign in button.
At this point, you will a message about CORS policy in the console log. Example:
    Access to fetch at 'https://*livedemo*.djaoapp.com/api/auth' from
    origin 'http://127.0.0.1:8000' has been blocked by CORS policy:
    Response to preflight request doesn't pass access control check:
    No 'Access-Control-Allow-Origin' header is present on the requested
    resource. If an opaque response serves your needs, set the request's
    mode to 'no-cors' to fetch the resource with CORS disabled.
By default your DjaoDjin-hosted site will block any browser-initiated requests that do not come from a page served by the site itself.
We want to temporarly disable CORS checks on our website so we can run a server locally on a developer machine, yet call the remote online API.
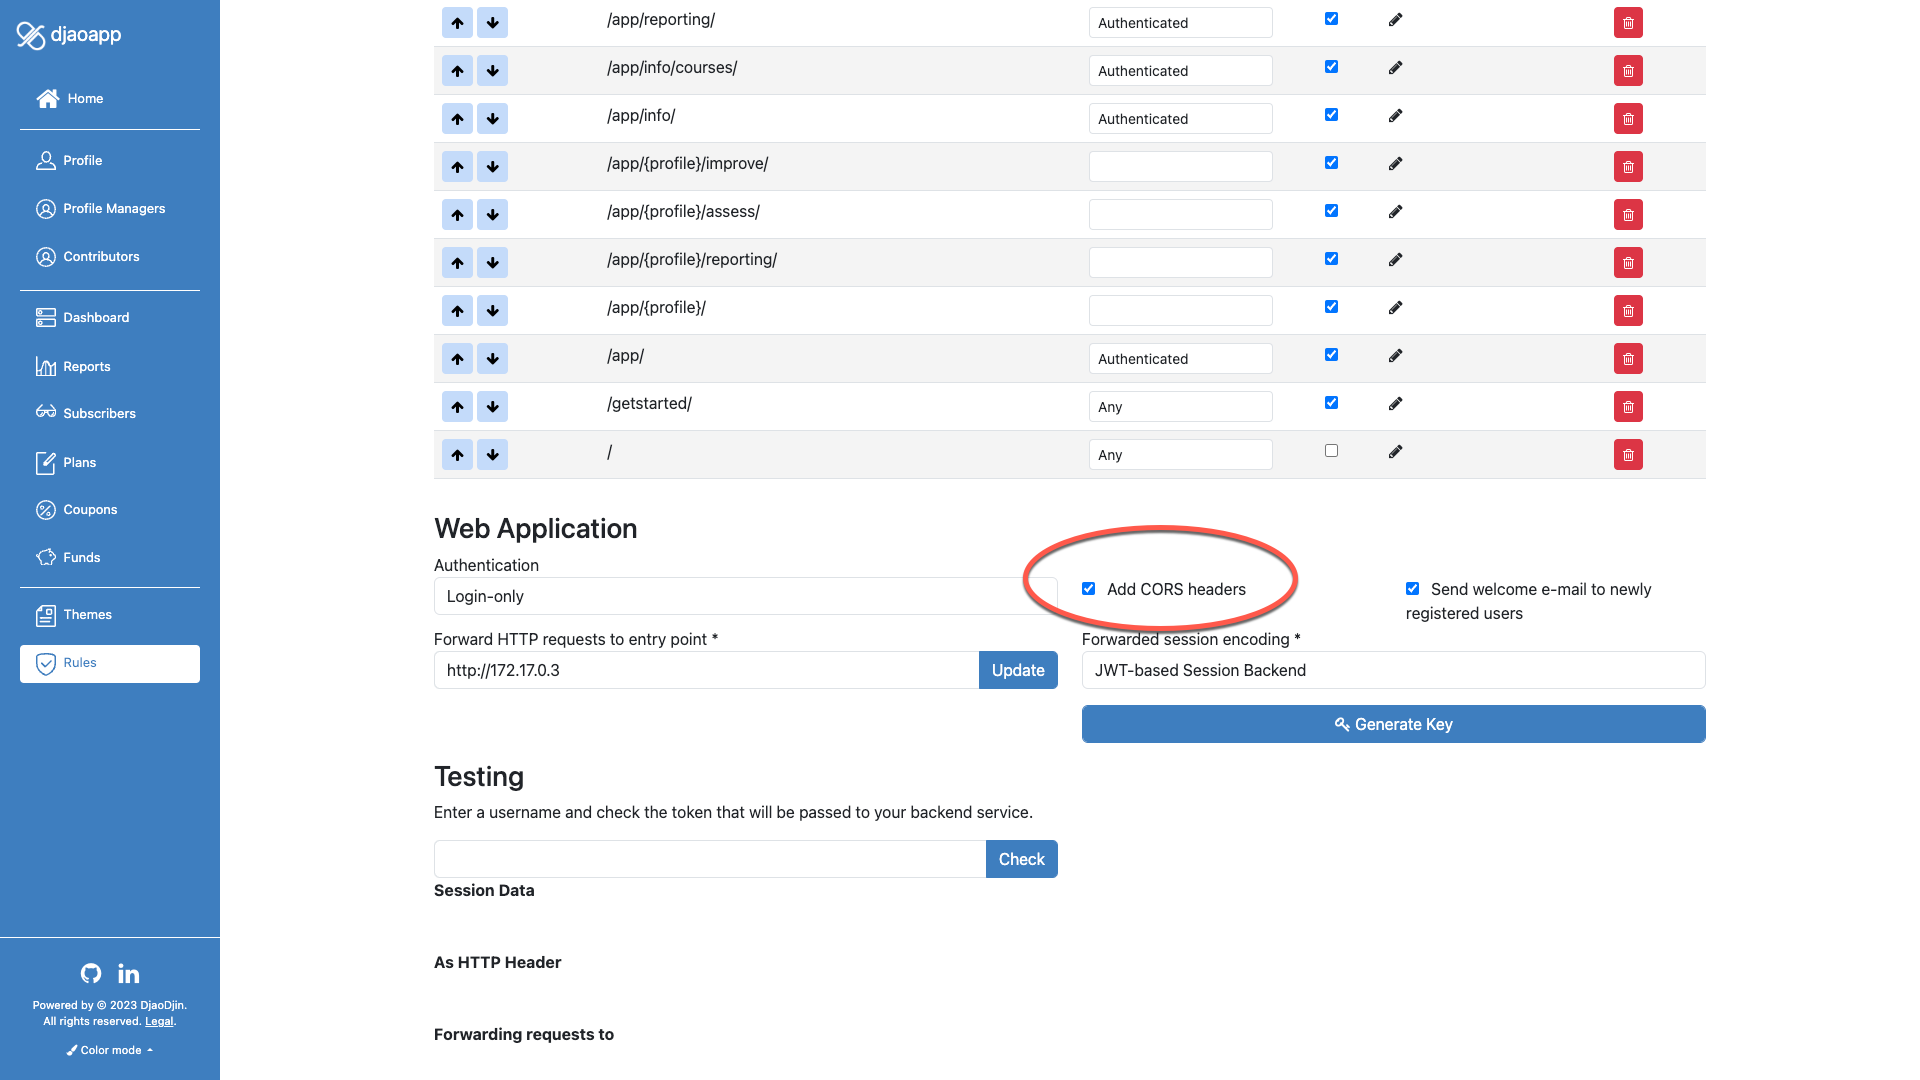
On the DjaoDjin-hosted site, we browse to Settings in the menubar dropdown, then Rules in the left sidebar, and uncheck Add CORS headers under the Web Application section.
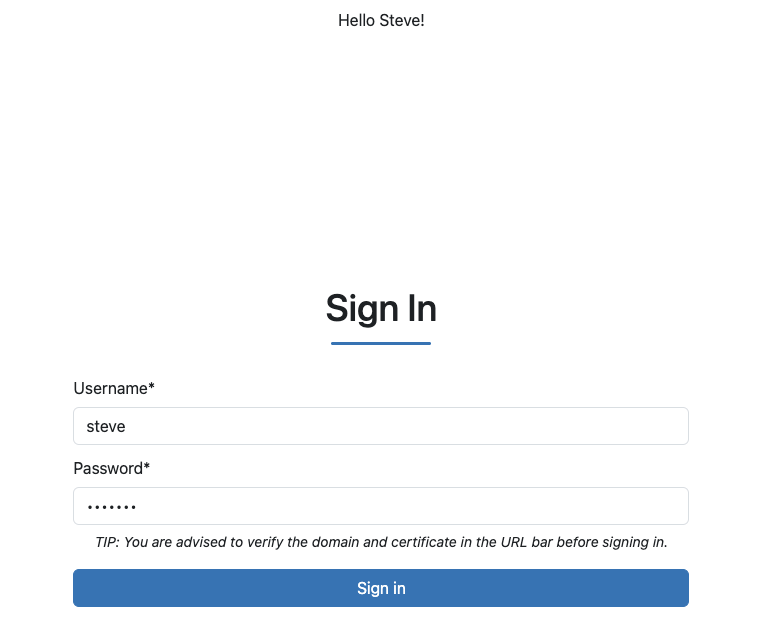
Let's try to login again! We enter our username, password for livedemo.djaoapp.com and click the Sign in button. Et voila! We see the user name show up at the top of the page.
The code works so let's publish it. To do so we run the command
$ djd upload *livedemo*/templates *livedemo*/publicNote that contrary to the Create and test content locally tutorial, we want to also upload the "auth.js" javascript file we created as a static asset, so we add the "livedemo/public" directory to the command line.
You can develop browser-based code locally while exercising your DjaoDjin-hosted site API. To do so, you will have to disable the CORS checks. Just be aware that it will give everyone on the Internet the ability to the same, so do not disable CORS checks on a production website.
Managing JWT securely on a client browser is beyhond the scope of this tutorial. If you are interested, we list interesting resources about SaaS cybersecurity here.


