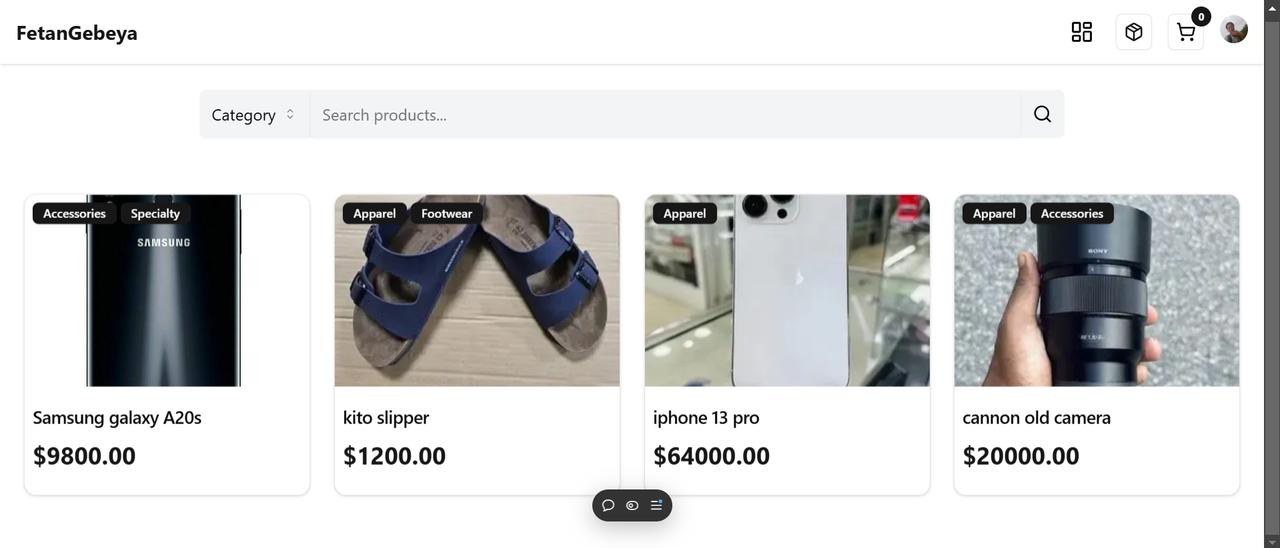
Ecom is An elegant and performant full-stack e-commerce platform built to showcase modern web technologies and provide a seamless shopping experience with ease and simplicity. 🚀
- Frontend: Built with Next.js for server-side rendering and fast client-side navigation.
- Styling: Beautiful and responsive design using Tailwind CSS.
- Backend: API server powered by Express.js for a robust and scalable backend.
- Database: Data stored in a PostgreSQL database using Prisma ORM for type-safe database queries.
- Authentication: Secure and hassle-free user management with Clerk.
- Payments: Stripe integration for handling payments securely.
- Image Uploads: Effortless image hosting powered by UploadThing.
- Hosting:
| Technology | Purpose |
|---|---|
| Next.js | Frontend framework |
| TypeScript | Type-safe development |
| Tailwind CSS | Styling |
| Express.js | Backend framework |
| PostgreSQL | Relational database |
| Prisma ORM | Database ORM |
| Clerk | Authentication |
| Stripe | Payment processing |
| UploadThing | Image upload service |
| Vercel | Frontend hosting |
| Render | Backend hosting |
| Neon | Database hosting |
Follow these steps to set up the project locally:
- Node.js installed
- PostgreSQL database set up
- API keys and credentials for Clerk, UploadThing, Neon, etc.
-
Clone the repository:
git clone https://github.com/kaleb110/ecom.git cd ecom -
Install dependencies for both frontend and backend:
cd ./frontend
npm install
cd ./backend
npm install
-
Set up environment variables:
- Frontend: Create a
.env.localfile in thefrontenddirectory with:NEXT_PUBLIC_CLERK_FRONTEND_API=<your-clerk-api-key> UPLOADTHING_TOKEN=<your-uploadthing-token>
- Backend: Create a
.envfile in thebackenddirectory with:DATABASE_URL=<your-neon-database-url> PORT=<5000 or any other port> CLERK_API_KEY=<your-clerk-api-key> CLERK_SECRET_KEY=<your-clerk-secret-key> CLIENT_URL=<your-front-end-url(http://localhost:3000)> SECRET_KEY=<your-stripe-secret-key>
- Frontend: Create a
-
Start the development servers:
- Frontend:
cd frontend npm run dev - Backend:
cd backend
npm run dev
- Frontend:
-
Access the app:
- Frontend:
http://localhost:3000 - Backend API:
http://localhost:5000
- Frontend:
.
├── frontend/        # Next.js frontend
│   ├── components/  # Reusable UI components
│   ├── app/         # Next.js routes or pages
│   ├── types/       # typescript declarations
│   └── ...          # Other frontend files
├── backend/         # Express.js backend
│   ├── src/         # API endpoints
│   ├── prisma/      # Prisma schema and migrations
│   └── ...          # Other backend files
└── README.md        # Project documentation
Deployed on Vercel:
- Push to the main branch to trigger auto-deployment.
Hosted on Render:
- Configure the backend service and deploy the repository.
Hosted on Neon:
- Ensure your database is connected and running.
Check out the live demo of the ecommerce App here.
Contributions are welcome! Here's how you can help:
- Fork the repository.
- Create a feature branch:
git checkout -b feature-name. - Commit changes:
git commit -m "Add feature description". - Push to the branch:
git push origin feature-name. - Open a pull request.
If you have any questions, feel free to reach out:
- Kaleb: kalisha123k.com
- GitHub Issues
Made with ❤️ using modern web technologies.
