-
-
Notifications
You must be signed in to change notification settings - Fork 11
FanPico Web Interface
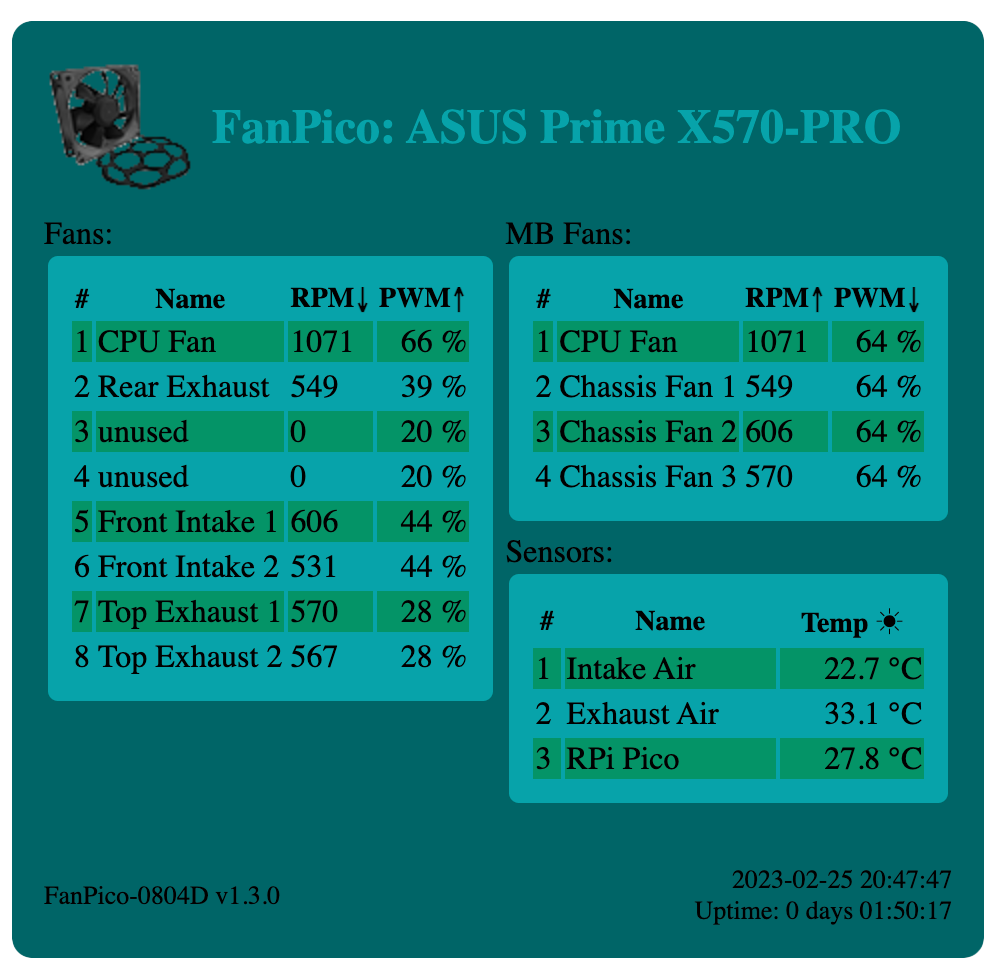
If a Raspberry Pi Pico W is installed on FanPico PCB then there is basic Web Interface available for monitoring.

To join FanPico into a WiFi network, configure network SSID and passphrase:
SYS:WIFI:SSD mynetwork
SYS:WIFI:PASS mypassword
By default FanPico will use DHCP for obtaining IP address and other network settings. So normally there is no need to manually configure network settings.
To manually configure static network settings, configure IP, Netmask, and Gateway.
For example:
SYS:WIFI:IP 192.168.1.42
SYS:WIFI:NETMASK 255.255.255.0
SYS:WIFI:GATEWAY 192.168.1.1
After WiFi is configured save configuration and reset the unit:
CONF:SAVE
*RST
Then wait for unit to reboot (and give it few seconds to connect to network).
We can use SYS:WIFI:STAT? command to check if FanPico is now successfully connected to network:
SYS:WIFI:STAT?
1,192.168.1.200,255.255.255,0,192.168.1.1
When connected to network first field returned should be "1" (see command description for list of possible status codes).
Web interface provides CSV and JSON formatted status output as well, to make it easier to automate status monitoring.
FanPico status in comma separated values (CSV) format returns same output as Read? command from console.
URL: http://x.x.x.x/status.csv
For example:
$ curl http://192.168.1.200/status.csv
fan1,"CPU Fan",606,20.20,35.0
fan2,"Rear Exhaust",483,16.10,31.5
fan3,"unused",0,0.00,35.0
fan4,"unused",0,0.00,35.0
fan5,"Front Intake 1",519,17.30,35.0
fan6,"Front Intake 2",456,15.20,35.0
fan7,"Top Exhaust 1",474,15.80,22.8
fan8,"Top Exhaust 2",462,15.40,22.8
mbfan1,"CPU Fan",606,20.20,35.0
mbfan2,"Chassis Fan 1",483,16.10,35.0
mbfan3,"Chassis Fan 2",519,17.30,35.0
mbfan4,"Chassis Fan 3",474,15.80,35.0
sensor1,"Intake Air",23.6
sensor2,"Exhaust Air",29.0
sensor3,"RPi Pico",28.2
FanPico status in JSON format is availabe using following URL:
URL: http://x.x.x.x/status.json
For example:
$ curl http://192.168.1.200/status.json
{
	"fans":	[{
			"fan":	1,
			"name":	"CPU Fan",
			"rpm":	606,
			"frequency":	20.200000763000000,
			"duty_cycle":	35
		}, {
			"fan":	2,
			"name":	"Rear Exhaust",
			"rpm":	480,
			"frequency":	16,
			"duty_cycle":	31.5000000000000
		}, {
			"fan":	3,
			"name":	"unused",
			"rpm":	0,
			"frequency":	0,
			"duty_cycle":	35
		}, {
			"fan":	4,
			"name":	"unused",
			"rpm":	0,
			"frequency":	0,
			"duty_cycle":	35
		}, {
			"fan":	5,
			"name":	"Front Intake 1",
			"rpm":	516,
			"frequency":	17.200000763000000,
			"duty_cycle":	35
		}, {
			"fan":	6,
			"name":	"Front Intake 2",
			"rpm":	450,
			"frequency":	15,
			"duty_cycle":	35
		}, {
			"fan":	7,
			"name":	"Top Exhaust 1",
			"rpm":	468,
			"frequency":	15.600000381000000,
			"duty_cycle":	22.7500000000000
		}, {
			"fan":	8,
			"name":	"Top Exhaust 2",
			"rpm":	459,
			"frequency":	15.300000191000000,
			"duty_cycle":	22.7500000000000
		}],
	"mbfans":	[{
			"mbfan":	1,
			"name":	"CPU Fan",
			"rpm":	606,
			"frequency":	20.200000763000000,
			"duty_cycle":	35
		}, {
			"mbfan":	2,
			"name":	"Chassis Fan 1",
			"rpm":	480,
			"frequency":	16,
			"duty_cycle":	35
		}, {
			"mbfan":	3,
			"name":	"Chassis Fan 2",
			"rpm":	516,
			"frequency":	17.200000763000000,
			"duty_cycle":	35
		}, {
			"mbfan":	4,
			"name":	"Chassis Fan 3",
			"rpm":	468,
			"frequency":	15.600000381000000,
			"duty_cycle":	35
		}],
	"mbfans":	[{
			"sensor":	1,
			"name":	"Intake Air",
			"temperature":	22.925205231000000
		}, {
			"sensor":	2,
			"name":	"Exhaust Air",
			"temperature":	28.996854782000000
		}, {
			"sensor":	3,
			"name":	"RPi Pico",
			"temperature":	28.244960785000000
		}]
}