Universal links (IOS) and App Links (Android) support for NativeScript.
Before you get started, review the following prerequisites:
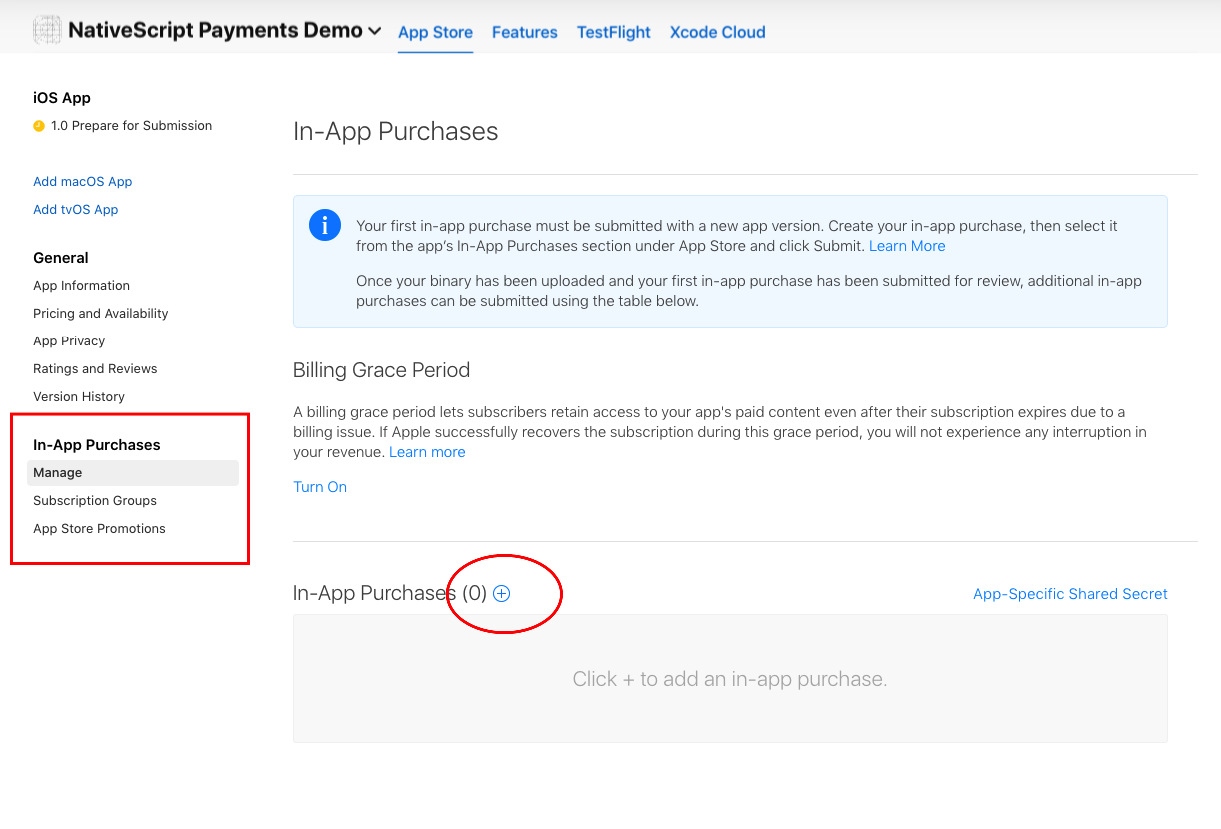
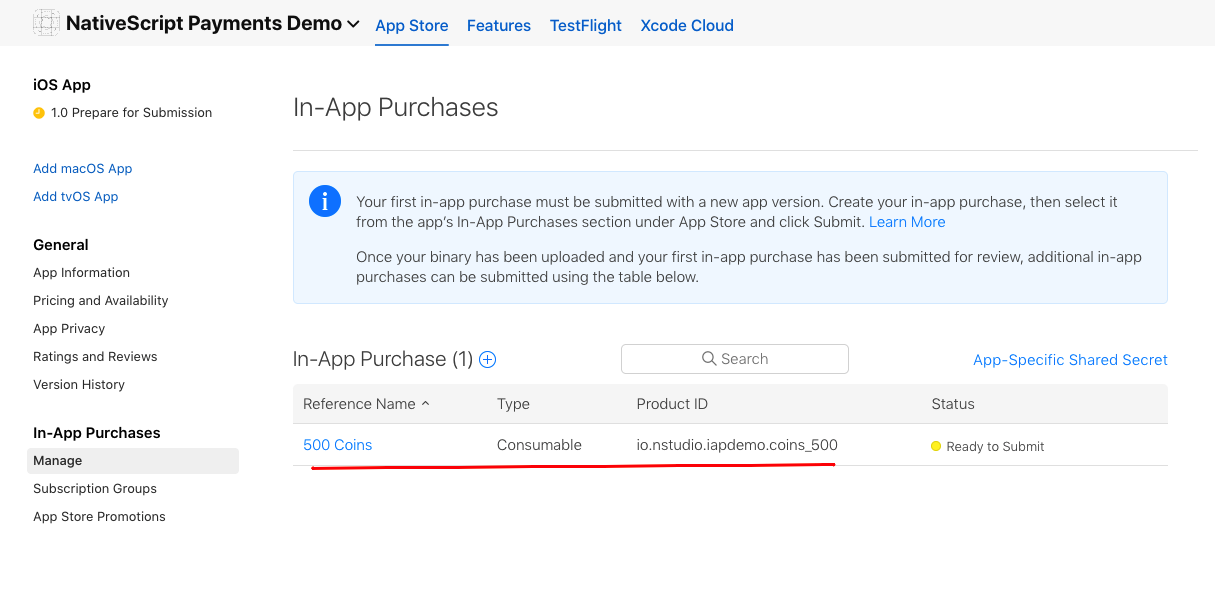
To offer in app purchases for your iOS app. You will need to create items for the app on AppStoreConnect.Apple.Com.
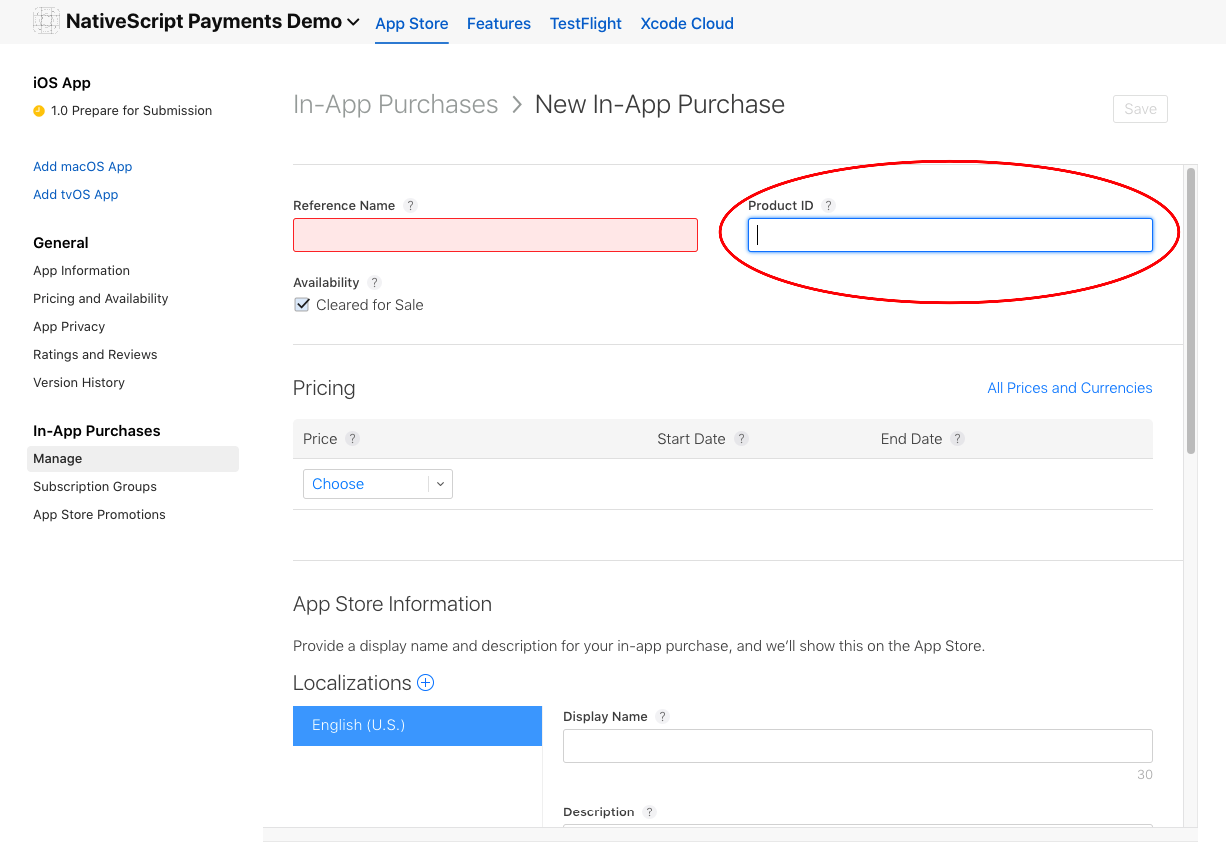
On the form to create the in app purchase item, the Product ID is the value you will use to fetch your items for the user to purchase in your app.
Once you complete creating an item you will see a list of all items for the app listed on the AppStore Connect.
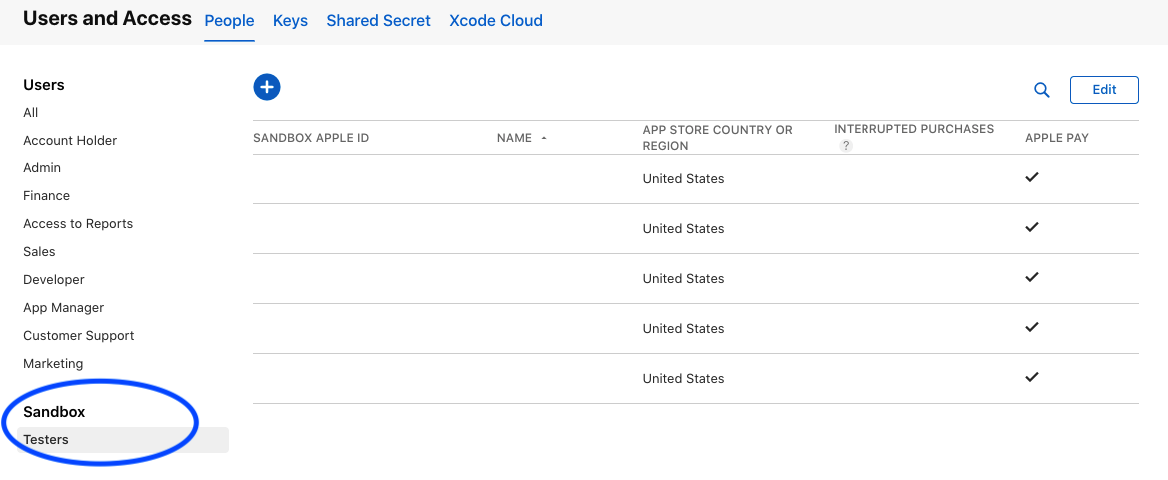
To test iOS purchases fully, you will need a real iOS device. You will also need a test user in the sandbox environment on your appstore account.
-
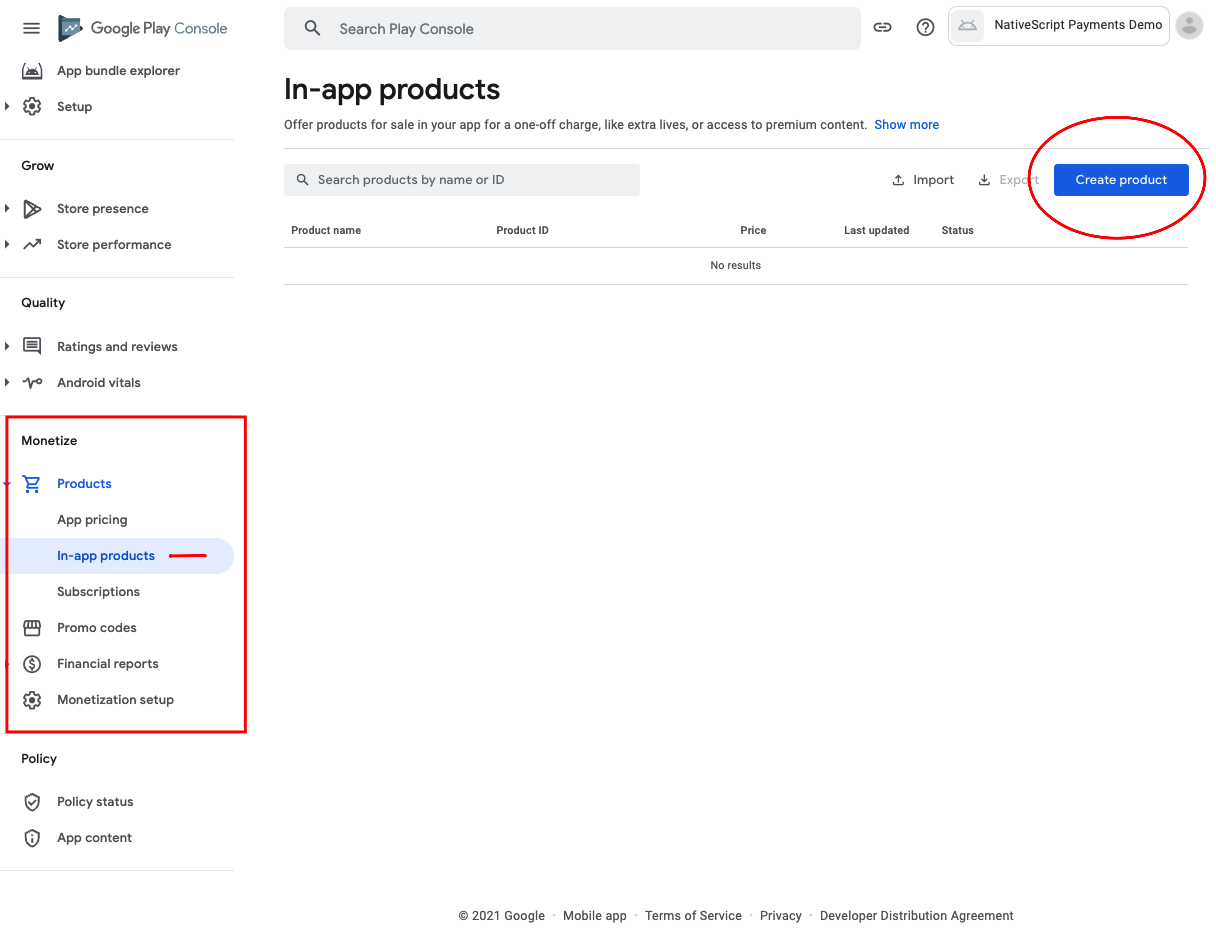
To offer in-app purchases for your Android app, you will need to upload at least ONE apk/aab to the Google Play Console.
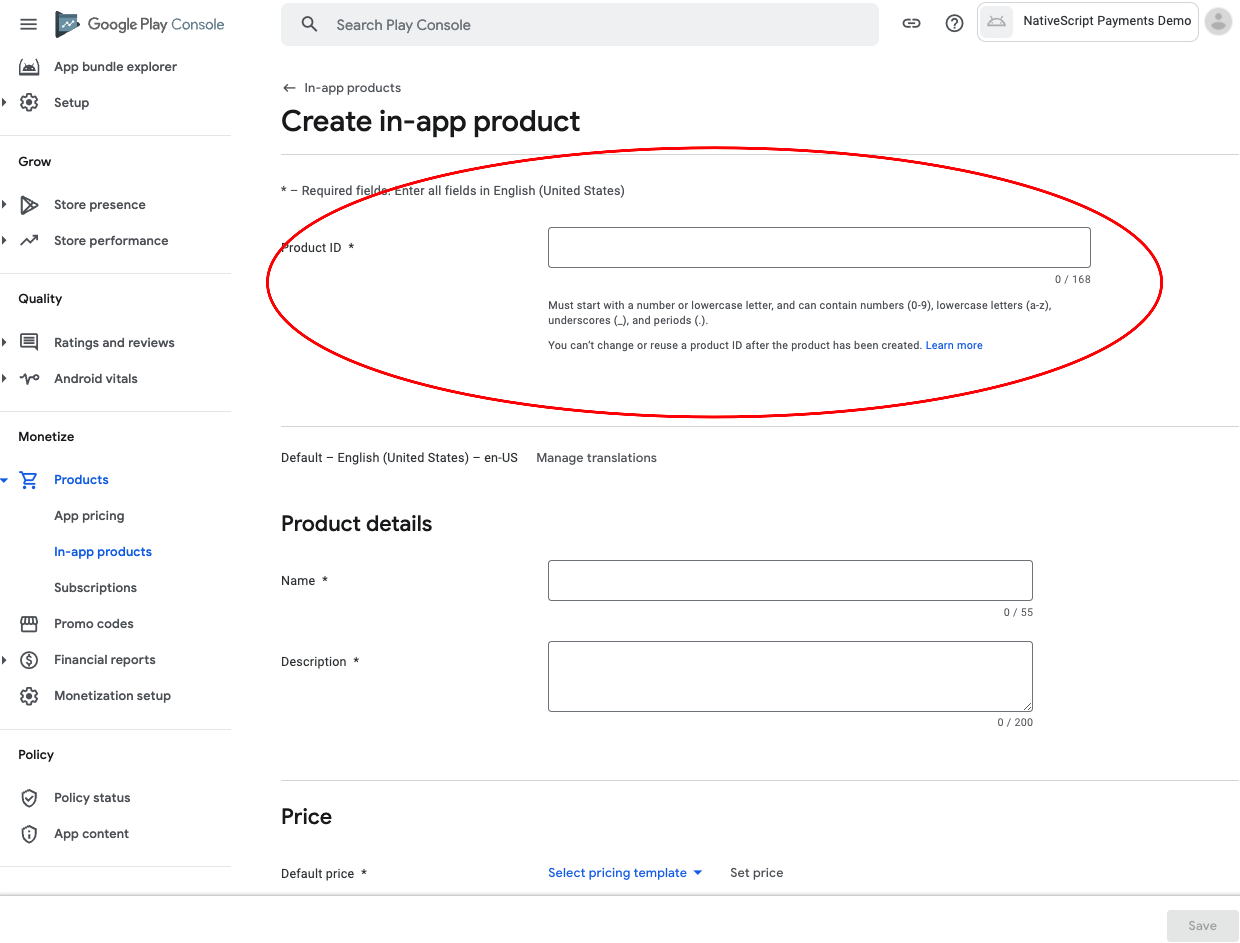
On the form to create your product, the Product ID is the value you will use to fetch your products for the user to purchase.
-
Google does not like numeric values in the ID field. It seems to ignore the Sku when querying for your items and only returns one item instead of multiple values if the IDs contain numeric values.
-
Google in app products will not work until Google has reviewed the app. They will appear in the list of products, but the API will error trying to purchase them. The title of the item when you call `fetchItems(['your.product.id']) should be suffixed with (in review) or something similar when returned at this point. You will not be able to finish the purchase flow until the review period has passed.
To test Android purchases completely, you should use a real device with Google Play setup and logged into an account. You can use test accounts for Google Play Billing for the work flow. This will allow you to test the app in development properly. For more info: https://support.google.com/googleplay/android-developer/answer/6062777
Below is the standard flow of the plugin's methods calls:
import { BuyItemOptions, Item as InAppItem, InAppPurchase, PaymentEvent } from '@akylas/nativescript-inapp-purchase/index';

const inAppPurchase = new InAppPurchase()
inAppPurchase.init();
inappPurchase.on(PaymentEvent.EventName, (event: PaymentEvent.IEvent) => {...

// fetchItems(['item.id', ...]) will query the store for the items requested.
// Handle these items inside the PaymentEvent.Context.RETRIEVING_ITEMS event.
inappPurchase.fetchItems(['item.id']);

// buyItem('item.id') will start the purchase flow on Android & iOS.
// Next handle the PaymentEvent.Context.PROCESSING_ORDER for SUCCESS or FAILURE.
// If SUCCESS then you can call the last method to the `finalizeOrder(payload)` method.
inappPurchase.buyItem('item.id');

// finalizeOrder(payload) will complete the purchase flow.
// The payload argument here is provided in the PaymentEvent.Context.PROCESSING_ORDER - SUCCESS event (see below example for detailed usage).
inappPurchase.finalizeOrder(payload)

// at this point you would process the order with your backend given the receiptToken from the purchase flowimport { BuyItemOptions, Item as InAppItem, InAppPurchase, PaymentEvent } from '@akylas/nativescript-inapp-purchase/index';
const inAppPurchase = new InAppPurchase()
export class SomeViewModel {
private item: Item;
pageLoaded() {
// Subscribe to the RxJS Observable
// You do not have to handle all of the events
// RETRIEVING_ITEMS && PROCESSING_ORDER are the ones you'll want to use to handle the purchase flow
inAppPurchase.on((event: PaymentEvent.Type) => {
switch (event.context) {
case PaymentEvent.Context.CONNECTING_STORE:
console.log('Store Status: ' + event.result);
if (event.result === PaymentEvent.Result.SUCCESS) {
const canPay = inAppPurchase.canMakePayments();
if (canPay) {
// pass in your product IDs here that you want to query for
inAppPurchase.fetchItems(['io.nstudio.iapdemo.coinsfive', 'io.nstudio.iapdemo.coinsone', 'io.nstudio.iapdemo.coinsonethousand']);
}
}
break;
case PaymentEvent.Context.RETRIEVING_ITEMS:
if (event.result === PaymentEvent.Result.SUCCESS) {
// if you passed multiple items you will need to handle accordingly for your app
this.item = event.payload;
}
break;
case PaymentEvent.Context.PROCESSING_ORDER:
if (event.result === PaymentEvent.Result.FAILURE) {
console.log(`🛑 Payment Failure - ${event.payload.description} 🛑`);
// handle the failure of the purchase
} else if (event.result === PaymentEvent.Result.SUCCESS) {
// handle the successful purchase
console.log('🟢 Payment Success 🟢');
console.log(`Order Date: ${event.payload.orderDate}`);
console.log(`Receipt Token: ${event.payload.receiptToken}`);
inAppPurchase.finalizeOrder(event.payload);
}
break;
case PaymentEvent.Context.FINALIZING_ORDER:
if (event.result === PaymentEvent.Result.SUCCESS) {
console.log('Order Finalized');
}
break;
case PaymentEvent.Context.RESTORING_ORDERS:
console.log(event);
break;
default:
console.log(`Invalid EventContext: ${event}`);
break;
}
});
// This initializes the internal payment system for the plugin
inAppPurchase.init();
}
buttonTap() {
const opts: BuyItemOptions = {
android: {
},
ios: {
quantity: 1,
simulatesAskToBuyInSandbox: true,
},
};
// This method will kick off the platform purchase flow
// We are passing the item and an optional object with some configuration
inAppPurchase.buyItem(this.item, opts);
}
}init()Sets up the internal system of the plugin.
| Method | Description |
|---|---|
fetchItems(itemIds: Array<string>) |
Queries the store for the items requested. You should handle these items inside the PaymentEvent.Context.RETRIEVING_ITEMS event. |
buyItem(item: Item, options?: BuyItemOptions) |
Starts the purchase flow on Android & iOS and emits PaymentEvent.Context.PROCESSING_ORDER with SUCCESS or FAILURE. If SUCCESS then you can call the last method to the finalizeOrder(payload). |
fetchSubscriptions(itemIds: Array<string>) |
Queries the store for the subscriptions offered by the app. You should handle these subscriptions inside the PaymentEvent.Context.RETRIEVING_ITEMS event. |
startSubscription(item: Item, userData?: string) |
Android only. Lanches the billing flow by presenting the Google Store subscription UI interface. |
restoreOrders(skuType?: string) |
Returns the purchase made by the user for each product. You call this method to install purchases on additional devices or restore purchases for an application that the user deleted and reinstalled. |
canMakePayments() |
Returns true or false indicating whether the billing service is available and is setup successfully. |
tearDown() |
Closes the connection to the billing service to free up resources. |
The repo uses submodules. If you did not clone with --recursive then you need to call
git submodule update --init
The package manager used to install and link dependencies must be pnpm or yarn. npm wont work.
To develop and test:
if you use yarn then run yarn
if you use pnpm then run pnpm i
Interactive Menu:
To start the interactive menu, run npm start (or yarn start or pnpm start). This will list all of the commonly used scripts.
npm run build.allWARNING: it seems yarn build.all wont always work (not finding binaries in node_modules/.bin) which is why the doc explicitly uses npm run
npm run demo.[ng|react|svelte|vue].[ios|android]

npm run demo.svelte.ios # Example
Demo setup is a bit special in the sense that if you want to modify/add demos you dont work directly in demo-[ng|react|svelte|vue]
Instead you work in demo-snippets/[ng|react|svelte|vue]
You can start from the install.ts of each flavor to see how to register new demos
You can update the repo files quite easily
First update the submodules
npm run updateThen commit the changes Then update common files
npm run syncThen you can run yarn|pnpm, commit changed files if any
npm run readmenpm run docThe publishing is completely handled by lerna (you can add -- --bump major to force a major release)
Simply run
npm run publishThe repo uses https:// for submodules which means you won't be able to push directly into the submodules.
One easy solution is t modify ~/.gitconfig and add
[url "ssh://[email protected]/"]
	pushInsteadOf = https://github.com/
If you have any questions/issues/comments please feel free to create an issue or start a conversation in the NativeScript Community Discord.
