This module provides a servlet which exposes the main EveKit front end code. This documentation contains instructions for configuring, building and deploying the front end. This documentation also contains an overview of the EveKit service, and instructions for configuring, building and deploying a complete standalone instance of EveKit.
EveKit is a web-based toolkit for building applications based on the EVE Online API and EVE Online Static Data Export (SDE). Through the frontend (this module), you can configure EveKit to automatically download Character and Corporation data. Other parts of the service (e.g. the model frontend) provide access to your data through a REST API. If you're running EveKit stand alone then you can, of course, access your data in the backend directly without going through a frontend. However, EveKit was designed to hide all this complexity behind a uniform REST API. The REST API is annotated with Swagger making it very easy to create clients in your favorite language.
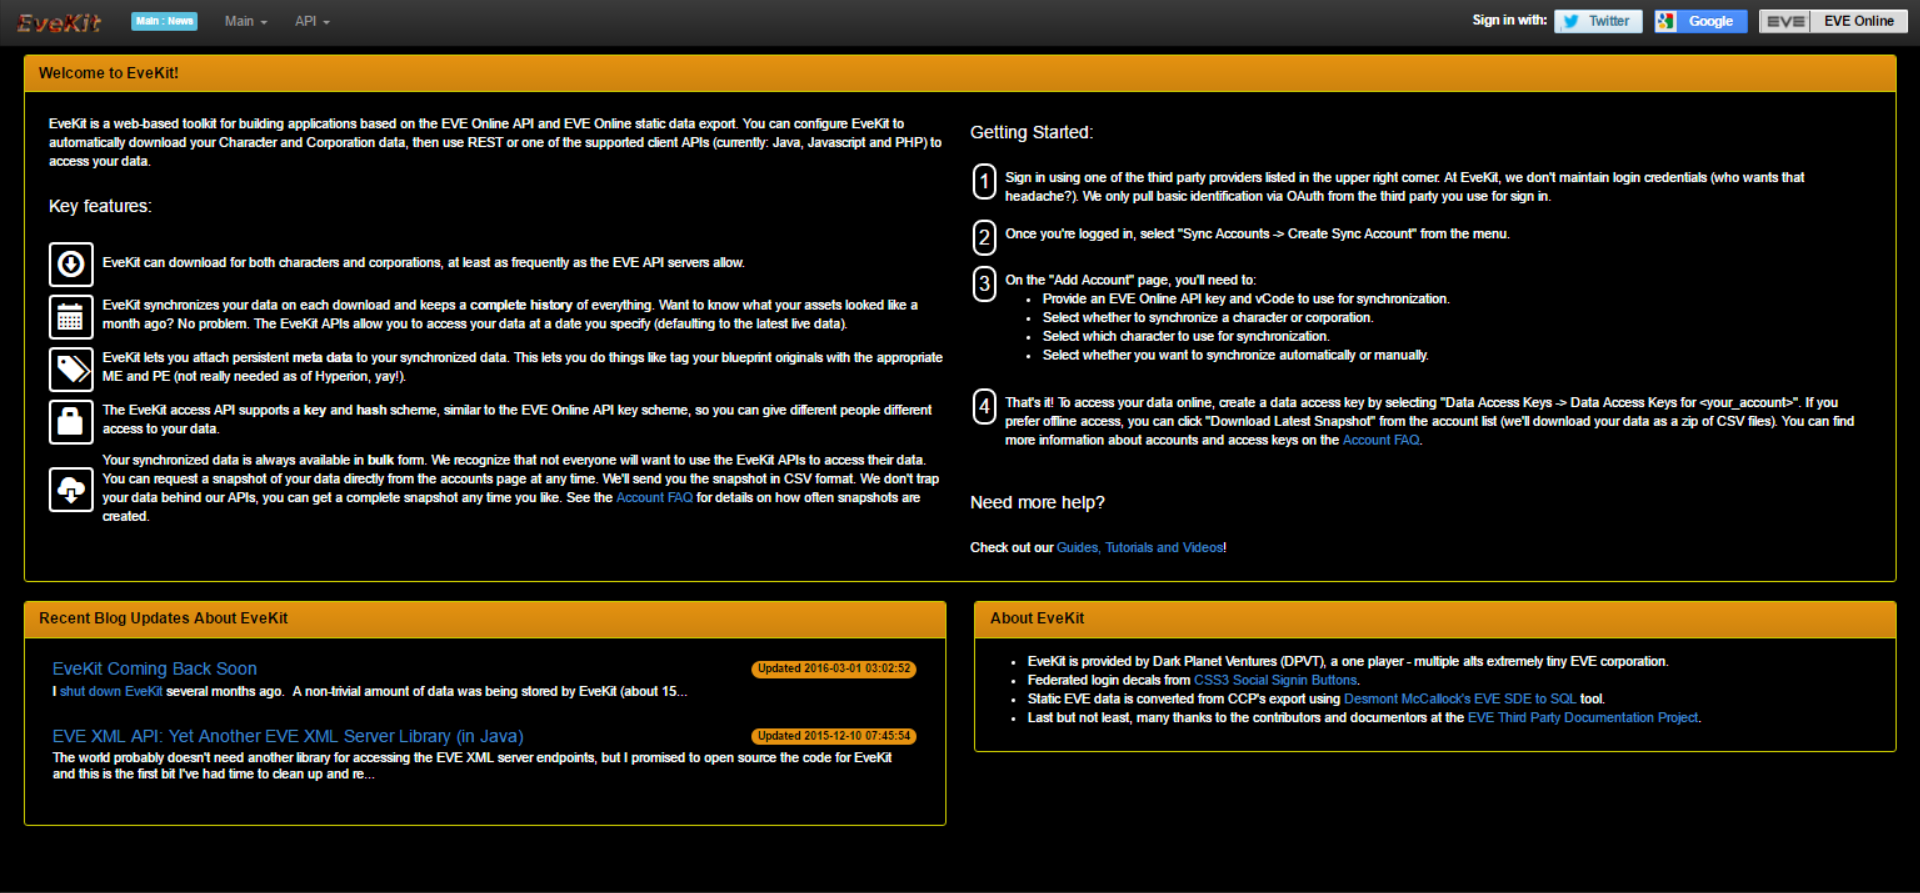
The key features of EveKit are:
- EveKit can download data for both characters and corporations, at least as frequently as the EVE API servers allow.
- EveKit synchronizes your data on each download and keeps a complete history of everything. That is, data is versioned. The REST API allows you to access your data as it appeared on any given date (defaulting to the latest live data).
- EveKit lets you attach persistent meta data to your downloaded data. This lets you tag your data, perhaps for use by applications built on top of EveKit.
- The EveKit access API supports a key and hash scheme, similar to the EVE Online API key scheme, so you can give different people different access to your data.
- EveKit also provides access to your data in bulk form. You can request a snapshot of your data directly from the accounts page at any time. This will generate a zip file containing the latest version of your data in CSV format.
EveKit has many configurable settings which can be changed if you plan to run in standalone mode. We document some of those features below.
Main Screen
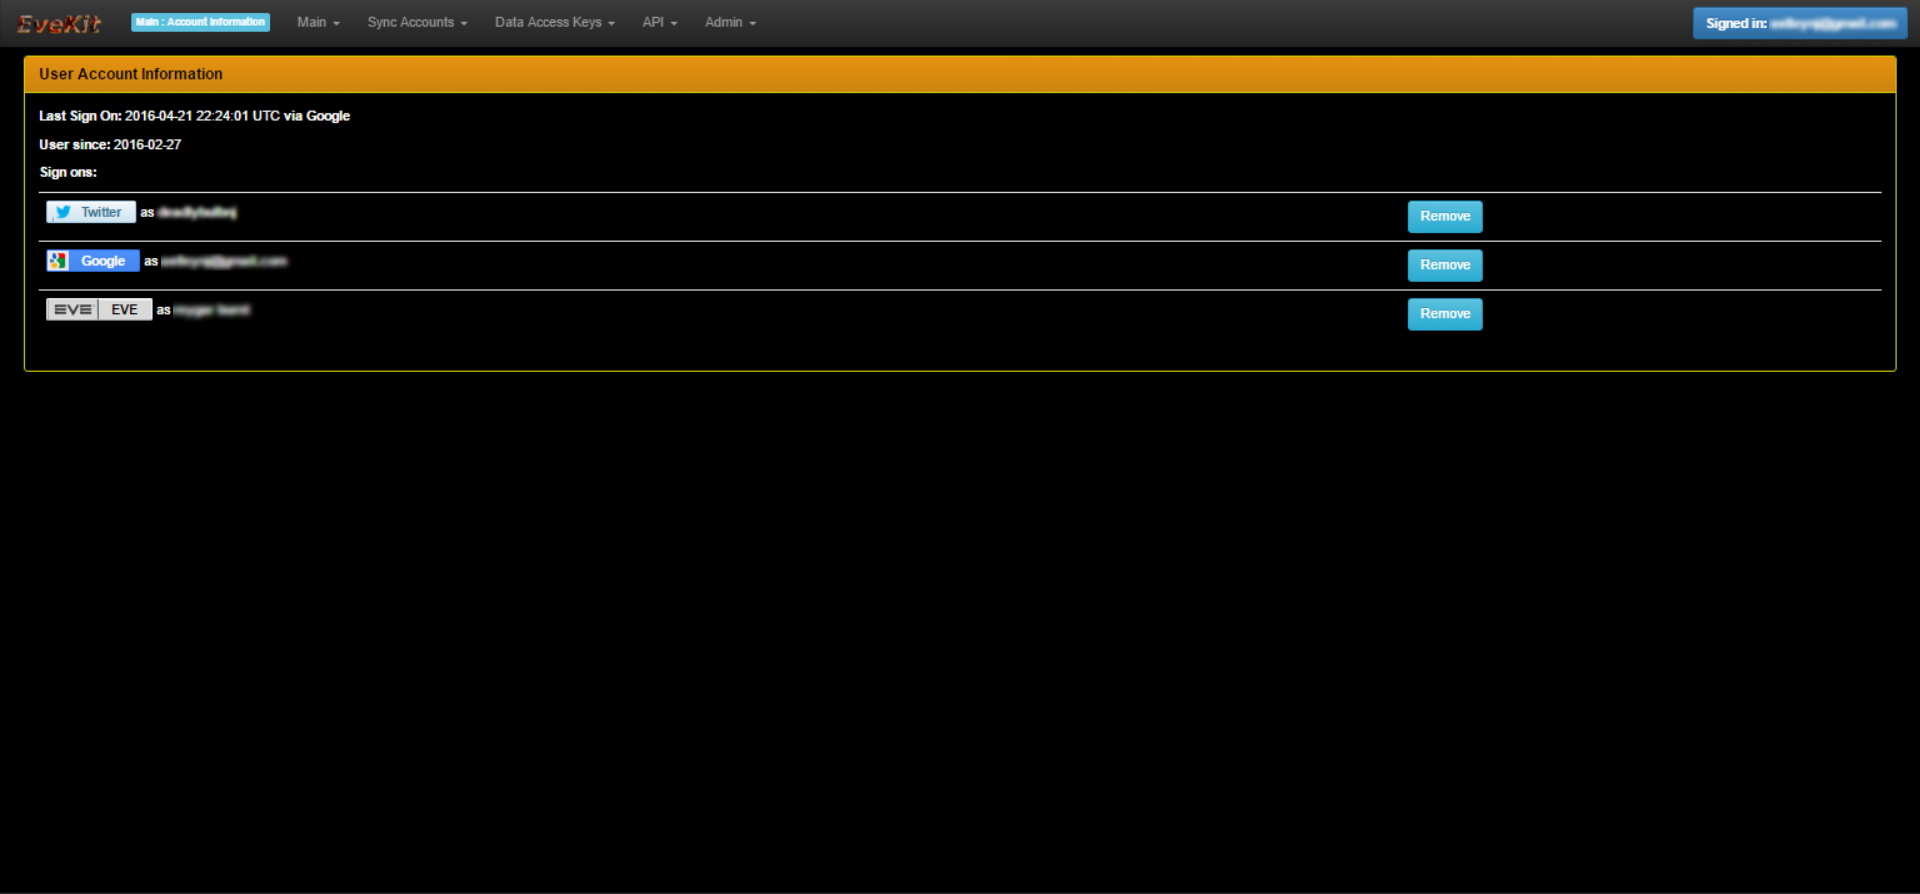
User Info Screen
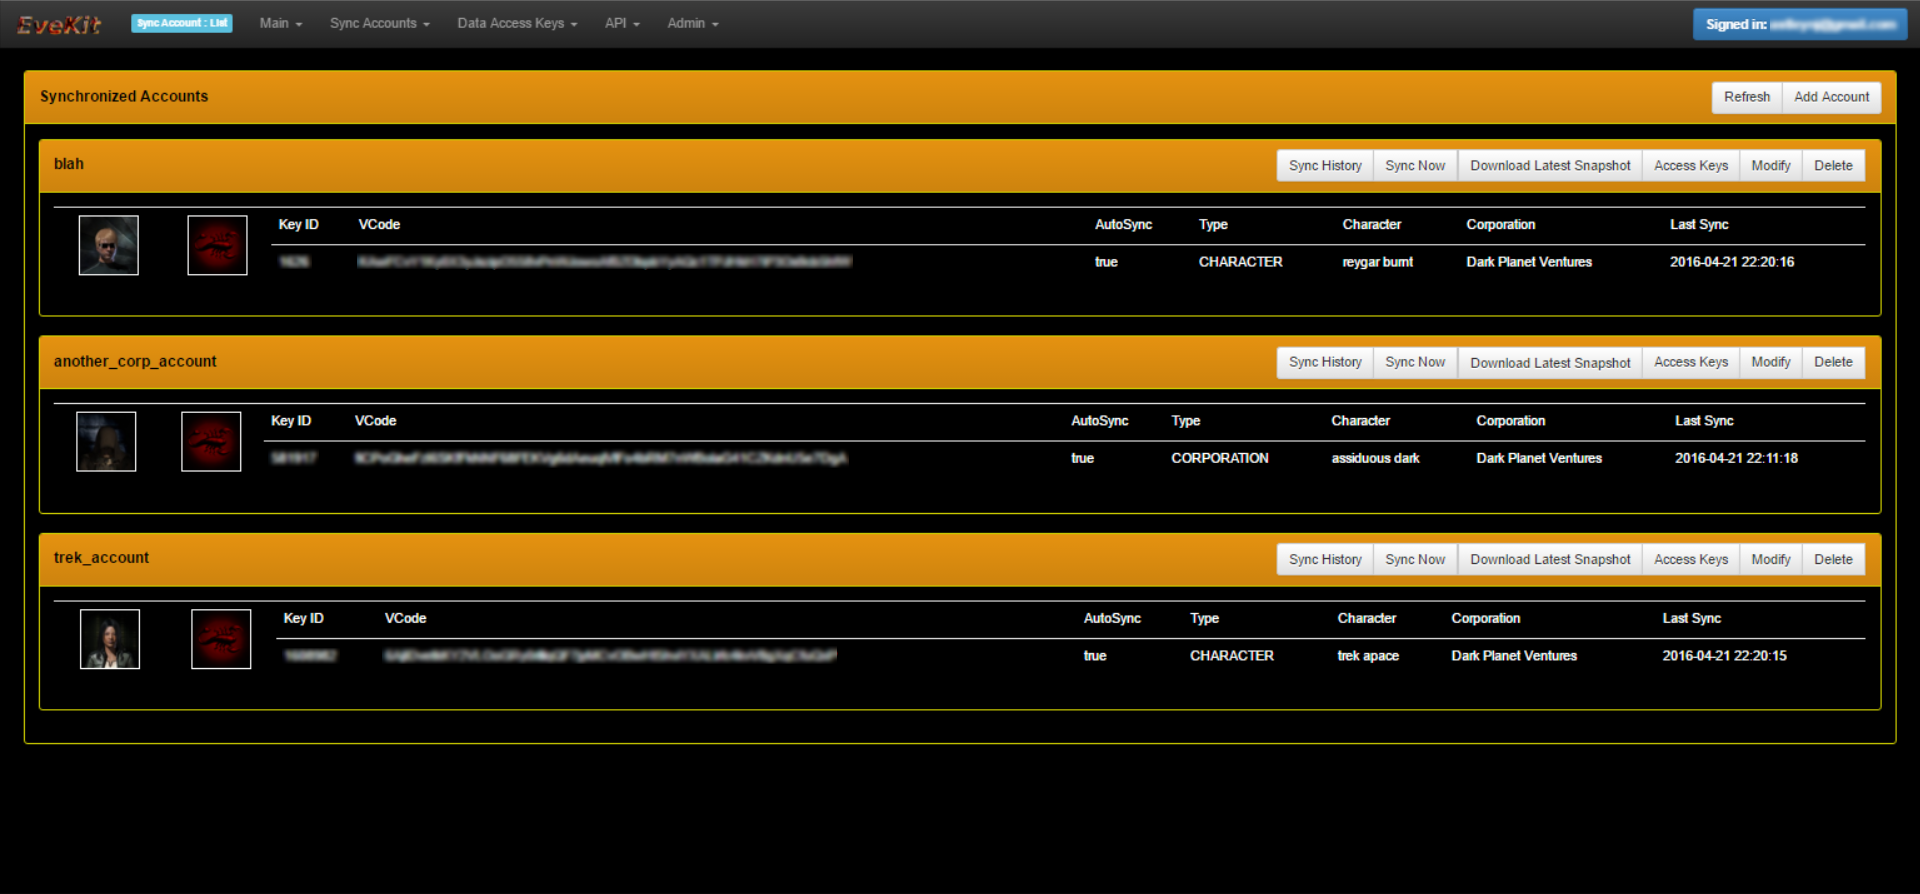
Account List Screen
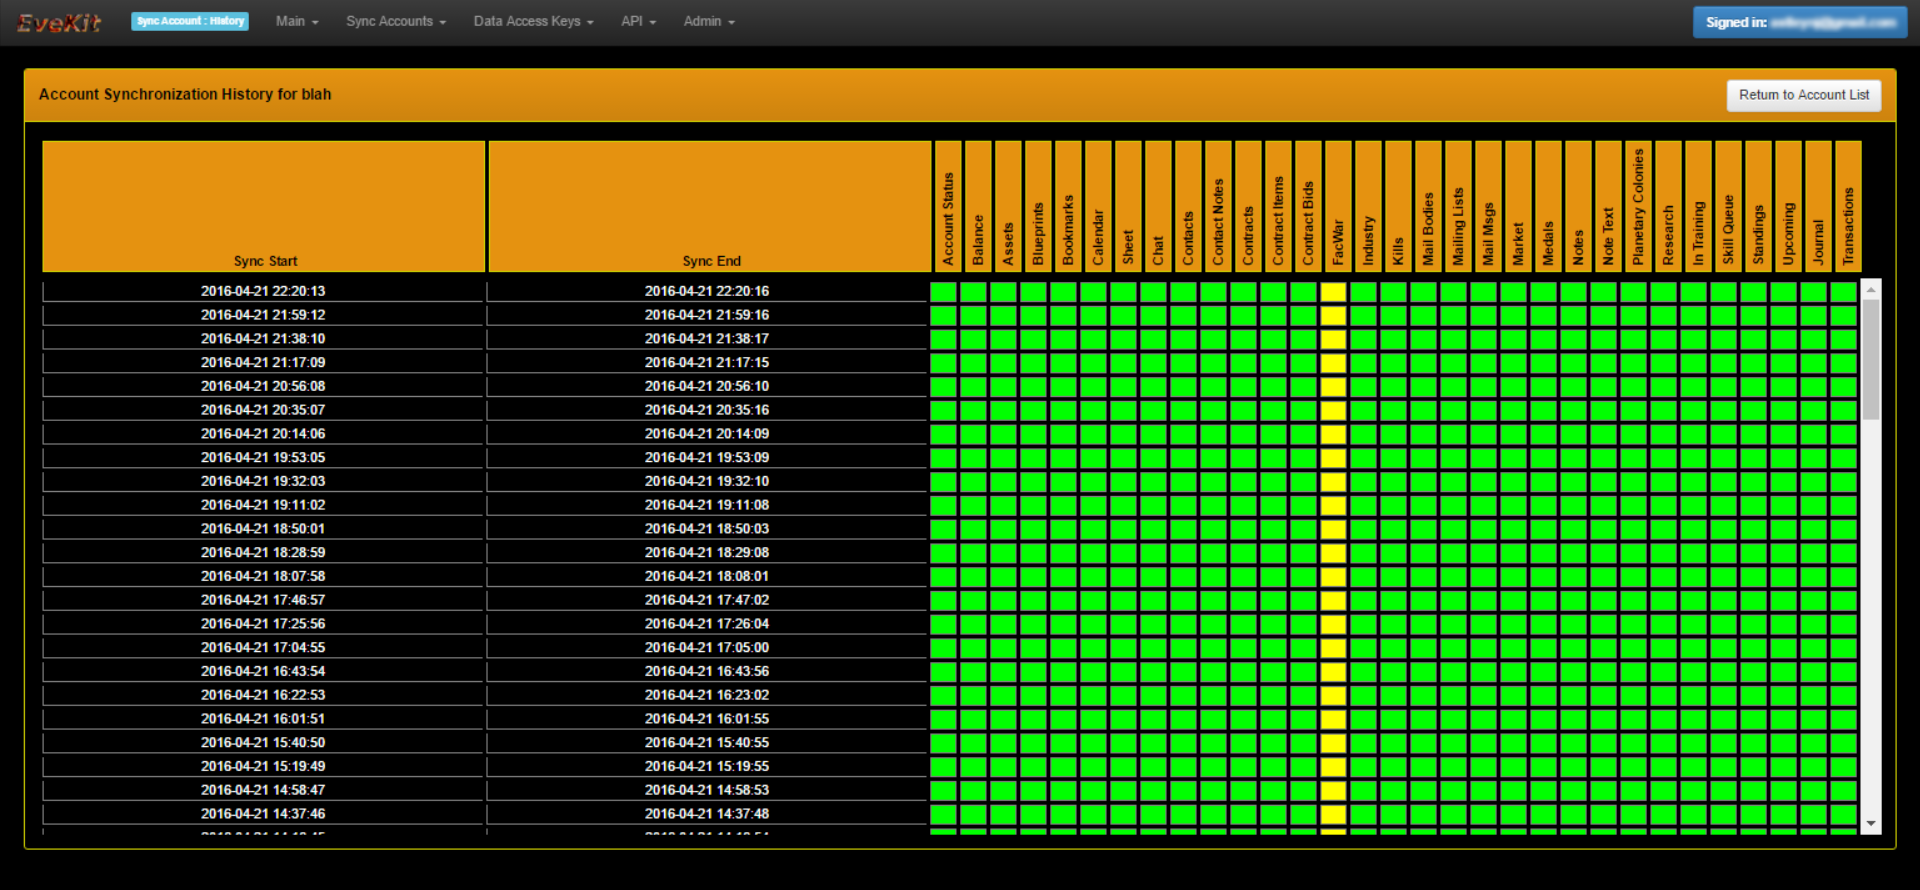
Sync History Screen
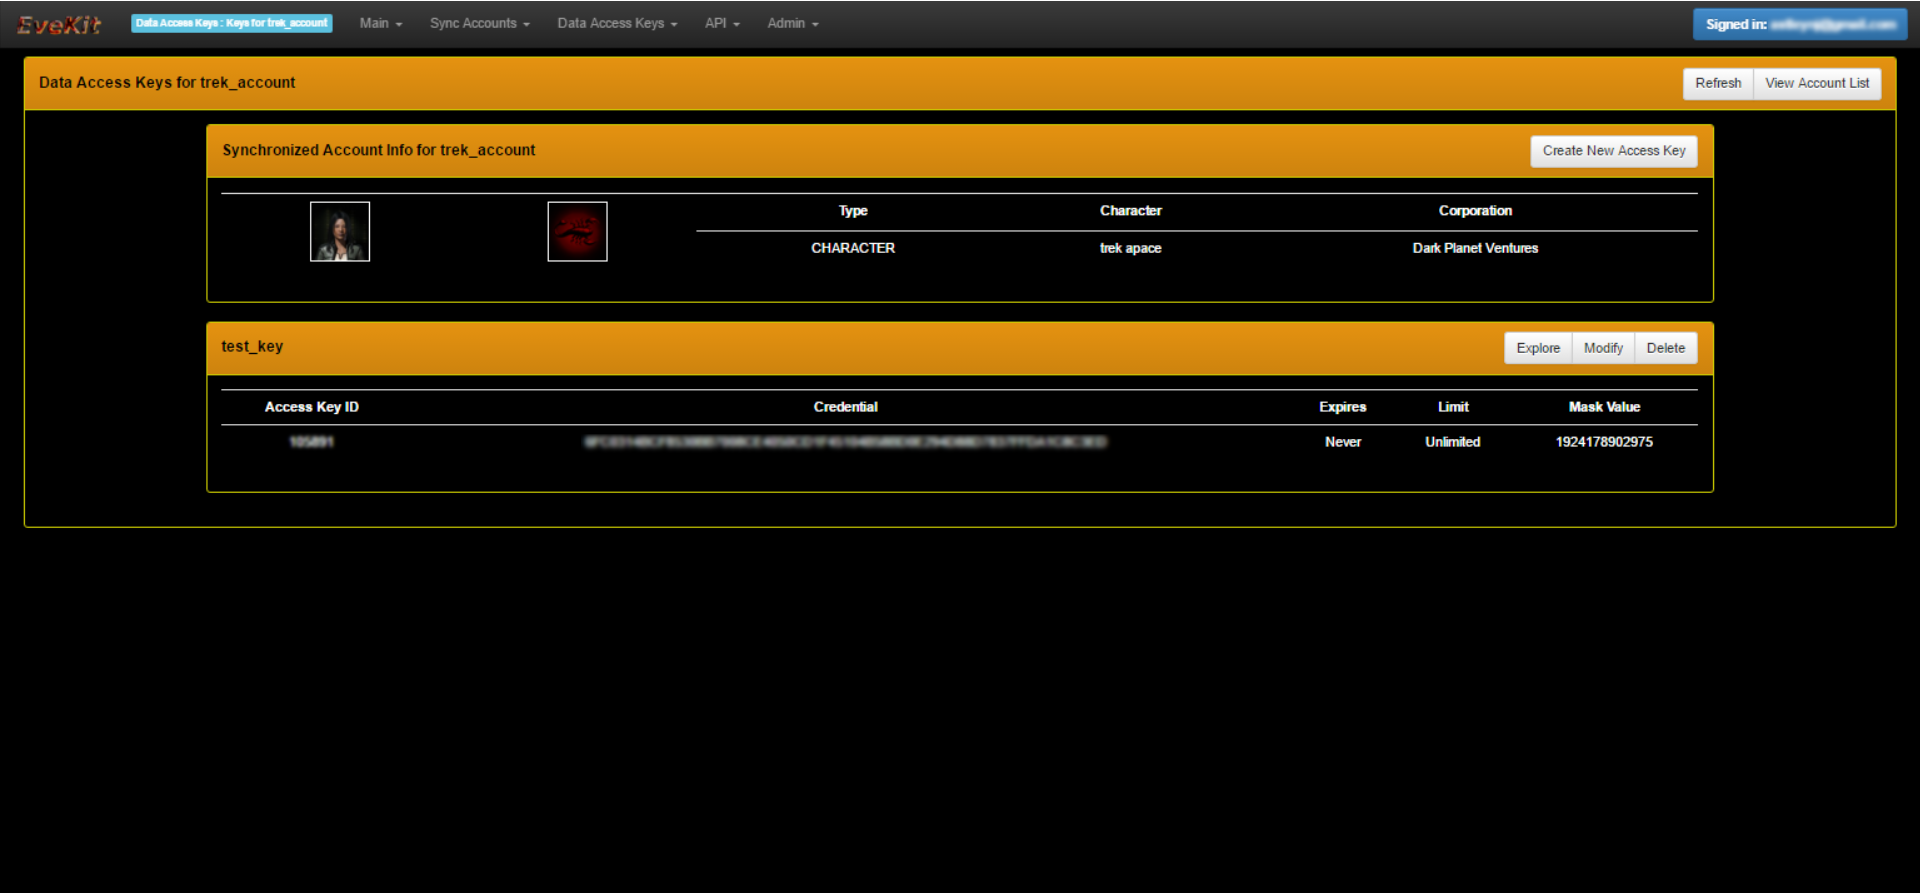
Access Keys Screen
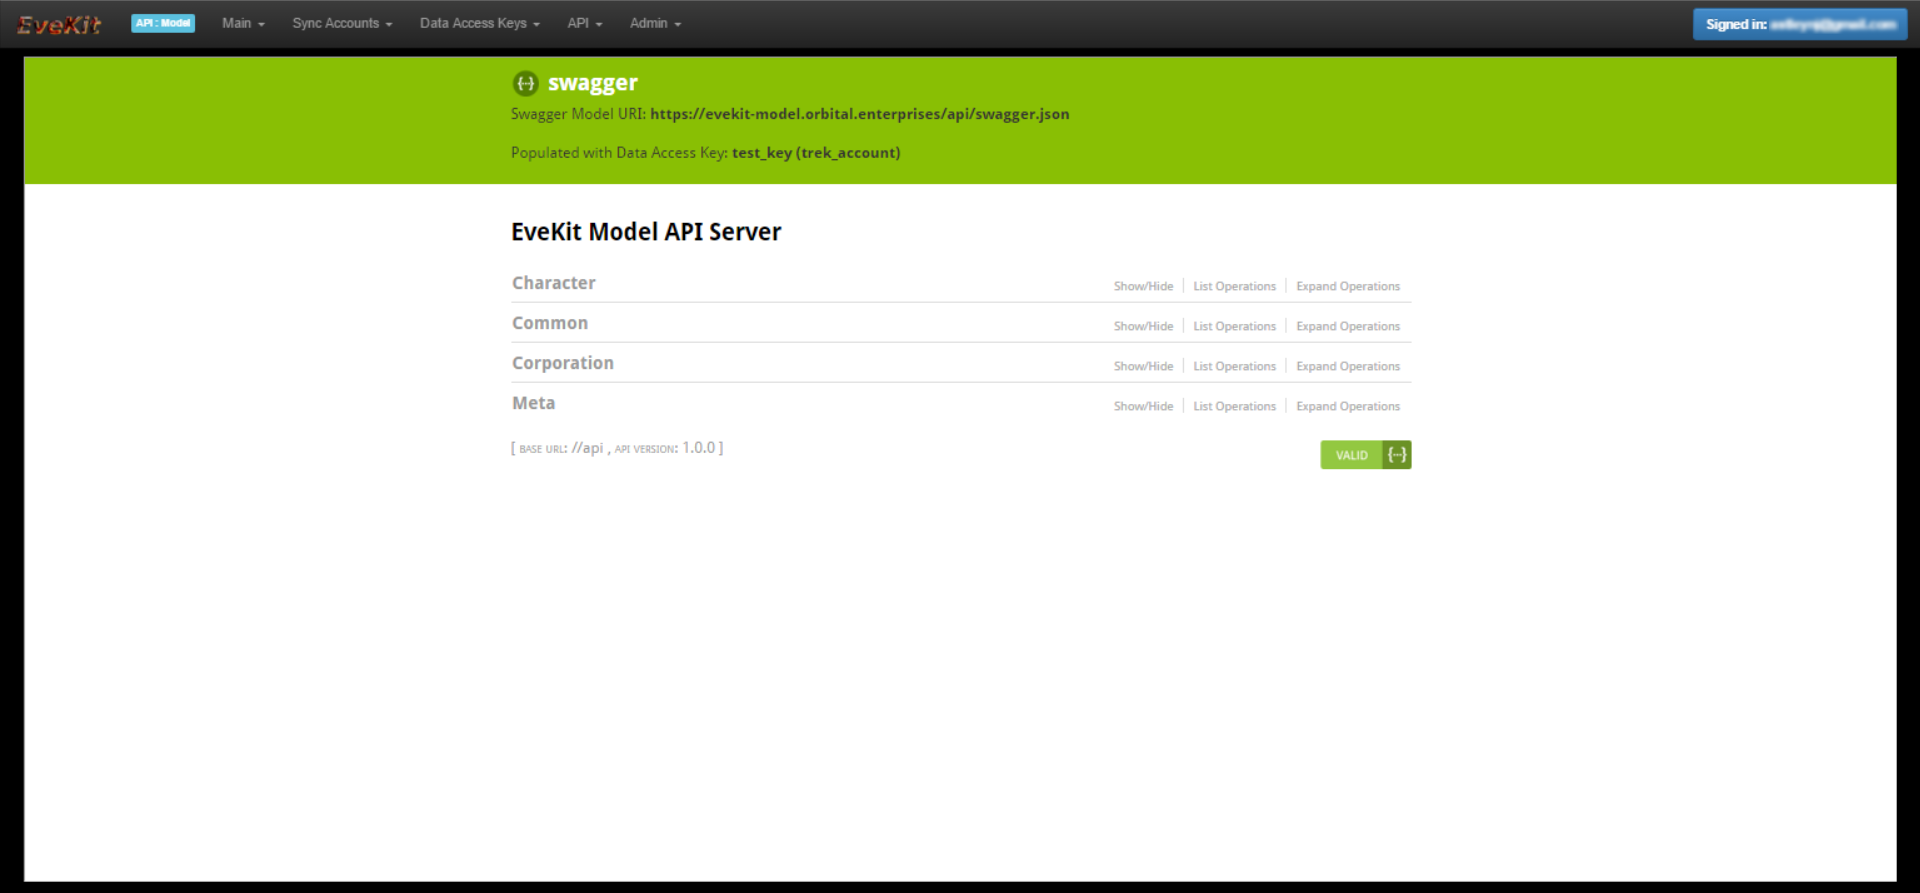
Model API Browser Screen
The EveKit service consists of four main components:
- At least one database instance to hold settings, accounts and model data.
- At least one instance of EveKit Frontend (this module) to allow users to login and set up accounts for synchronization.
- At least one instance of EveKit Model Frontend to provide REST access to downloaded model data.
- A synchronization manager responsible for periodically downloading data for all eligible accounts. There is currently one implementation provided, the EveKit Standalone Synchronization Manager.
All data for EveKit is currently stored in a SQL database. The public instance of EveKit uses MySQL, but any other database compatible with JDBC and Hibernate should work fine. The EveKit Frontend and Model Frontend are stateless web services. You can run as many instances of these services as you deem fit. The synchronization manager may be implemented a number of different ways depending on your needs. The EveKit Standalone Synchronization Manager is designed to be run as a single instance and will likely fail if multiple instances are run concurrently. Other implementations are possible if measures are taken to ensure that synchronization managers synchronize properly on model data.
Setting up your own instance of EveKit is straightforward and can easily be done on a relatively modest machine. The steps are:
- Create a database instance using your favorite JDBC and Hibernate compatible SQL database. EveKit uses separate database connections for settings and model data. However, it is perfectly fine to use the same underlying database instance for both connections. You'll also need to create appropriate EveKit tables on your database instance. This can be done in one of two ways:
- Create the tables using the sample_schema.sql file in the top level directory of this module. You may need to customize this file according to the format expected by your database vendor; or,
- Let Hibernate create tables for you as needed. This can be done by adding
<property name="hibernate.hbm2ddl.auto" value="create"/>to each persistence.xml file. NOTE: be careful with table name case if you develop on MySQL on both Windows and Linux (as I do). Windows table names are case insensitive, but case matters on Linux. In order to make things work correctly, I set "lower_case_table_names = 1" in my.cnf on Linux MySQL. - Follow the instructions below to create an EveKit Frontend instance with access to your database instance. You'll want to verify authentication works correctly with all the authentication modes you plan to support. You'll also want to create at least one account for testing synchronization.
- Follow the instructions in EveKit Standalone Synchronization Manager to setup and run an instance of the synchronization manager, again using the database instance you just created. If everything is working correctly, you should see the synchronization manager download appropriate data from the EVE Online servers, and you should see copies of this data in your database. You should also be able to view synchronization status and history from your instance of EveKit Frontend.
- Follow the instructions in EveKit Model Frontend to create an EveKit Model Frontend instance using your database instance. After you've started your model frontend, you can configure your EveKit Frontend with the URL for the model frontend to allow browsing of model data directly from the API -> Model API page.
If everything has worked up to this point, then you now have a complete standalone instance of EveKit. If you get stuck somewhere, or otherwise need help, you can ask question on the Orbital Forum.
The EveKit frontend requires the setting and substitution of several parameters which control authentication, database and servlet settings. Since the frontend is normally build with Maven, configuration is handled by setting or overriding properties in your local Maven settings.xml fie. The following configurations parameters should be set:
| Parameter | Meaning |
|---|---|
| enterprises.orbital.evekit.frontend.basepath | The base location where the servlet is hosted, e.g. http://localhost:8080 |
| enterprises.orbital.evekit.frontend.appname | Name of the servlet when deployed |
| enterprises.orbital.evekit.frontend.db.properties.url | Hibernate JDBC connection URL for properties |
| enterprises.orbital.evekit.frontend.db.properties.user | Hibernate JDBC connection user name for properties |
| enterprises.orbital.evekit.frontend.db.properties.password | Hibernate JDBC connection password for properties |
| enterprises.orbital.evekit.frontend.db.properties.driver | Hibernate JDBC driver class name for properties |
| enterprises.orbital.evekit.frontend.db.properties.dialect | Hibernate dialect class name for properties |
| enterprises.orbital.evekit.frontend.db.account.url | Hibernate JDBC connection URL for account info |
| enterprises.orbital.evekit.frontend.db.account.user | Hibernate JDBC connection user name for account info |
| enterprises.orbital.evekit.frontend.db.account.password | Hibernate JDBC connection password for user info |
| enterprises.orbital.evekit.frontend.db.account.driver | Hibernate JDBC driver class name for account info |
| enterprises.orbital.evekit.frontend.db.account.dialect | Hibernate dialect class name for account info |
| enterprises.orbital.evekit.snapshot.directory | Local directory where accout snapshots are stored |
| enterprises.orbital.evekit.frontend.swaggerui.model | URL of the model frontend Swagger configuration, e.g. https://evekit-model.orbital.enterprises/api/swagger.json |
| enterprises.orbital.auth.twitter_api_key | Twitter authentication key |
| enterprises.orbital.auth.twitter_api_secret | Twitter authentication secret |
| enterprises.orbital.auth.google_api_key | Google authentication key |
| enterprises.orbital.auth.google_api_secret | Google authentication secret |
| enterprises.orbital.auth.eve_client_id | EVE Online authentication ID |
| enterprises.orbital.auth.eve_secret_key | EVE Online authentication secret |
| enterprises.orbital.auth.eve_debug_mode | If true, then EVE Online authentication authenticates as a local debug account (always succeeds, useful for testing) |
As with all EveKit components, two database connections are required: one for retrieving general settings for system and user accounts; and, one for retrieving user account and model information. These can be (and often are) the same database.
EveKit authentication settings follow the conventions in the Orbital OAuth module. At time of writing, there is no configuration parameter for changing which methods of authentication are supported. If you decide not to support all methods, you'll need to do a small amount of HTML repair to index.html to remove the login buttons you don't want to support.
To make debugging easier, we've added the parameter "eve_debug_mode". When set to true, authenticating with EVE Online will always succeed (EVE Online logger servers are never actually invoked), and the logged in user will be named "eveuser". This mode allows you to develop and test when you're not connected to a network, or otherwise don't want to have to go through the usual authentication flow every time.
At build and deploy time, the parameters above are substituted into the following files:
- src/main/resources/META-INF/persistence.xml
- src/main/resources/EveKitFrontend.properties
- src/main/webapp/WEB-INF/web.xml
If you are not using Maven to build, you'll need to substitute these settings manually.
We use Maven to build all EveKit modules. EveKit dependencies are released and published to Maven Central. EveKit front ends are released but must be installed by cloning a repository. To build the EveKit Frontend, clone this repository and use "mvn install". Make sure you have set all required configuration parameters before building (as described in the previous section).
This project is designed to easily deploy in a standard Servlet container. Two parameters need to be substituted in the web.xml file in order for deployment to work correctly:
| Parameter | Meaning |
|---|---|
| enterprises.orbital.evekit.frontend.basepath | The base location where the servlet is hosted, e.g. http://localhost:8080 |
| enterprises.orbital.evekit.frontend.appname | Name of the servlet when deployed |
If you follow the configuration and build instructions above, these parameters will be substituted for you. These settings are used to define the base path for the REST API endpoints (via Swagger) needed for the frontend.
The default pom.xml in the project includes the Tomcat Maven plugin which makes it easy to deploy directly to a Tomcat instance. This is normally done by adding two stanzas to your settings.xml:
<servers>
  <server>
    <id>LocalTomcatServer</id>
    <username>admin</username>
    <password>password</password>
  </server>
</servers>

<profiles>
  <profile>
    <id>LocalTomcat</id>
    <properties>
      <enterprises.orbital.evekit.frontend.tomcat.url>http://127.0.0.1:8080/manager/text</enterprises.orbital.evekit.frontend.tomcat.url>
      <enterprises.orbital.evekit.frontend.tomcat.server>LocalTomcatServer</enterprises.orbital.evekit.frontend.tomcat.server>
      <enterprises.orbital.evekit.frontend.tomcat.path>/evekit</enterprises.orbital.evekit.frontend.tomcat.path>
    </properties>
  </profile>
</profiles>
The first stanza specifies the management credentials for your Tomcat instance. The second stanza defines the properties needed to install into the server you just defined. With these settings, you can deploy to your Tomcat instance as follows (this example uses Tomcat 7):
mvn -P LocalTomcat tomcat7:deploy
If you've already deployed, use "redploy" instead. See the Tomcat Maven plugin documentation for more details on how the deployment plugin works.
The best place to get help is on the Orbital Forum.
