Using Git with Visual Studio
Visual Studio has git integration built in. This means that you don't have to use a different program to use version control. You can do everything* from within Visual Studio.
(* some git commands, you will still have to use a command line)
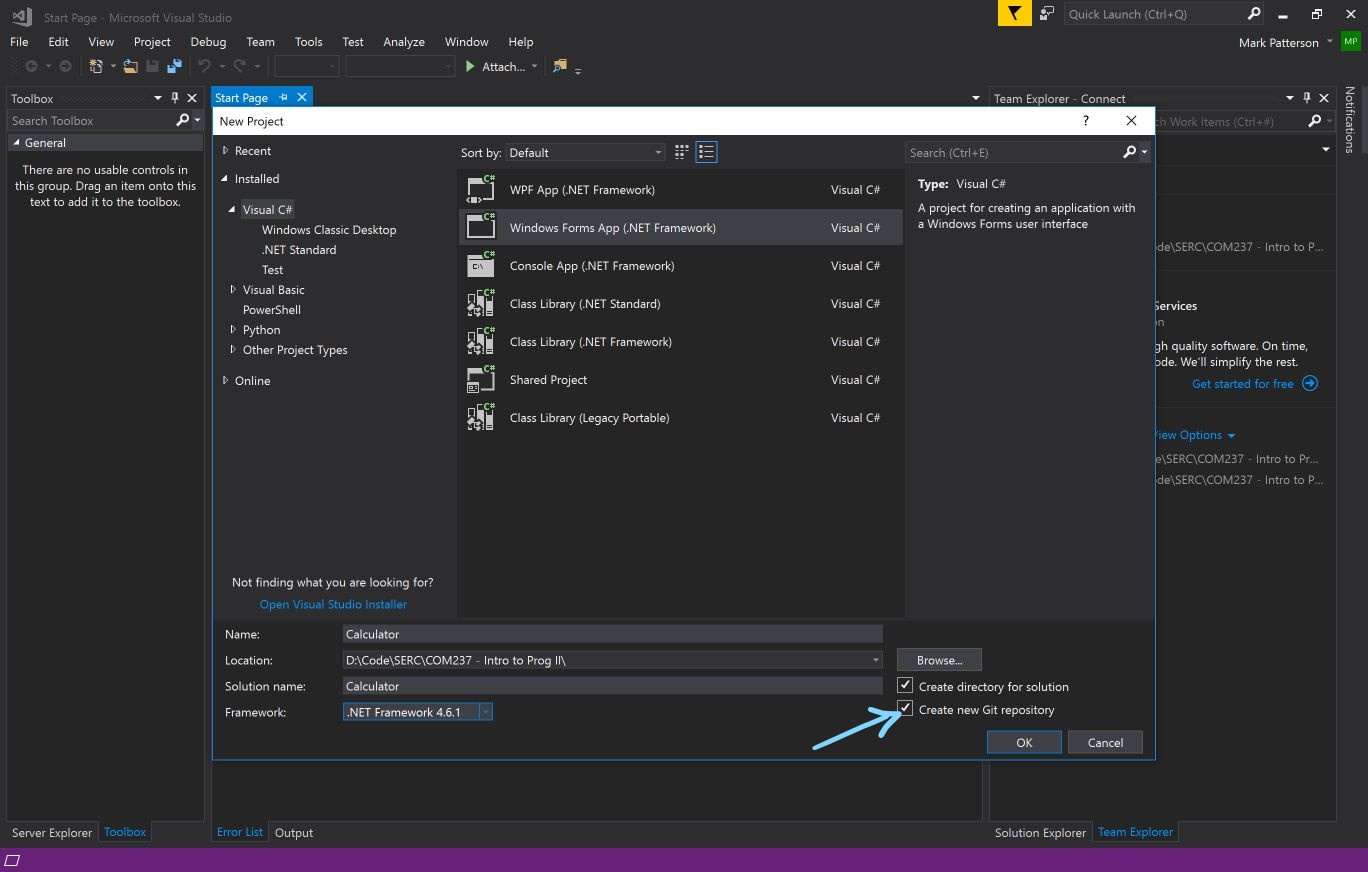
When you create a new project in Visual Studio, you will be given the option to also create a local git repository to track changes in your project. On the 'New Project' form, there is a tick box towards the bottom right of the form 'Create new Git repository'. Tick this box.
This is the best way to create a git repository when working with Visual Studio. Special files will be created that configure the git repo to work well with Visual Studio. (.gitignore and .gitattributes files)
- To add a remote repository you first need to open the 'Team Explorer' window.
_LI.jpg)
- Click the Home icon on the Team Explorer menu.
- Click the Sync button on the Home menu.
This will open the syncronisation menu.
_LI.jpg)
DO NOT click the 'Publish to GitHub' button. I know this is counter-intuitive, but the 'Publish to GitHub' button will create a new repository on GitHub. You want to add a repository that already exists.
Click the 'Publish Git Repo' button instead. This will open a text field.
_LI.jpg)
Paste (or type) the URL of your remote repository into the text field..
Click the 'Publish' button.
todo
todo
todo