Using the DNN Demo Persona Skin Object
<< back to the Demo Skin Object home
The Demo Persona Skin Object injects a CSS-changeable footer bar that overlays the page in DNN when a user is logged in. By default, it allows you to display their profile picture, bio, and display name. However, it is templated so that you can change the HTML and use any other token that you'd like.
Please Note: There's also another version of this skin object that allows you to impersonate or switch user accounts.

I think I made this super simple for you...
- Install DNN 07.06.06 or newer
- Add a few users
- Populate their Display Name, Biography, and Photo (smaller photos work better)
- Install the Skin Object in DNN
- Add it to your skin (theme)
The default properties you should set include Display Name, Bio, and Photo. Others can be used if you edit the template.
This requires that you properly set the visibility of the profile properties that are showing in order to have the desired effect. This is especially true if you choose the modify the template and/or use custom profile properties.
First, download and install this SkinObject the same way that you would install any Module or any other extension in DNN.
Next, copy and paste the following code into your DNN skin. There are no parameters or other options to use at this time.
ASCX Skins
<%@ Register TagPrefix="wns" TagName="DEMOPERSONA" Src="~/DesktopModules/WillStrohl.DemoSO/DemoPersona.ascx" %>
<wns:DEMOPERSONA id="DemoPersona" runat="server" />
HTML Skins
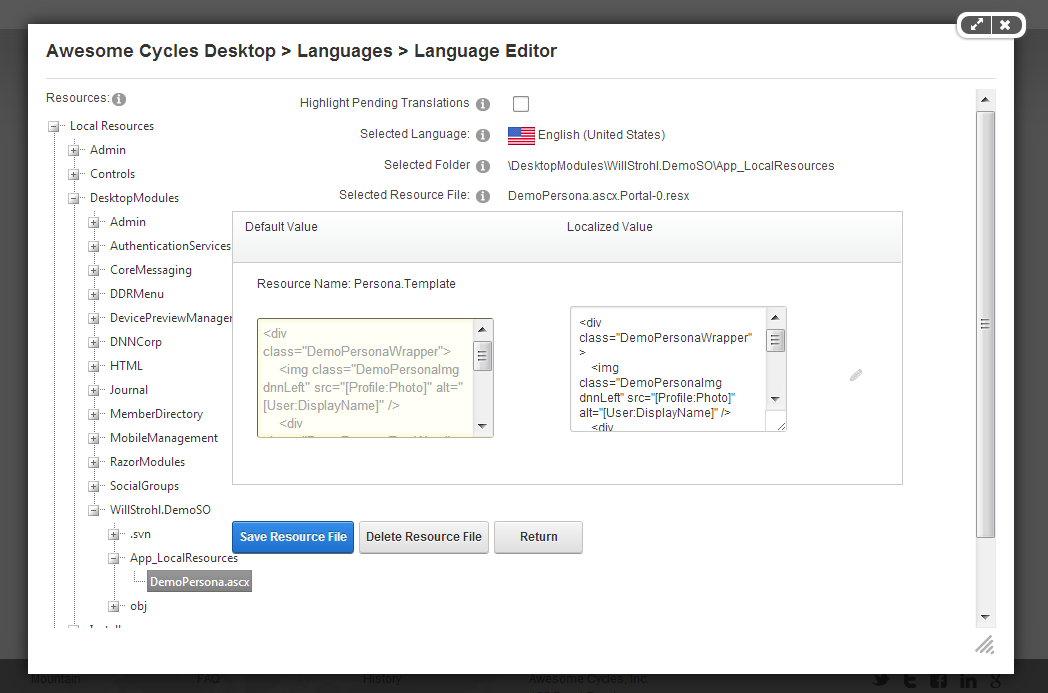
<object id="DemoPersona" codetype="dotnetnuke/server" codebase="DemoPersona"></object>Open the following file and create your own HTML or make any other necessary HTML-compliant changes (e.g., CSS classes). You can also open this file in the Language Editor when logged n as an Administrator or Superuser. This would be the best practice.
- ~/DesktopModules/WillStrohl.DemoSO/App_LocalResources/DemoPersona.ascx.resx
When using the Language Editor, log in as a Superuser or Admin and navigate to the Languages page in the Admin menu. Click the pencil to edit the Static Resource file. Navigate to the skin object as shown in the image below. When you select it, paste in your desired HTML in the box on the right and then click the Save Resource File button.