-
Notifications
You must be signed in to change notification settings - Fork 11
Nimbus Cumulus on an Odroid U3 with Ubuntu 16.04 LTS
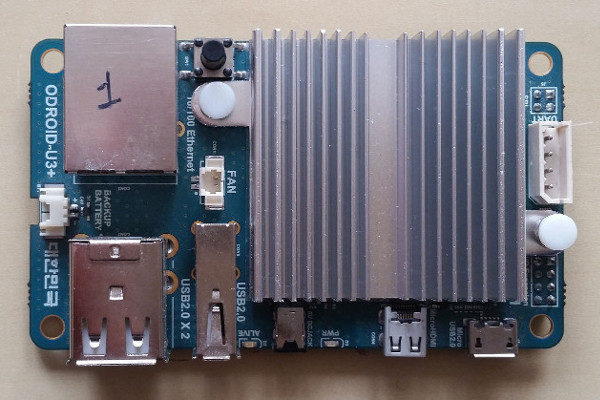
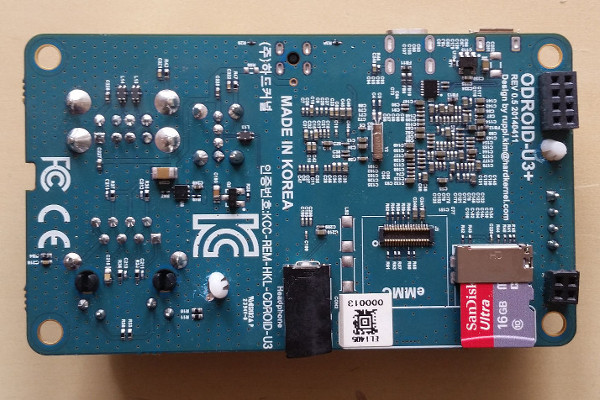
The ODROID U3 single board computer from Hardkernel has a 1.7 GHz quad-core processor, 2 GByte main memory and a 10/100 Mbps Ethernet interface.


This installation tutorial explains the installation of an Odroid device from scratch and the configuration of s3cmd on your computer.
This implies that you have already an installation of s3cmd on the system you want to use for the interaction with the Cumulus storage service.
$ wget http://odroid.in/ubuntu_16.04lts/ubuntu-16.04-mate-odroid-u2u3-20160920.img.xz
$ xz -d ubuntu-16.04-mate-odroid-u2u3-20160920.img.xz
Check which one is the correct device! If you use an internal card reader, it is often /dev/mmcblk0.
# dd bs=1M if=ubuntu-16.04-mate-odroid-u2u3-20160920.img of=/dev/sdb && sync
Default login of this image is odroid/odroid and root/odroid.
Insert the micro SD card into the Odroid computer, connect it with the ethernet cable and the micro USB cable for power suppy and switch on the power supply. The operating system will try to fetch network configuration by using DHCP on the Ethernet interface per default. You can now log in via SSH. A SSH server is running on the Odroid per default and the SSH port 22 is also open per default.
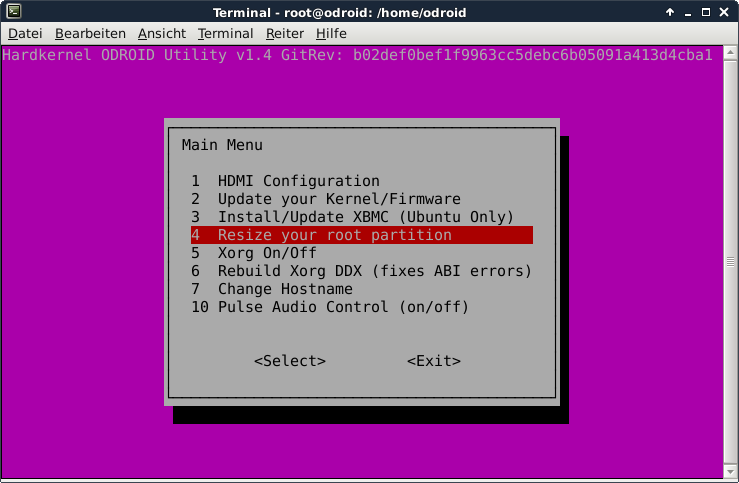
$ sudo odroid-utility.sh

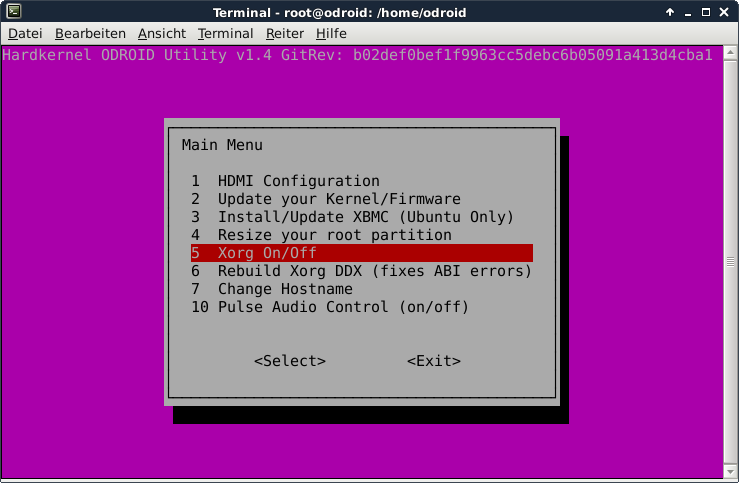
This is not required for running Nimbus Cumulus, but the Odroid U3 has just 2 GB of main memory which is not much at all and there is no need to waste some capacity for a graphical user interface which is not used.
$ sudo odroid-utility.sh


Disable the display manager:
$ sudo systemctl disable lightdm.service
This is not required for running Nimbus Cumulus, but it is always useful to configure the operating system properly
$ sudo dpkg-reconfigure tzdata
$ cat /etc/timezone
Europe/Berlin
This is not required for running Nimbus Cumulus, but it is always useful to have the correct time on a computer
$ sudo apt-get update && sudo apt-get install -y ntp ntpdate
Now the time sould be synchronized with several NTP servers.
$ ntpq -p
     remote           refid      st t when poll reach   delay   offset  jitter
==============================================================================
 0.ubuntu.pool.n .POOL.          16 p    -   64    0    0.000    0.000   0.001
 1.ubuntu.pool.n .POOL.          16 p    -   64    0    0.000    0.000   0.001
 2.ubuntu.pool.n .POOL.          16 p    -   64    0    0.000    0.000   0.001
 3.ubuntu.pool.n .POOL.          16 p    -   64    0    0.000    0.000   0.001
 ntp.ubuntu.com  .POOL.          16 p    -   64    0    0.000    0.000   0.001
*ns1.blazing.de  213.172.96.14    2 u  152  256  377   21.667    3.032   0.715
+intrepid2.memor 192.53.103.103   2 u  132  256  377   21.471    3.013   0.783
+ntp2.ig-haase.d 192.53.103.108   2 u  102  256  377   35.454   -1.956   0.825
-isis.uni-paderb 192.53.103.108   2 u   88  256  377   31.780    6.063   4.887
-business-90-187 192.168.100.15   2 u  126  256  377   43.762    0.557  17.025
Check the time and date:
$ date -R
Sat, 01 Apr 2017 10:17:12 +0200
Because we don't need the entire Nimbus IaaS functionality, we will only install, configure and start the Cumulus storage service
1) Install some packages
Some of them are required for the installation of Cumulus. Some are just nice to have.
$ sudo apt-get install -y curl htop joe nmap virtualenv sqlite3 git
$ sudo apt-get install -y python-dateutil python-pysqlite2 build-essential
$ sudo apt-get install -y libssl-dev ant-optional python-dev python-pip openjdk-8-jdk
Important !!! With this version of Ubuntu, you need to create a missing link manually. Otherwise you will get an error No module named _sysconfigdata_nd. This is because of a bug in the Ubuntu package for Python 2.7.
$ sudo ln -s /usr/lib/python2.7/plat-*/_sysconfigdata_nd.py /usr/lib/python2.7/
2) Create a user nimbus
$ sudo adduser nimbus
3) Become user nimbus and jump the its home directory
$ su nimbus
$ cd ~
4) Fetch the nimbus source code and decompress it
$ curl -O http://www.nimbusproject.org/downloads/nimbus-iaas-2.10.1-src.tar.gz
$ tar xvzf nimbus-iaas-2.10.1-src.tar.gz
5) Update pyOpenSSL
Important !!! With this version of Ubuntu, pyOpenSSL version 0.13, which is included in Cumulus does not work properly. To solve this issue, pyOpenSSL needs to be upgraded.
$ cd ~/nimbus-iaas-2.10.1-src/cumulus/deps/
$ wget https://pypi.python.org/packages/3a/c1/6582bca6b910848d36556e47e00408c28c53df2c846d76f04cb033718f37/pyOpenSSL-0.15.tar.gz#md5=661ddf97b75320d6004a56160a4a8578
Open the file ~/nimbus-iaas-2.10.1-src/cumulus/reqs.txt and modify this line:
deps/pyOpenSSL-0.13.tar.gz
this way:
deps/pyOpenSSL-0.15.tar.gz
6) Create a new folder for Cumulus and install the storage service into it
$ mkdir ~/cumulus
$ ./nimbus-iaas-2.10.1-src/cumulus/cumulus-install.sh ~/cumulus**
**7) Insert the search path into the bashrc file and restart the bash
$ echo "export CUMULUS_HOME=~/cumulus" > ~/.bashrc
$ bash
8) Start Cumulus
$ ~/cumulus/bin/cumulus &
Now the service should be running and accessible via port 8888
$ nmap localhost

Starting Nmap 7.01 ( https://nmap.org ) at 2017-04-01 10:55 CEST
Nmap scan report for localhost (127.0.0.1)
Host is up (0.00026s latency).
Other addresses for localhost (not scanned): ::1
Not shown: 998 closed ports
PORT     STATE SERVICE
22/tcp   open  ssh
8888/tcp open  sun-answerbook

Nmap done: 1 IP address (1 host up) scanned in 0.17 seconds
8) Create a new user inside the nimbus service
$ ~/cumulus/bin/cumulus-add-user <your_email_address>@server.com
ID              : 9CWSA6IH223I5mBrp9o02
password        : pRY0n3GHqPOHBxp4KirftlIYpV4c5qv5thqCRPG3Mf
quota           : None
canonical id    : 3e9287e0-1629-11e7-9f28-3a05dd37b603
Just these lines need to be modified:
access_key = 9CWSA6IH223I5mBrp9o02
host_base = <the_ip_of_your_odroid>:8888
host_bucket = <the_ip_of_your_odroid>:8888
secret_key = pRY0n3GHqPOHBxp4KirftlIYpV4c5qv5thqCRPG3Mf
use_https = False
Now s3cmd should work properly with the Cumulus service.
$ s3cmd mb s3://TESTBUCKET
Bucket 's3://TESTBUCKET/' created
$ s3cmd ls
2017-04-01 11:09  s3://TESTBUCKET
Important !!! When using s3cmd together with Cumulus, all buckets have to start with a capital letter. Otherwise you will just get this error message:
$ s3cmd mb s3://testbucket
WARNING: Retrying failed request: /?location (500 (InternalError): We encountered an internal error. Please try again.)
WARNING: Waiting 3 sec...
The config file of Cumulus is here:
~/cumulus/etc/cumulus.ini
Inside this file, it is among others specified...
- the port number of cumulus (
8888) - the local folder, which is used to store the buckets and objects (
/home/nimbus/cumulus/posixdata) - the hostname
- the logfile (
/home/nimbus/cumulus/log/cumulus.log) - the installation directory (
/home/nimbus/cumulus) - if HTTPS shall be used
- Nimbus Cumulus on...
- Minio on...
- S3ninja on...
- S3rver on...
- Fake S3 on...
- Scality S3 on...
- OpenStack Swift on...
- Riak CS on...
- Measurements with s3perf and...
- Measurements with gsutil and...