Welcome to the DIY Spider Robot firmware project! This repository contains the code running on a CircuitPython-based microcontroller to control a quadruped (“spider”) robot. Below is a comprehensive overview of the project structure, how to deploy the code, its main functionalities, and instructions on how to customize or extend it.

- Project Overview
- Hardware & Components
- Directory Structure & File Descriptions
- Installation & Setup
- Deploying to the Microcontroller
- Excluding Unwanted Files
- Runtime Behavior
- REST API Endpoints
- Logging & Debugging
- Testing
- Future Improvements
- License & Credits
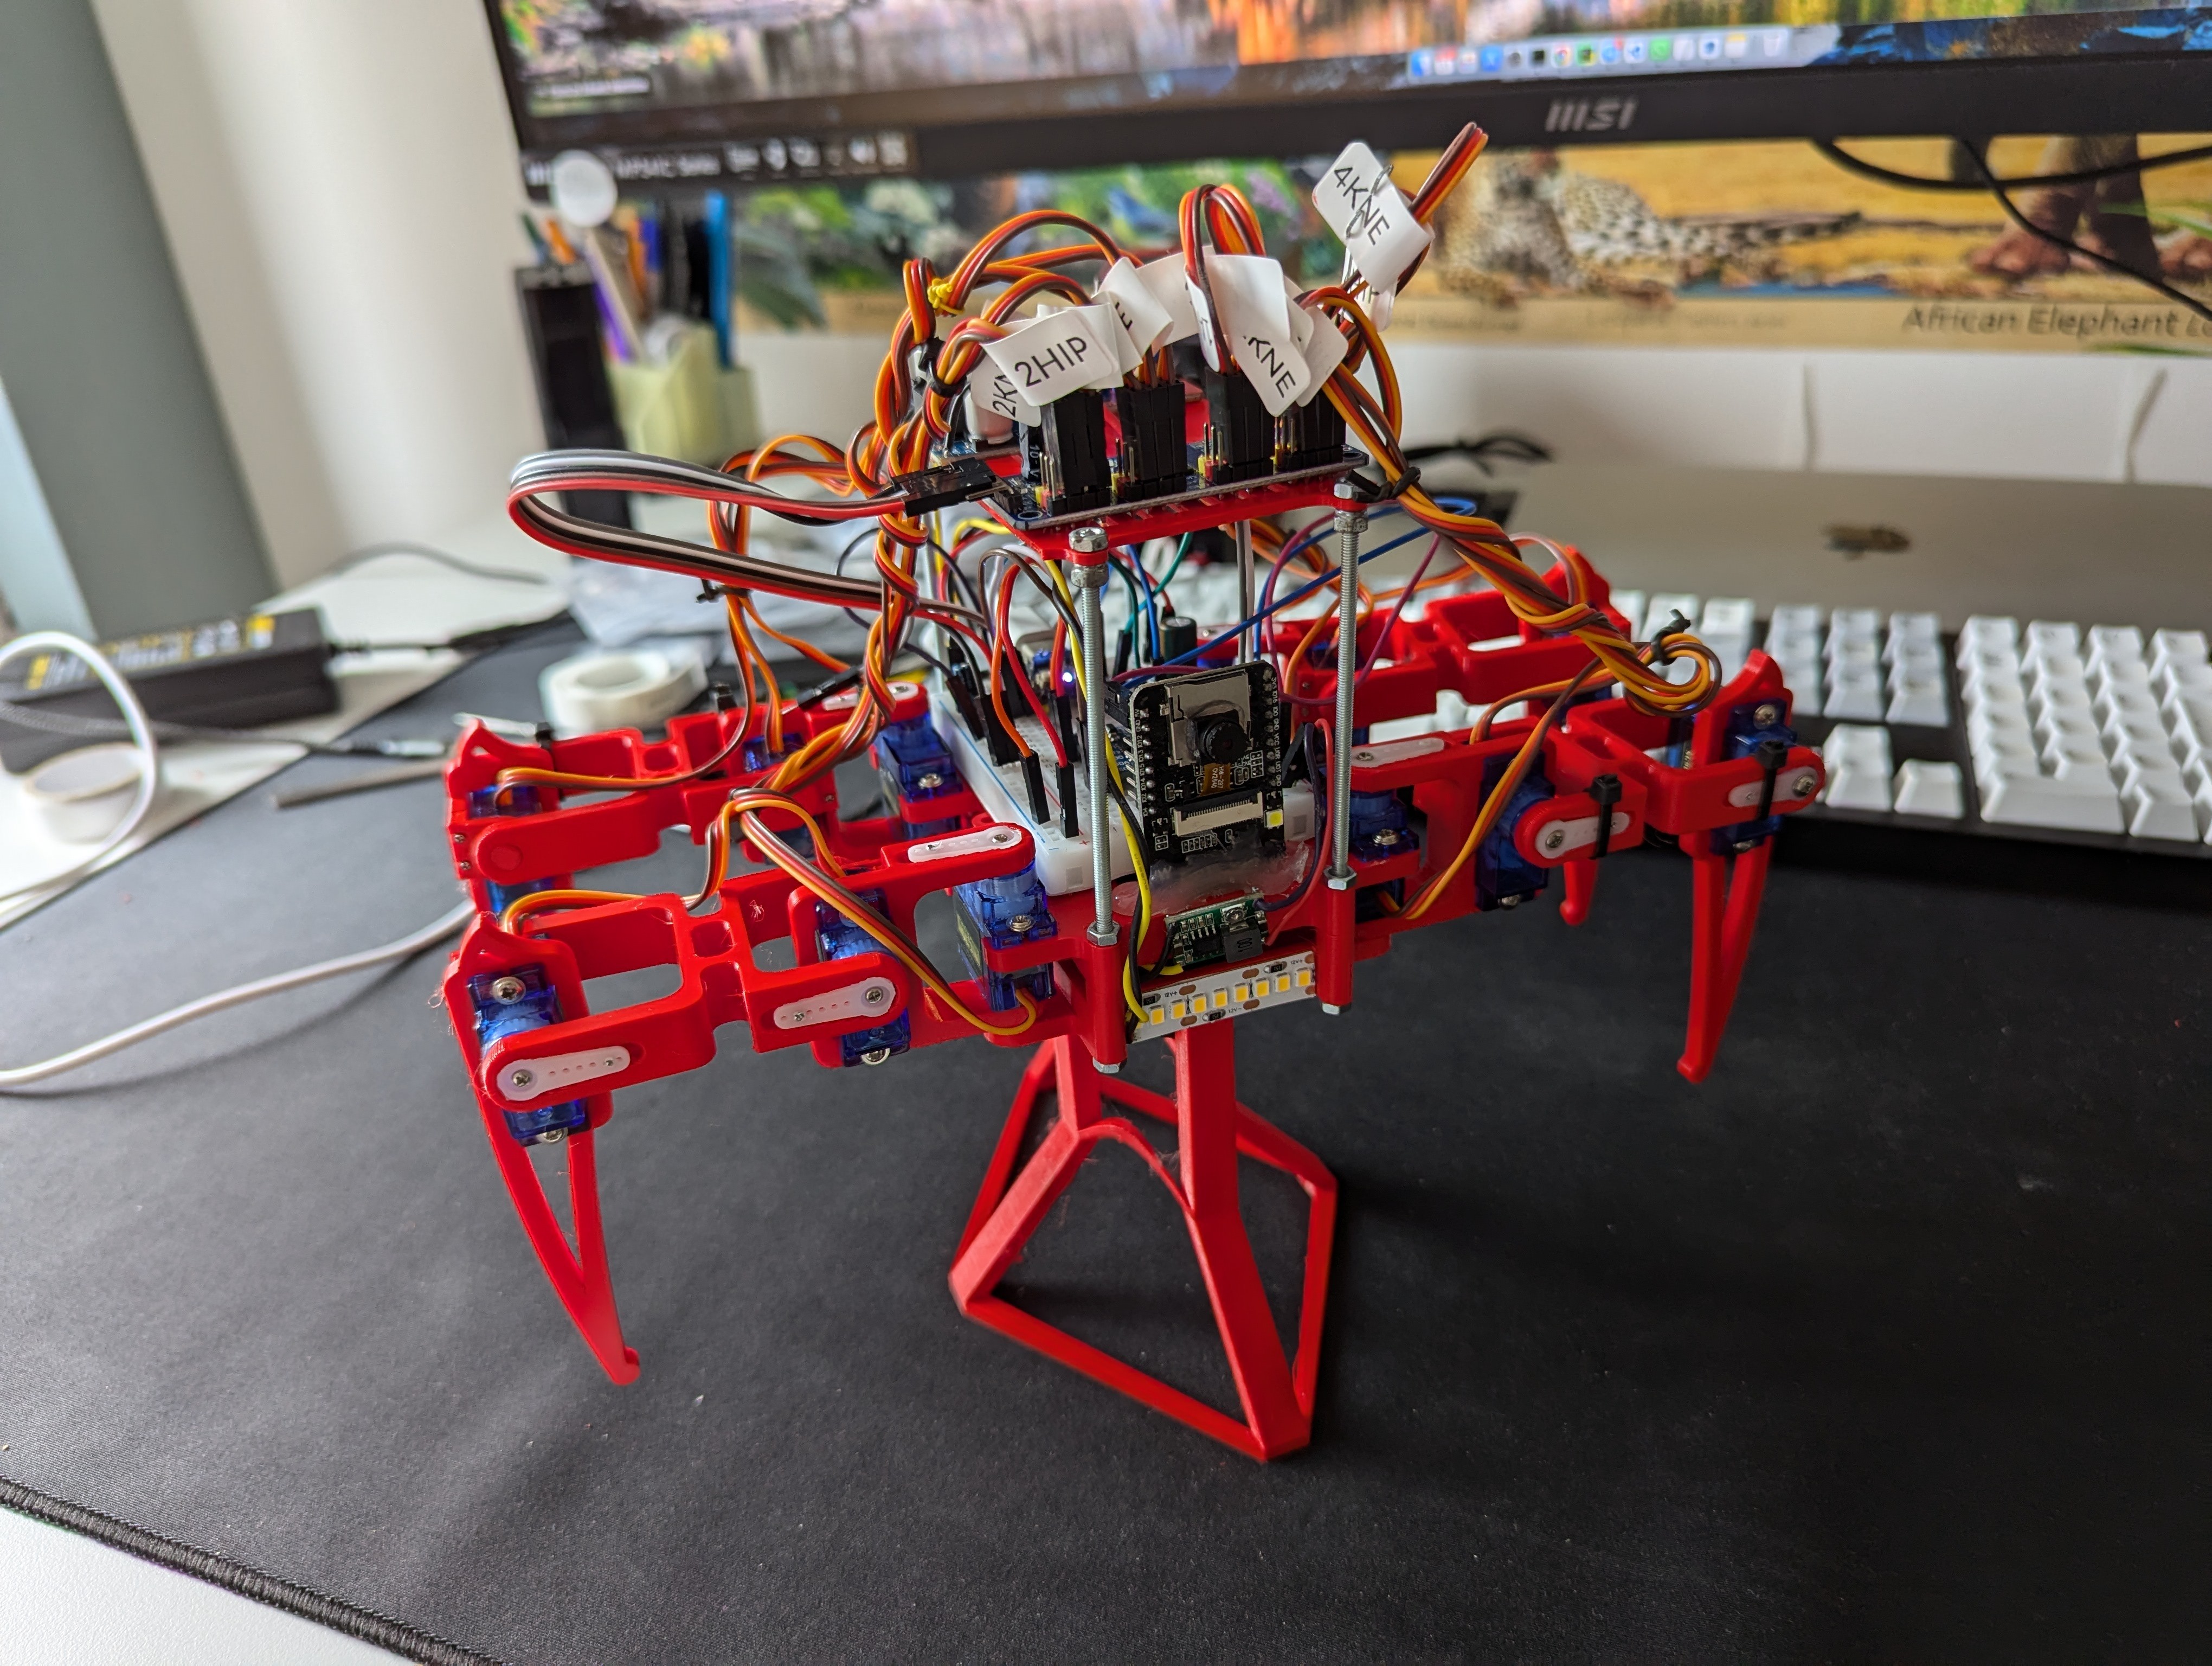
This project is intended for a custom quadruped robot (resembling a “spider” robot with four legs). It uses:
- A CircuitPython-compatible microcontroller (e.g., an ESP32-S3, Raspberry Pi Pico W, or similar).
- A PCA9685 PWM driver to control multiple servos for the legs.
- Various sensors, such as an accelerometer (ADXL345) and a battery monitor.
- A small SSD1306 OLED display for local feedback.
- A Wi-Fi module for hosting a local HTTP server, allowing for real-time commands and telemetry via REST endpoints.
- Flash memory for persistent storage of logs and saved servo positions.
- Microcontroller: Must support CircuitPython and Wi-Fi (e.g., Espressif or Raspberry Pi Pico W).
- Servo Driver: Adafruit PCA9685 controlling up to 16 servos.
- Servos: Used in the
Walkerclass to articulate the 4 legs (3 joints per leg = 12 servos). - Battery: Typically a LiPo pack (3S or 2S). A designated pin reads battery voltage.
- Accelerometer: ADXL345 sensor (I²C).
- Light: An LED strip or single LED (PWM controlled).
- OLED Display: SSD1306 (128x32 or 128x64) for local debug info.
- Mechanical: The mechanical chassis is up to you. The
hardware.pyfile sets pin assignments for the servos, battery sensor, etc.
.
├── api.py                 # Defines the HTTP routes and command endpoints
├── code.py                # Entry point for the main async loop (CircuitPython main)
├── deploy.sh              # Bash script to deploy files to the microcontroller
├── excluded_files.txt     # List of files/directories to exclude from deployment
├── flash_storage.py       # Provides a dictionary-like persistent storage (JSON-based)
├── hardware.py            # Hardware pin config, setup of servos, battery, accelerometer, display, etc.
├── logging_.py            # Logging system with a ring buffer for storing logs
├── pins.py                # Pin definitions (board-level constants)
├── requirements.txt       # Dependencies (CircuitPython libraries) for reference
├── routines.py            # Routines registry for scheduling asynchronous tasks
├── serial_monitor.sh      # Simple script to open a serial console (screen)
├── tests.py               # Various test routines (like servo tests, light tests)
├── uart.py                # Example UART read routine
├── utils.py               # Helper utilities (async call wrapper, color math, inverse kinematics stubs)
│
├── python_utils/          # (Optional) Additional Python reference utilities (functools, itertools, etc.)
│
├── research/              # Extra URDF files, IKPy experiments, or other research notes
│
├── simulator/             # Contains a prototype Python GUI-based simulator (PyQt + Matplotlib)
│
├── static/                # Static web assets (like `index.html` for the built-in HTTP server)
│
└── tests/                 # Additional test configs or smaller tests
-
api.py- Sets up REST API endpoints using
adafruit_httpserver. - Routes include:
/api/statsfor battery & sensor info/api/command(POST) to receive commands (like servo movements, calibration, etc.)/api/logsfor logs/api/servos-anglesto read current servo angles/api/saved-positionsto list stored servo positions
- Commands dictionary maps string commands to callable methods (e.g.,
"wiggle" -> walker.wiggle).
- Sets up REST API endpoints using
-
code.py- The main entry point.
- Initializes the routines in
RoutinesRegistryand starts them in an asyncio event loop. - Handles any top-level exceptions, deactivates servos if an error occurs.
-
flash_storage.py- Implements a JSON-backed storage dictionary to persist data on the microcontroller’s flash:
storage["key"] = valuesaves data todata.json.- Re-mounts storage in write mode, then returns to read-only mode.
- Implements a JSON-backed storage dictionary to persist data on the microcontroller’s flash:
-
hardware.py- Configures hardware for:
- I²C sensors (accelerometer & display).
- The PCA9685 servo driver for controlling leg servos.
- Wi-Fi connection.
- Battery ADC reading.
- LED Light PWM pin.
- Defines a global
walkerobject with 4Legobjects.
- Configures hardware for:
-
logging_.py- Maintains an in-memory ring buffer for log lines.
log("message")to add a log line to both the ring buffer and print it.get_unsent_loglines(...)used by/api/logsand the display routine to fetch new logs incrementally.
-
pins.py- Board-specific pin definitions (I²C pins, LED pin, battery ADC pin, etc.).
-
requirements.txt- References to the CircuitPython libraries used.
- For local simulation or typed-linting, there are also Python stubs (like
circuitpython-stubs).
-
routines.py- A minimal framework for registering background tasks (
tick()methods). RoutinesRegistry.register()registers a routine, and theinitialise()method schedules them into a singleasyncio.gather.
- A minimal framework for registering background tasks (
-
tests.py- Contains test routines, e.g.
leg_test()that wiggles the legs one by one, orlight_test()to fade the LED. - Potentially run these test calls from the REPL or via an API command.
- Contains test routines, e.g.
-
uart.py- Basic example capturing data from a UART device.
-
utils.py- Various helpers:
run_callable_async_or_not(...)to unify calling sync or async tasks.- Color interpolation stubs.
- Some inverse kinematics math stubs (for advanced control).
- Various helpers:
deploy.sh
Automates copying the code onto the microcontroller’s USB drive withrsync.excluded_files.txt
Lists files/folders to skip during deployment.serial_monitor.sh
Quick script usingscreento open a serial console at the correct baud rate.
- Install CircuitPython on your microcontroller if not pre-flashed.
- Obtain the correct drivers for your platform (e.g., Adafruit PCA9685 library, etc.).
- Clone or download this repository onto your PC.
- Solder & assemble your hardware:
- PCA9685 connected to the microcontroller’s I²C pins (
SDA,SCL). - ADXL345 connected to the same I²C.
- Battery sense pin connected to an ADC pin (through appropriate voltage divider).
- Servos connected to the PCA9685 channels 0–15.
- (Optional) SSD1306 OLED also on I²C.
- PCA9685 connected to the microcontroller’s I²C pins (
The deploy.sh script automates copying the relevant project files to your microcontroller’s CIRCUITPY drive (or a mounted folder). Steps:
- Mount the microcontroller’s CIRCUITPY drive, e.g., at
/Volumes/CIRCUITPYon macOS or/media/username/CIRCUITPYon Linux. - Open a terminal in the project root.
- Run:
./deploy.sh /path/to/CIRCUITPY
- The script reads
excluded_files.txtto skip certain files/folders. rsynconly copies changed files.
- The script reads
Once deployed, the microcontroller automatically restarts and runs code.py as the main script.
In excluded_files.txt, list everything you do not want to copy to the device. For instance:
.git/,.vscode/, and other ephemeral dev folders.- Large images or backups not needed on-device.
tests/folder if not required at runtime.
Rsync uses --exclude-from=excluded_files.txt.
code.pystarts an async event loop.- Routines from
RoutinesRegistrystart:HttpServerRoutineto handle web requests on port 80 or 5000 (depending on your code inhardware.py).SchedulerRoutineto periodically log battery stats.DisplayRoutine(if using SSD1306).HttpCommandsRoutinefor queued tasks from the API.
- The robot is now ready to accept commands via the
/api/commandendpoint to move servos, calibrate accelerometer, or log data.
When the robot boots, it connects to Wi-Fi with credentials in environment variables (or your os.getenv(...) in hardware.py).
Below are the main routes defined in api.py:
| Endpoint | Method | Description | Example |
|---|---|---|---|
/api/stats |
GET |
Returns JSON with sensor data (battery, accelerometer, etc.). | curl http://robot/api/stats |
/api/logs |
GET |
Returns logs since last fetch. | curl http://robot/api/logs |
/api/servos-angles |
GET |
Returns a JSON dict of current servo angles. | curl http://robot/api/servos-angles |
/api/saved-positions |
GET |
Returns a JSON object of all saved positions. | curl http://robot/api/saved-positions |
/api/command |
POST |
Accepts a JSON with action and optional params. Executes command |
curl -X POST -d '{"action":"wiggle","params":{"movements":5}}' http://robot/api/command |
Example Command JSON:
{
  "action": "set-servos",
  "params": {
    "leg1_hip": 90,
    "leg1_knee": 90,
    "leg1_ankle": 90,
    "leg2_hip": 90,
    "leg2_knee": 90,
    "leg2_ankle": 90,
    "leg3_hip": 90,
    "leg3_knee": 90,
    "leg3_ankle": 90,
    "leg4_hip": 90,
    "leg4_knee": 90,
    "leg4_ankle": 90,
    "hard": true
  }
}- Serial Port: Use
screen /dev/cu.usbmodemXXXX 115200or run./serial_monitor.sh(depending on your OS). - Logs: The
logging_.pysystem buffers logs inLOG_LINES.- Request them via GET
/api/logs. - The display routine can also show them on the SSD1306 if set to
Logsmode.
- Request them via GET
- Live Tests:
- With the robot connected via USB or Wi-Fi, call your test endpoints:
POST /api/commandwith{ "action": "leg-test" }or{"action": "light-test"}etc.
- Watch the physical effect or logs.
- With the robot connected via USB or Wi-Fi, call your test endpoints:
- Local Tests:
- The file
tests.pyincludes small functions to test specific hardware. - You can call them from REPL or from an endpoint (see
commands = { "leg-test": leg_test, ... }inapi.py).
- The file
- Simulator (Experimental):
- In
simulator/, you’ll find amain.py(PyQt + Matplotlib) that tries to simulate or visualize leg movements. This is purely optional for offline debugging.
- In
- Inverse Kinematics: Currently partially implemented. Future expansions can add real-time IK-based walking gaits.
- Motion Routines: Waypoint-based or inverse-kinematics–based walking to be integrated in
routines.py. - Web Interface: Expand
static/index.htmlfor a more interactive servo control or real-time graphs. - Configuration: Centralize all calibrations (like servo mid-angles, battery parameters) for easier adaptation to different hardware.
This is a DIY project for personal use. The user can adapt, modify, or use any part. If you share derivatives, please include references to the original project structure.
- Adafruit libraries used under their respective licenses.
- Thanks to the CircuitPython community for building the ecosystem.
Disclaimer: This code is a Work In Progress (WIP). Use at your own risk. You assume all responsibility for hardware damage, personal injury, or software issues arising from using this firmware.
Enjoy building your quadruped robot! For questions or contributions, open an Issue or PR on this repository.