-
Notifications
You must be signed in to change notification settings - Fork 10.3k
Deployment With GitHub Actions
The build page describes how Github Actions are used to build code for each of the eShopOnContainers microservices. These YAML files compile the code and create new container images which are pushed to a container registry. However, this does not deploy the container images to the Kubernetes cluster.
In this page, you will see how to utilize a deployment YAML file to deploy the newly pushed image to an existing cluster.
You will need the following:
- An Azure Container Registry (ACR)
- An Azure Kubernetes Service (AKS) cluster, with a secure connection to the ACR
- An NGINX Ingress Controller
- Have deployed eShopOnContainers
- Optionally configured allowing large headers
NOTE: You can deploy the AKS cluster and go through all the above steps by following the instructions in this page.
If you do not have any infrastructure configured, you can create everything needed for this walkthrough by running the following script from the root of the eShopOnContainers repo. The script can be run locally if you install the Azure CLI or you can open an instance of the Azure Cloud Shell and select bash.
export rg="<name of your resource group to create>"
export acr="<name of your container registry to create>"
export aks="<name of your AKS cluster to create>"
export spnName="<name of SPN to create>" # see below if you have an existing SPN

# create RG
az group create -n $rg --location southcentralus

# create ACR
az acr create -g $rg -n $acr --sku Basic --admin-enabled true
export acrId=$(az acr show -g $rg -n $acr --query "id" -o tsv)

# assign push/pull role to SPN
spnPassword=$(az ad sp create-for-rbac --name http://$spnName --scopes $acrId --role acrpush --query password --output tsv)
spnId=$(az ad sp list --display-name http://$spnName --query [0].appId  --output tsv) # Ref : https://github.com/Azure/azure-cli/issues/19179

# for an existing SPN
# export spnId="<id of an existing service principle>"
# az role assignment create --assignee $spnId --role acrpush --scope $acrId

# create AKS cluster
az aks create -g $rg -n $aks --node-count 1 --enable-addons monitoring,http_application_routing --enable-rbac --generate-ssh-keys --attach-acr $acr

# set the k8s context locally
az aks get-credentials -g $rg -n $aks

# deploy nginx controller
cd deploy/k8s/nginx-ingress
kubectl apply -f mandatory.yaml
kubectl apply -f local-cm.yaml
kubectl apply -f local-svc.yaml

# update nginx controller to allow large heaeders for login
cd -
cd deploy/k8s/helm
kubectl apply -f aks-httpaddon-cfg.yaml
kubectl delete pod $(kubectl get pod -l app=addon-http-application-routing-nginx-ingress -n kube-system -o jsonpath="{.items[0].metadata.name}") -n kube-system

cd -

# deploy all from public repos
cd deploy/k8s/helm
kubectl create ns eshop
./deploy-all.sh --dns aks --aks-name $aks --aks-rg $rg -t linux-latest

# fix versions for apigwms (envoy)
export domain="$(az aks show -n $aks -g $rg --query addonProfiles.httpApplicationRouting.config.HTTPApplicationRoutingZoneName -o tsv)"
export dns="$aks.$domain"

helm uninstall eshop-apigwms -n eshop
helm install "eshop-apigwms" --namespace eshop --set "ingress.hosts={$dns}" --values app.yaml --values inf.yaml --values ingress_values.yaml --set app.name=eshop --set inf.k8s.dns=$dns --set image.pullPolicy=Always apigwms

helm uninstall eshop-apigwws -n eshop
helm install "eshop-apigwws" --namespace eshop --set "ingress.hosts={$dns}" --values app.yaml --values inf.yaml --values ingress_values.yaml --set app.name=eshop --set inf.k8s.dns=$dns --set image.pullPolicy=Always apigwws
Ensure that everything looks good when you check the deployment status
Along with the build YAML file that builds and pushes the container image to the registry, there are also -deploy.yml files for each microservice.
Take a look at the catalog-api-deploy.yml file in the .github/workflows folder:
name: Deploy catalog-api

on:
  workflow_dispatch:
  repository_dispatch:
    types:
    - deploy
  workflow_run:
    workflows: ["catalog-api"]
    branches: [dev]
    types: [completed]

env:
  CHART: catalog-api
  NAMESPACE: eshop
  CHART_ROOT: deploy/k8s/helm

jobs:
  deploy-to-k8s:
    #if: ${{ github.event_name == 'workflow_dispatch' || github.event_name == 'repository_dispatch' || github.event.workflow_run.conclusion == 'success' }}
    if: false
    runs-on: ubuntu-latest

    steps:
      - uses: actions/checkout@v2

      - uses: azure/login@v1
        with:
          creds: ${{ secrets.AZURE_CREDENTIALS }}

      - uses: azure/aks-set-context@v1
        name: Set AKS context
        with:
          creds: '${{ secrets.AZURE_CREDENTIALS }}'
          cluster-name: ${{ secrets.CLUSTER_NAME }}
          resource-group: ${{ secrets.RESOURCE_GROUP }}

      - name: Set branch name as env variable
        run: |
          currentbranch=$(echo ${GITHUB_REF##*/})
          echo "running on $currentbranch"
          echo "BRANCH=$currentbranch" >> $GITHUB_ENV
        shell: bash

      - name: Deploy CHART
        run: |
          ./deploy-CHART.sh -c ${{ env.CHART }} --dns aks --aks-name ${{ secrets.CLUSTER_NAME }} --aks-rg ${{ secrets.RESOURCE_GROUP }} -r ${{ secrets.REGISTRY_HOST }} -t $TAG --NAMESPACE ${{ env.NAMESPACE }} --acr-connected
        env:
          TAG: ${{ env.BRANCH }}
        working-directory: ${{ env.CHART_ROOT }}
Note the following:
- The name of the workflow is
Deploy catalog-api. - This workflow has three triggers:.
-
workflow_dispatchis for manually triggering a deployment. -
repository_dispatchis for triggering this workflow via the REST API. -
workflow_runtriggers this workflow when runs of thecatalog-apiworkflow run ondevand arecompleted.
-
- Some variables are defined inline under the
envsection. - There is a single job called
deploy-to-k8s. - The job is set to never run via the
if: falsecondition. This line should be commented out and the otherifcondition should be uncommented (remove the#) so that it only executes if the trigger was manual or via the REST API or if it was a workflow run trigger, if the workflow run completed with asuccessstatus. - The job checks out the repo.
- The job then logs into Azure using secret
AZURE_CREDENTIALS. - The job then sets the AKS context.
- The job works out what branch it is on.
- The job invokes the
deploy-chart.shscript to deploy the chart to the AKS cluster, using the branch as the tag.
In this section, you will make a change to the catalog-api service in the dev branch. The push to dev will trigger the workflow to compile and push a new container image to the repo. Once this completes, the deploy workflow will deploy the new container image via Helm.
The workflows require a number of secrets in order to work. Select the Settings tab on your repo and then select Secrets. Define the following repository secrets:
| Secret Name | Description | Example |
|---|---|---|
AZURE_CREDENTIALS |
JSON with credentials for a Service Principle with access to the container registry and AKS cluster. Further instructions can be foundhere
|
{ 'clientId': "<app ID of SPN>", "clientSecret": "<SPN Key>", "tenantId": "<Azure tenant GUID>", "subscriptionId": "<Azure subscription ID>" } |
CLUSTER_NAME |
Name of the AKS cluster | myeshop |
PASSWORD |
Admin password for ACR | Retrieve this from the container registry blade in the Azure portal |
REGISTRY_ENDPOINT |
Endpoint for container registry | myeshopacr.azurecr.io/eshop |
REGISTRY_HOST |
FQDN of registry | myeshopacr.azurecr.io |
RESOURCE_GROUP |
Name of resource group containing AKS cluster | myeshop-rg |
USERNAME |
Admin username for ACR (typically name of ACR) | myeshopacr |
Note: To fetch the
AZURE_CREDENTIALS, follow .
When you are done, the secrets should look something like this:
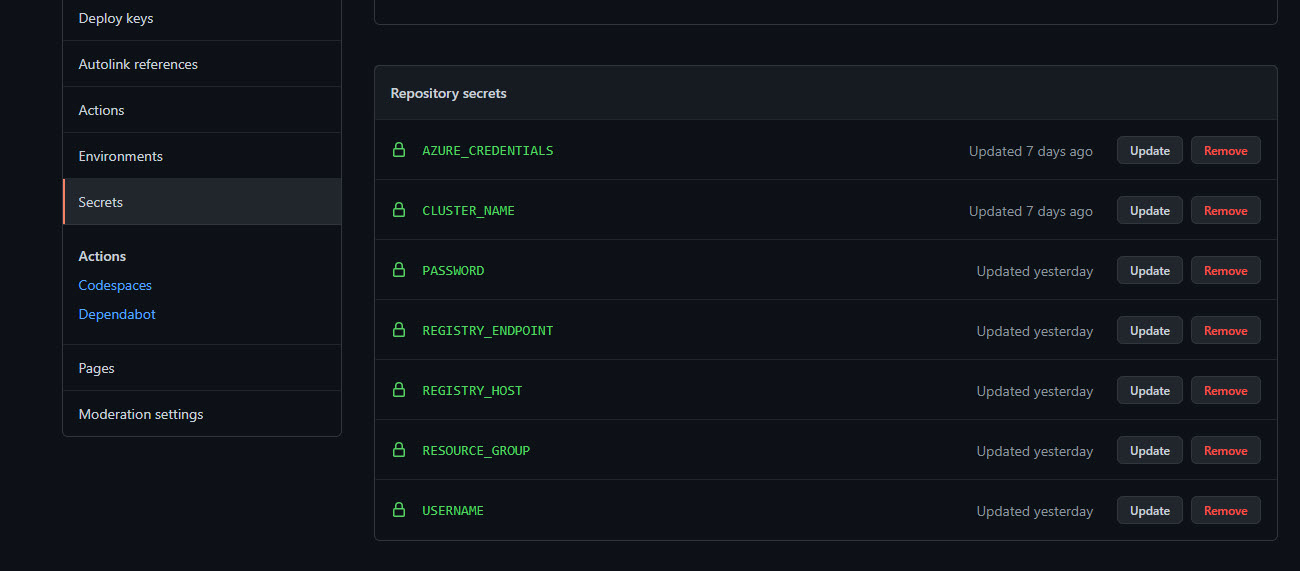 Figure 1: Repository secrets.
If you select the Actions tab on your repository, you may already have some Actions. If you forked the main repo, you will be prompted to enable the Actions - you can do so now.
Ensure that you see catalog-api and Deploy catalog-api in the list of workflows.
The deploy jobs will fail if the infrastructure is not created. To prevent this, the if condition in the deploy jobs is hard-coded to if: false. To enable the jobs, simply comment out this if condition and uncomment the other if condition. The first couple lines of the job code should look as follows when you are done:
jobs:
  deploy-to-k8s:
    if: ${{ github.event_name == 'workflow_dispatch' || github.event_name == 'repository_dispatch' || github.event.workflow_run.conclusion == 'success' }}
    #if: false
runs-on: ubuntu-latestYou can test that the workflow is working correctly by selecting the catalog-api workflow. Next, select Run workflow to manually trigger the workflow. Select the dev branch.
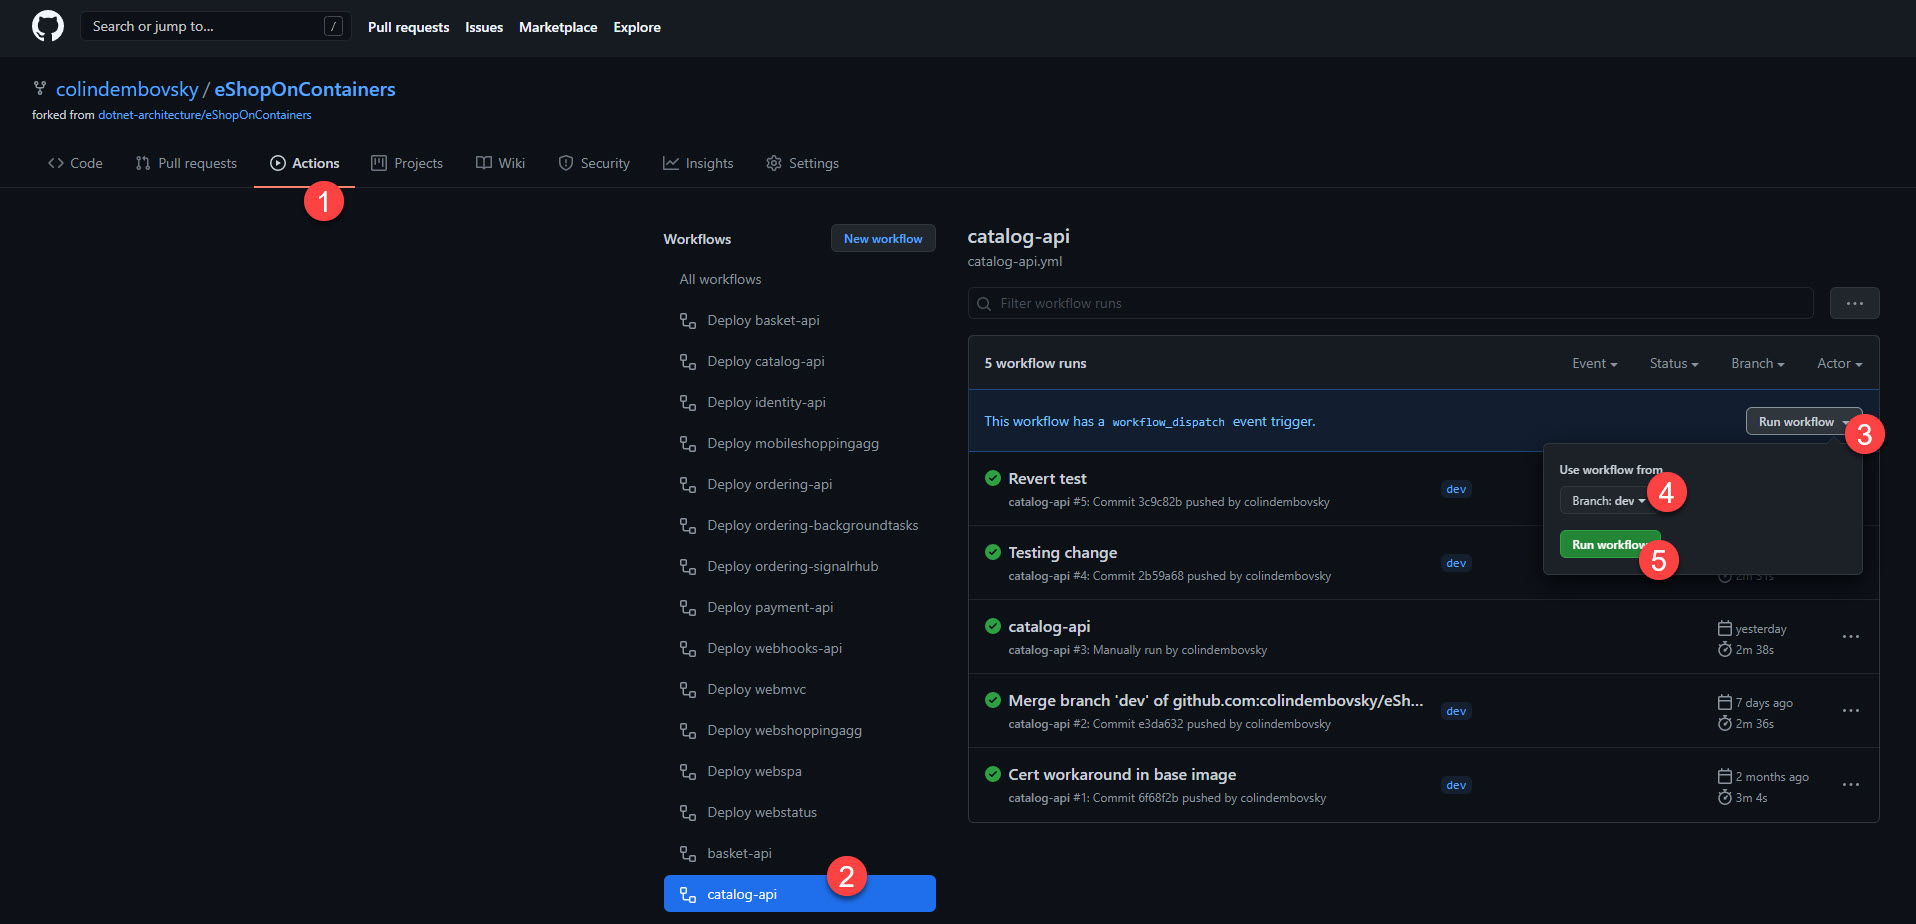 Figure 2: Triggering the catalog-api workflow manually.
Make sure that the catalog-api workflow completes successfully, which should in turn trigger the Deploy catalog-api workflow. Ensure that this workflow completes successfully too.
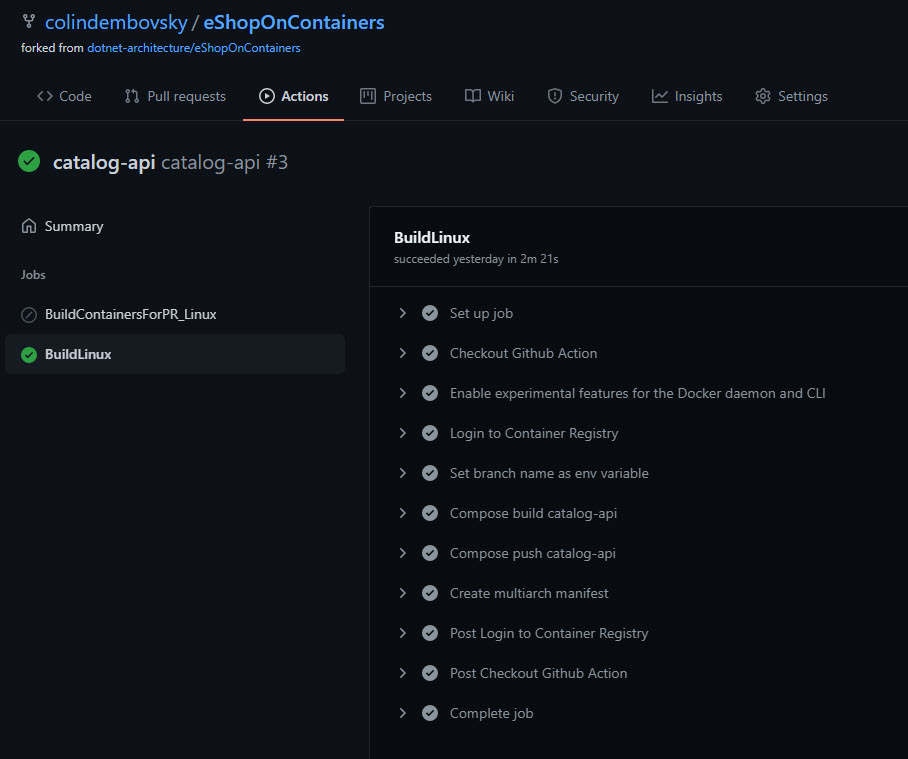 Figure 3: Catalog-api successful run.
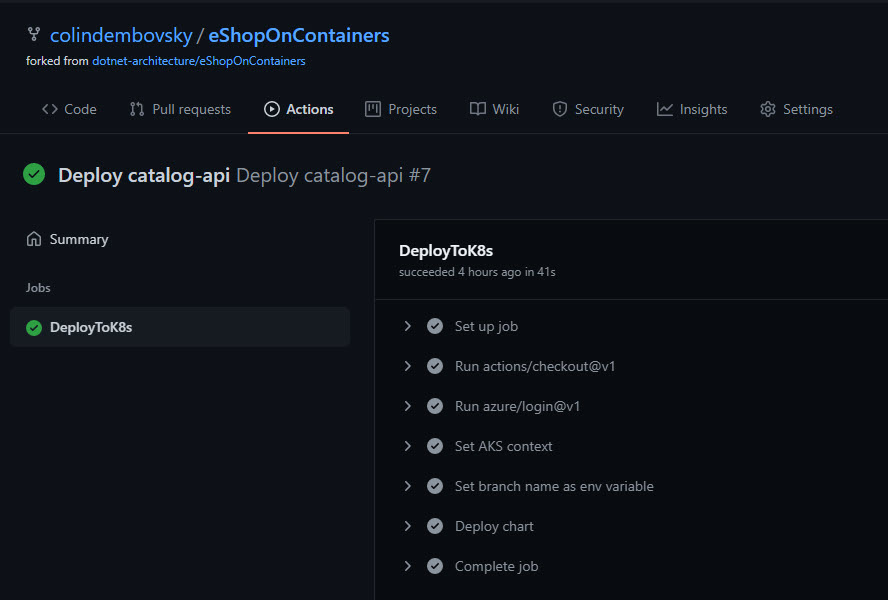 Figure 4: Deploy catalog-api successful run.
Ensure that you can navigate to the store front using the ingress URLs. Take note of the names of the first few items:
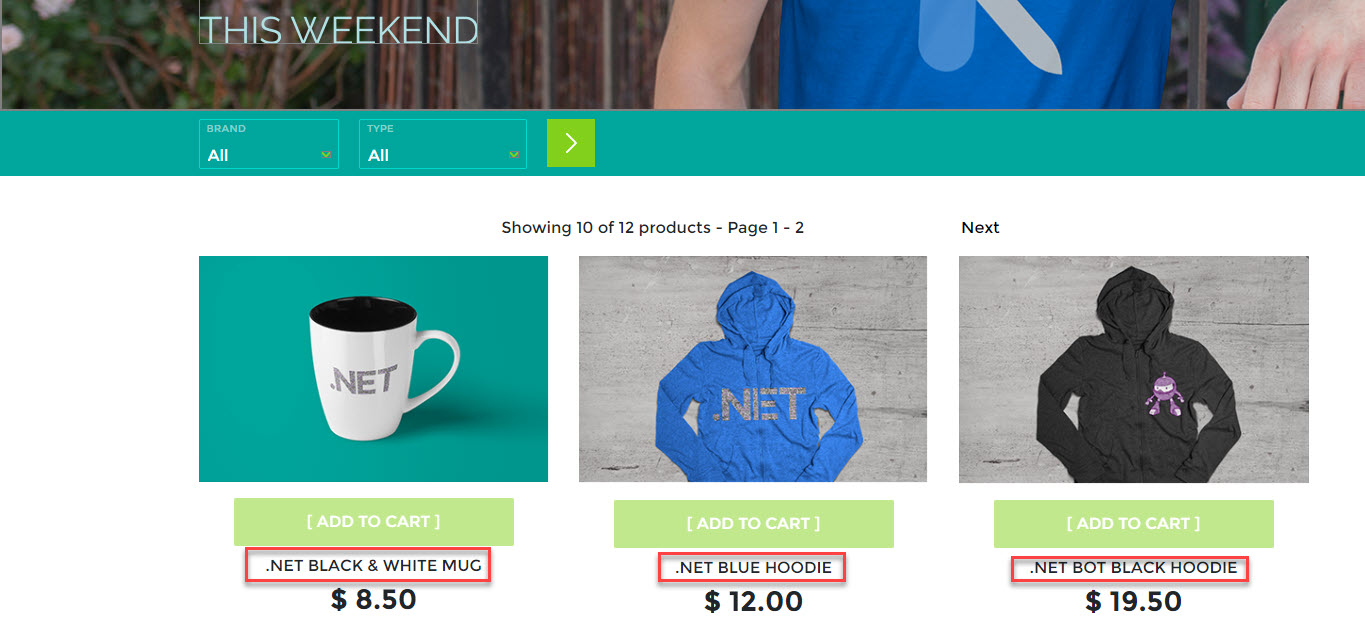 Figure 5: Store front displaying items.
Now that you have verified that the build and deploy workflows are working, you can simply push code changes to dev and the workflows will deploy those changes.
Navigate to src/Services/Catalog/Catalog.API/Controllers/CatalogController.cs on the dev branch. Scroll down to around line 63. Remove the comments /* and */ above and below the foreach loop:
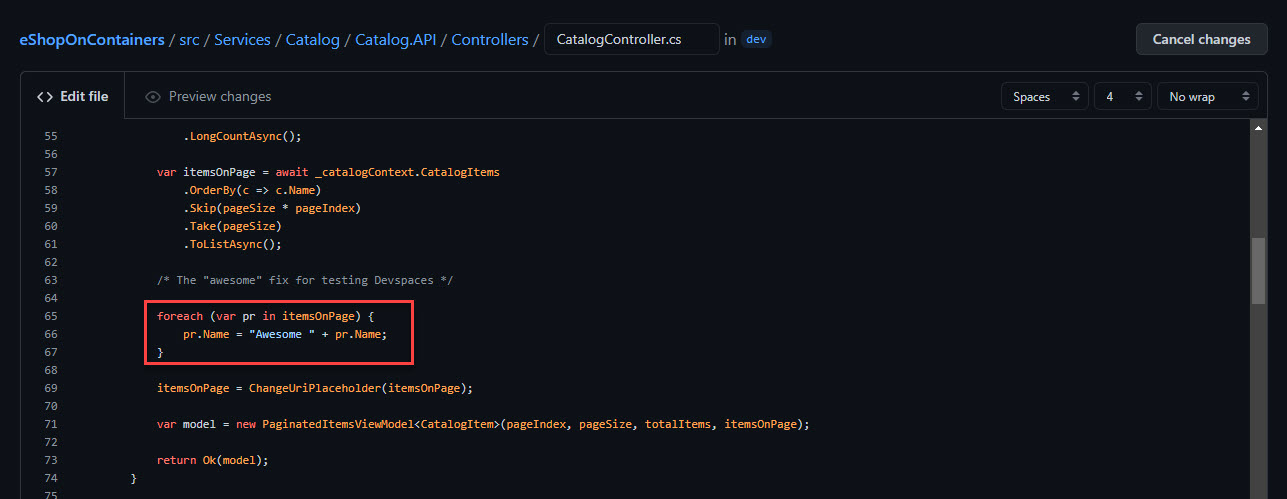 Figure 6: Uncomment the for loop.
Scroll to the bottom of the page and commit the change directly to the dev branch, entering a commit message:
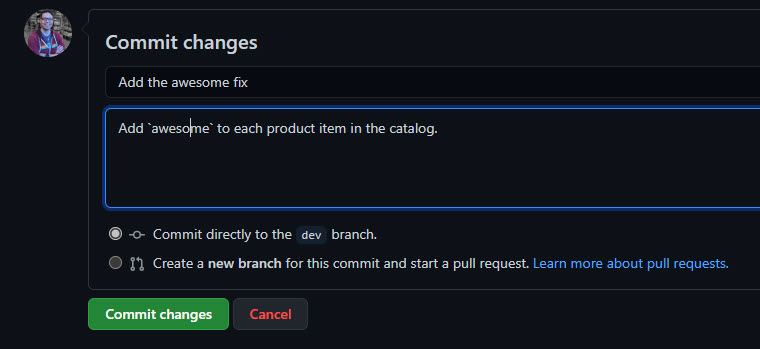 Figure 7: Commit the code change.
Select the Actions tab and ensure that a new workflow has triggered.
 Figure 8: Workflow triggered by pushing to
 dev.
Once that workflow completes, you should see the deploy workflow trigger immediately:
 Figure 9: Deploy workflow triggered after building completes.
After about a minute, navigate back to the store front and verify that the word Awesome appears in front of each catalog item:
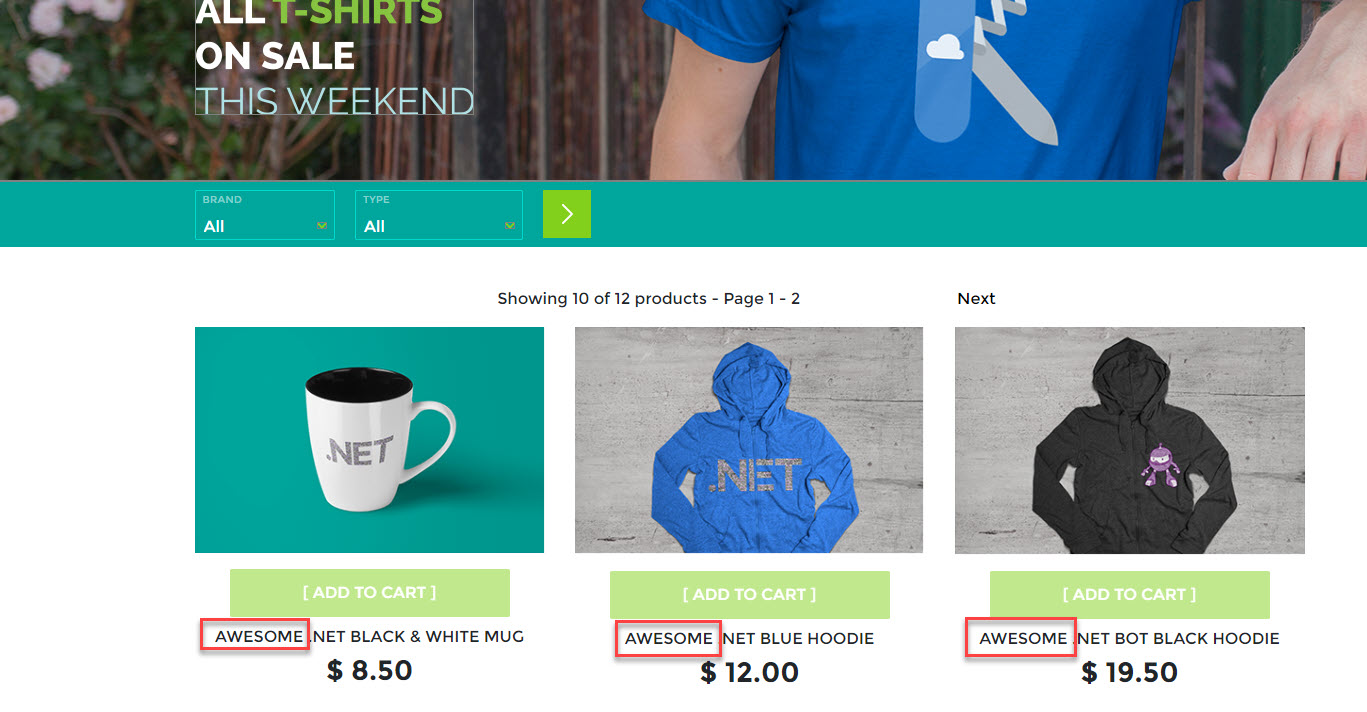 Figure 10: New code is running successfully.
- System requirements
- Development setup
- Databases & containers
- Architecture
- Application
- Code
- Logging and Monitoring
- Tests