This project visualizes real-time WiFi data in a 3D environment using Babylon.js and a WebSocket connection to stream data from an Android device gyroscope information. The data includes access points detected by airodump-ng, their signal strength, and the current orientation of the Android device, which is used to position the access points in a 3D space.

- Real-Time Data Visualization: Access points are visualized in a 3D environment in real-time as they are detected.
- Gyroscope Integration: The position of access points is adjusted based on the current orientation of the device.
- Dynamic Tooltip: Hover over access points to see detailed information, including ESSID, BSSID, channel, signal strength, privacy, cipher, and authentication method.
- Dynamic Coloring: Access points are colored based on signal strength:
- Blue: 0 to -45 dBm
- Yellow: -45 to -70 dBm
- Red: Below -70 dBm
- Sidebar Toggle: Easily toggle the visibility of a sidebar listing all detected access points.
- Associated Stations: You can see each associated station to the selected access point.
- Not Associated Stations: You can see roaming devices around not associated to any access point and their probes (searched Ap's)!
-
Hardware:
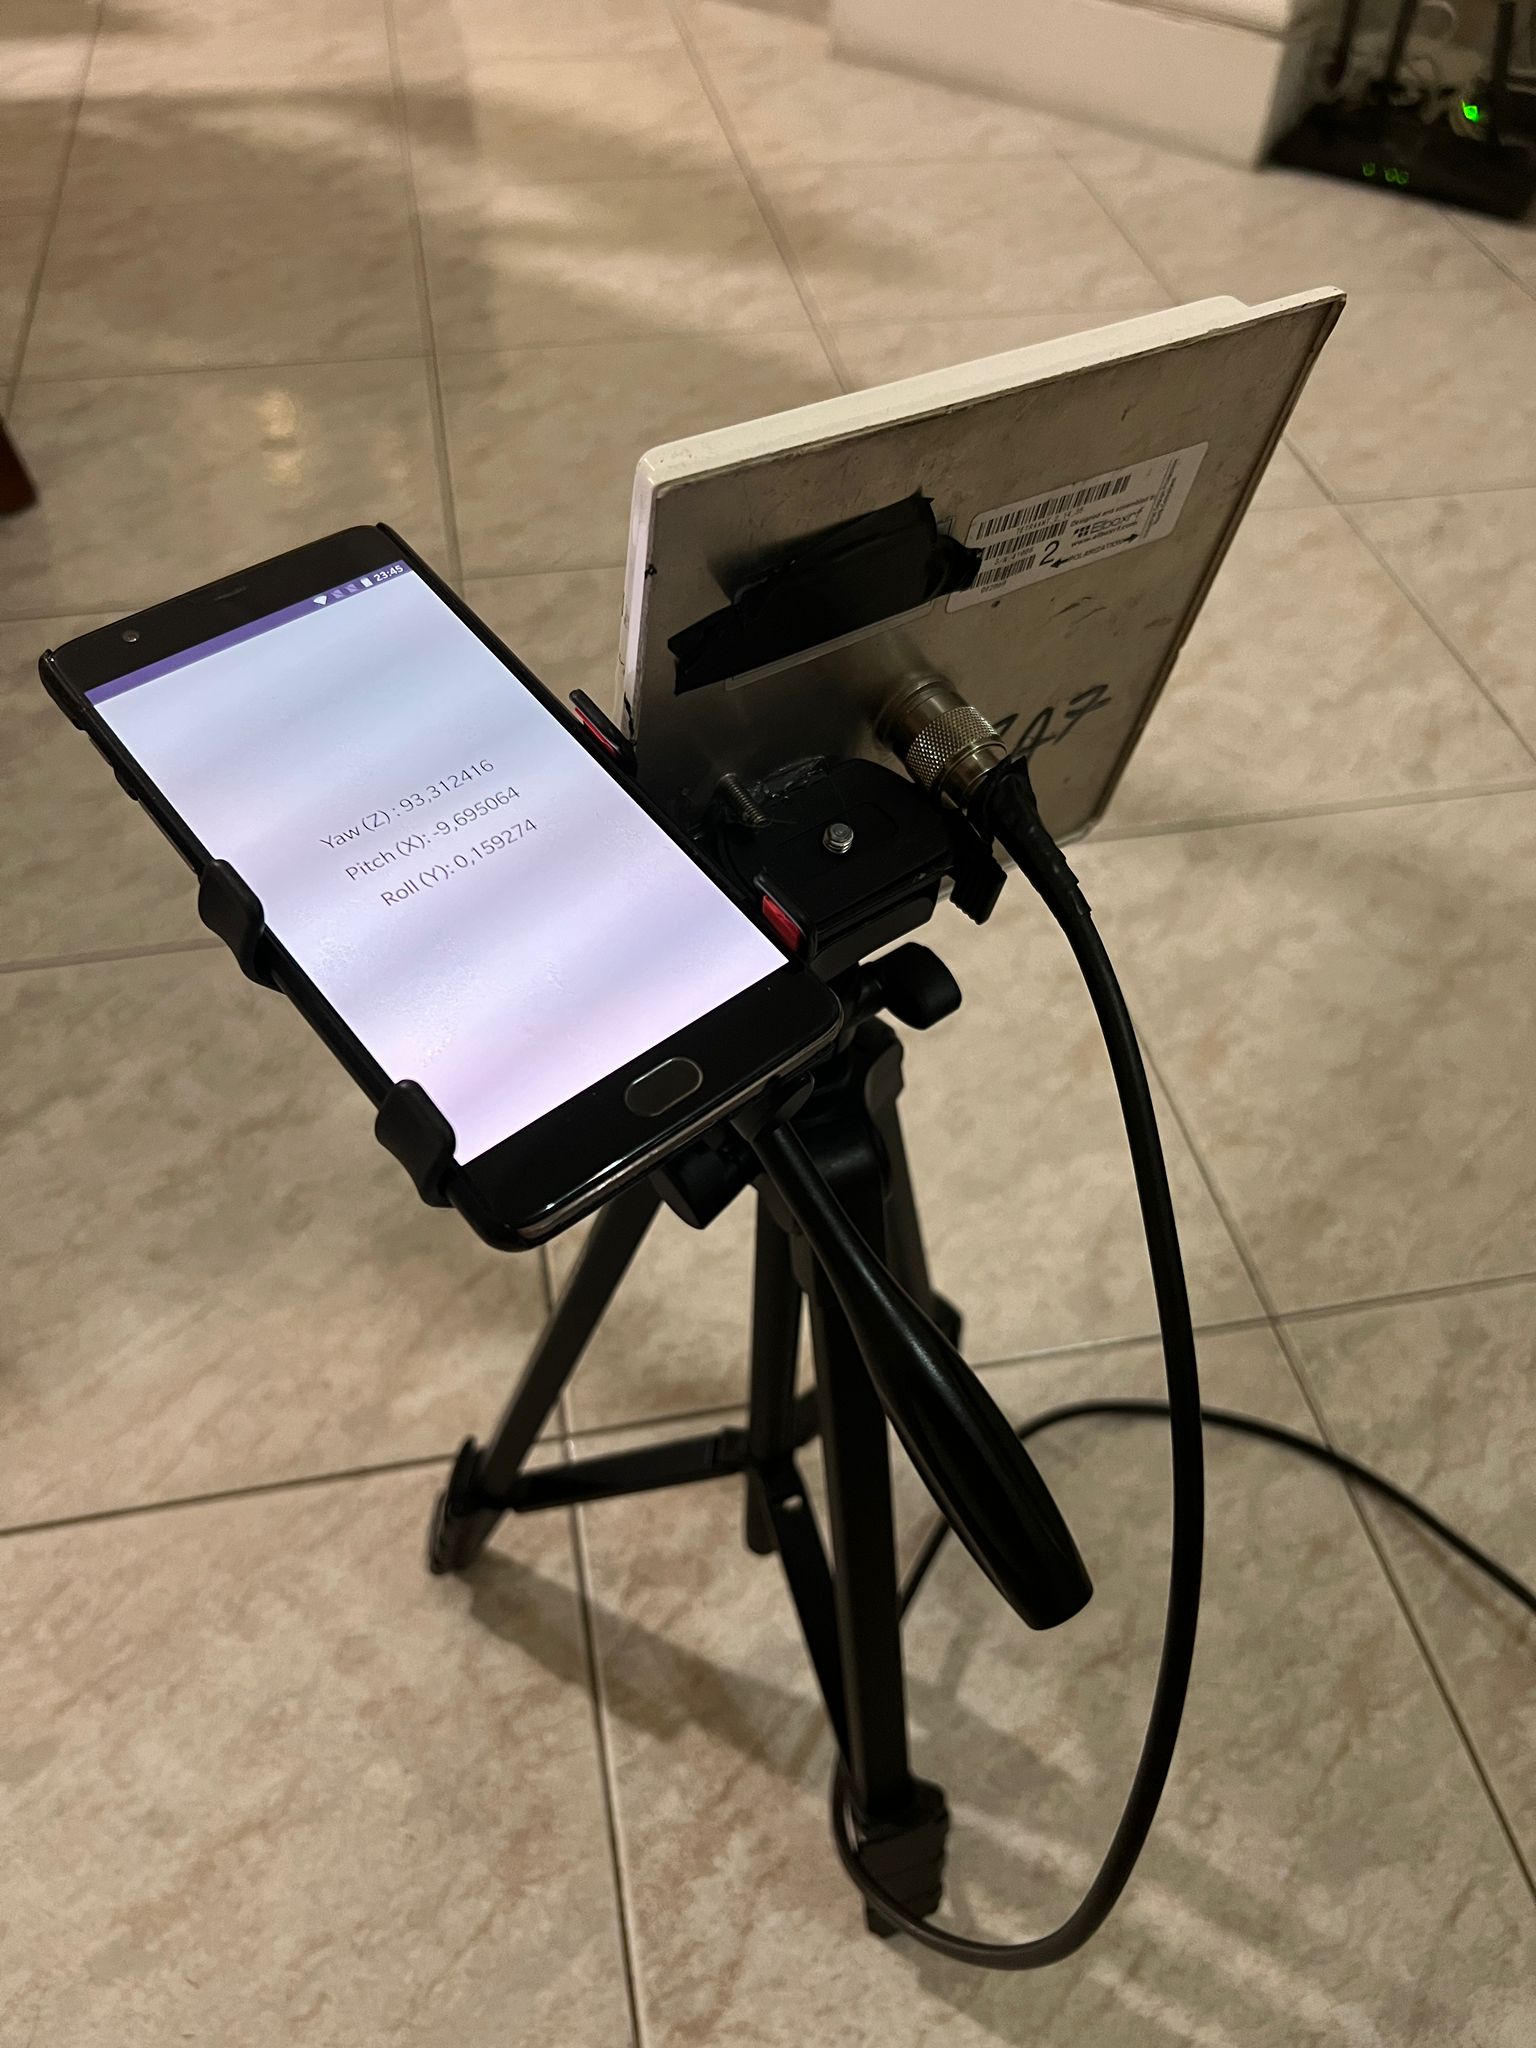
- A directional WiFi antenna for accurate signal detection.
- A WiFi card capable of monitor mode eg. Alfa AWUS036NHA
- An Android device with a gyroscope sensor, mounted on the antenna to track its orientation.
- A tripod to stabilize both the antenna and the Android device during the scan.
-
Software:
- Linux environment (I developed it on Debian)
- Java 21+ the application is a SpringBoot app relying on Java 21
aircrack-ngsuite installed on your system.
To better understand the physical setup required for this project, refer to the following images:

-
Clone the Repository:
git clone https://github.com/emp3r0r7/WifiBall.git
-
Install Dependencies:
sudo apt install aircrack-ng
-
Build and Run the Application:
Build and run the application (sudo is required) to handle WebSocket connections and manage WiFi data:
cd wifiball ./mvnw clean package cp /target/WifiBall-0.0.1-Alpha.jar /your/desired/location sudo java -jar /your/desired/location/WifiBall-0.0.1-Alpha.jar -
Connect your Android Device
- Launch the Android App
- Connect your Android Device in the same network of your computer
- Input your computer lan ip and WifiBall default port 8011
-
Configure WifiBall
- Set your network interface card capable of monitor mode
cd ~
sudo nano /root/.wifiball/config.properties
Set your network card accordingly at
network.card, always put the card managed state eg. wlan0 instead of wlan0mon -
Access the Application:
Open your web browser and navigate to
http://localhost:8011/realtime-datato see the real-time 3D visualization.
- Be smooth!:
- While turning your antenna and gyroscope around , be gentle , steady and slow , the application currently has a polling rate of 1 second, its useless to turn the antenna rapidly.
- In order to have precise and accurate readings , you must scan the environment a lot, because higher signals will be shown by replacing weaker ones. You got the idea.
- Control the Camera:
- Use your mouse to rotate, zoom, and pan around the scene.
- View Access Point Details:
- Hover over an access point to see detailed information about it in a tooltip.
- Toggle Sidebar:
- Click the "Show AP List" button to toggle the visibility of the sidebar listing all detected access points and their associated stations.
Im not a front-end developer so feel free to contribute if you want to improve the 3d html web page! (at the moment its a bit messy but i'll make it better)