Firebase Cloud Messaging
This documentation refers to the legacy FCM API which was deprecated on June 20, 2023 and will be removed by Google in June 2024. For newer FCM HTTP API v1 see this document.
This document applies to Firebase Cloud Messaging version 6. For FCM version 5.x see this documentation: Firebase Cloud Messaging 5.x
Firebase Cloud Messaging is a cross-platform cloud messaging service which allows Infobip to send Push Messages from the Infobip server to your users’ Android-powered devices. You will need to create and configure a project in the Firebase Console to enable Push Notifications for your Android applications.
- Go to Firebase Console and start creating a new project.

- Choose the name of your new project, then press "Continue".

- Choose your Google Analytics preferences and then press "Create Project". Analytics are not used in MM SDK.

- After the new project is created, add Firebase to your Android app by selecting the Android icon on the overview screen.
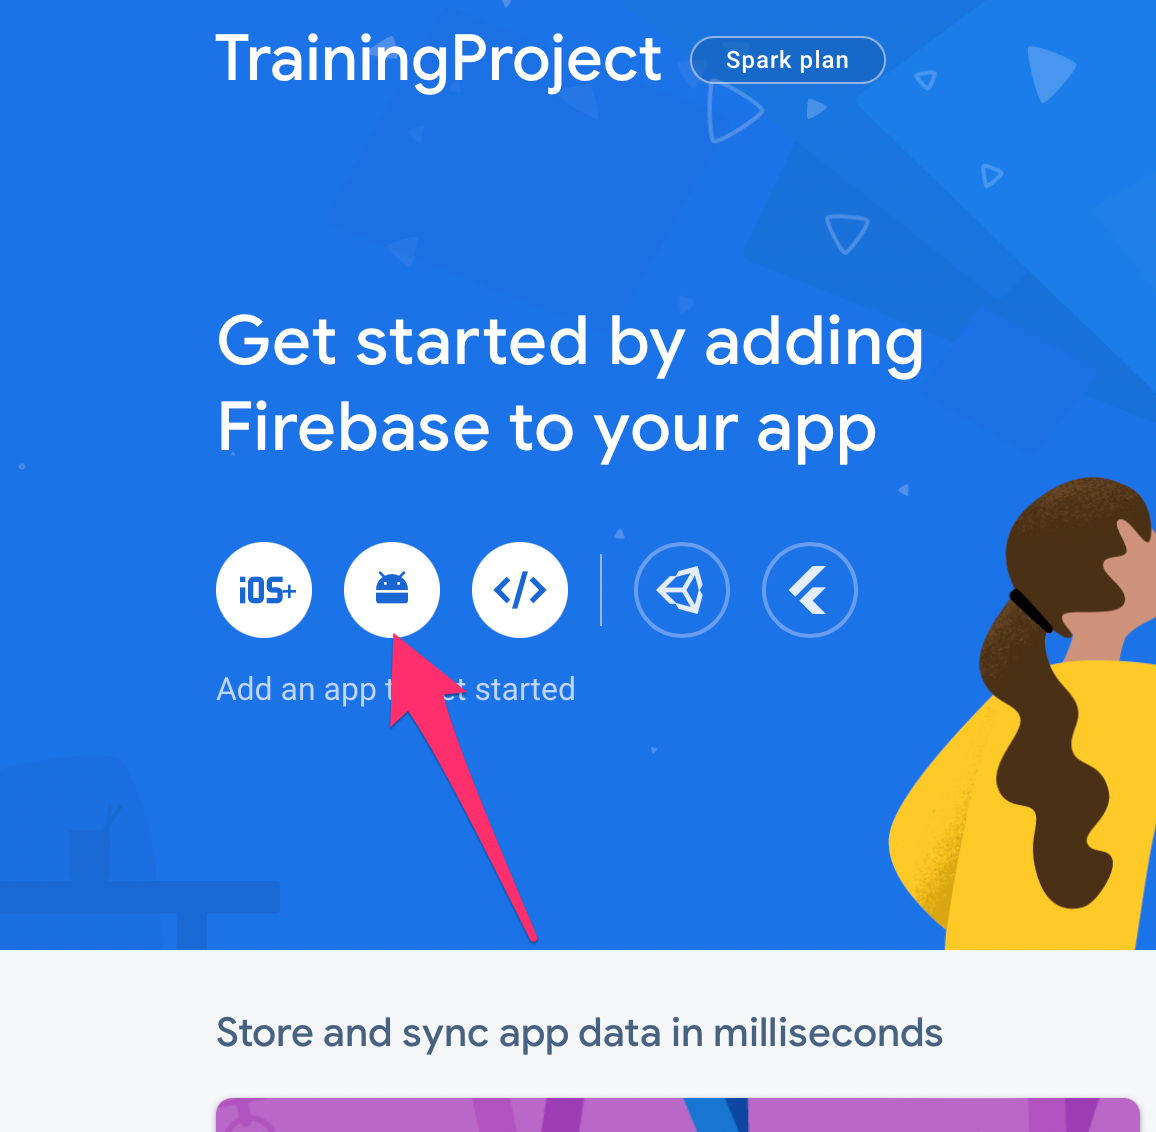
- Enter the package name of your Android application and press "Register app".

- Now your Android app is added to Firebase Console, you can download the
google-services.jsonfile here.

- Here you can select "Next". *This code is already integrated in the SDK, no need for implementation.

- At this step you can select "Continue to Console", and you should be redirected to the main Firebase Console screen.

- On the main Console screen, click on the Android project you just created.

- Once clicked, you will be presented with the "Settings" icon. Click on the icon.

- When project settings are opened, select "Cloud Messaging" from the tab menu.

- To enable the Cloud Messaging API, select three-dot menu.

- When clicked, you will be prompted to: "Manage API in Google Cloud Console". Select that option.

- When Google Cloud Console is opened, you should select "Enable" for your project. Once the Messaging API is enabled, you can go back to the Settings tab of your Firebase project. Refresh the screen to retrieve the keys.

- Next, you to need go to the Cloud Messaging settings of your Firebase project and find the Server API key.
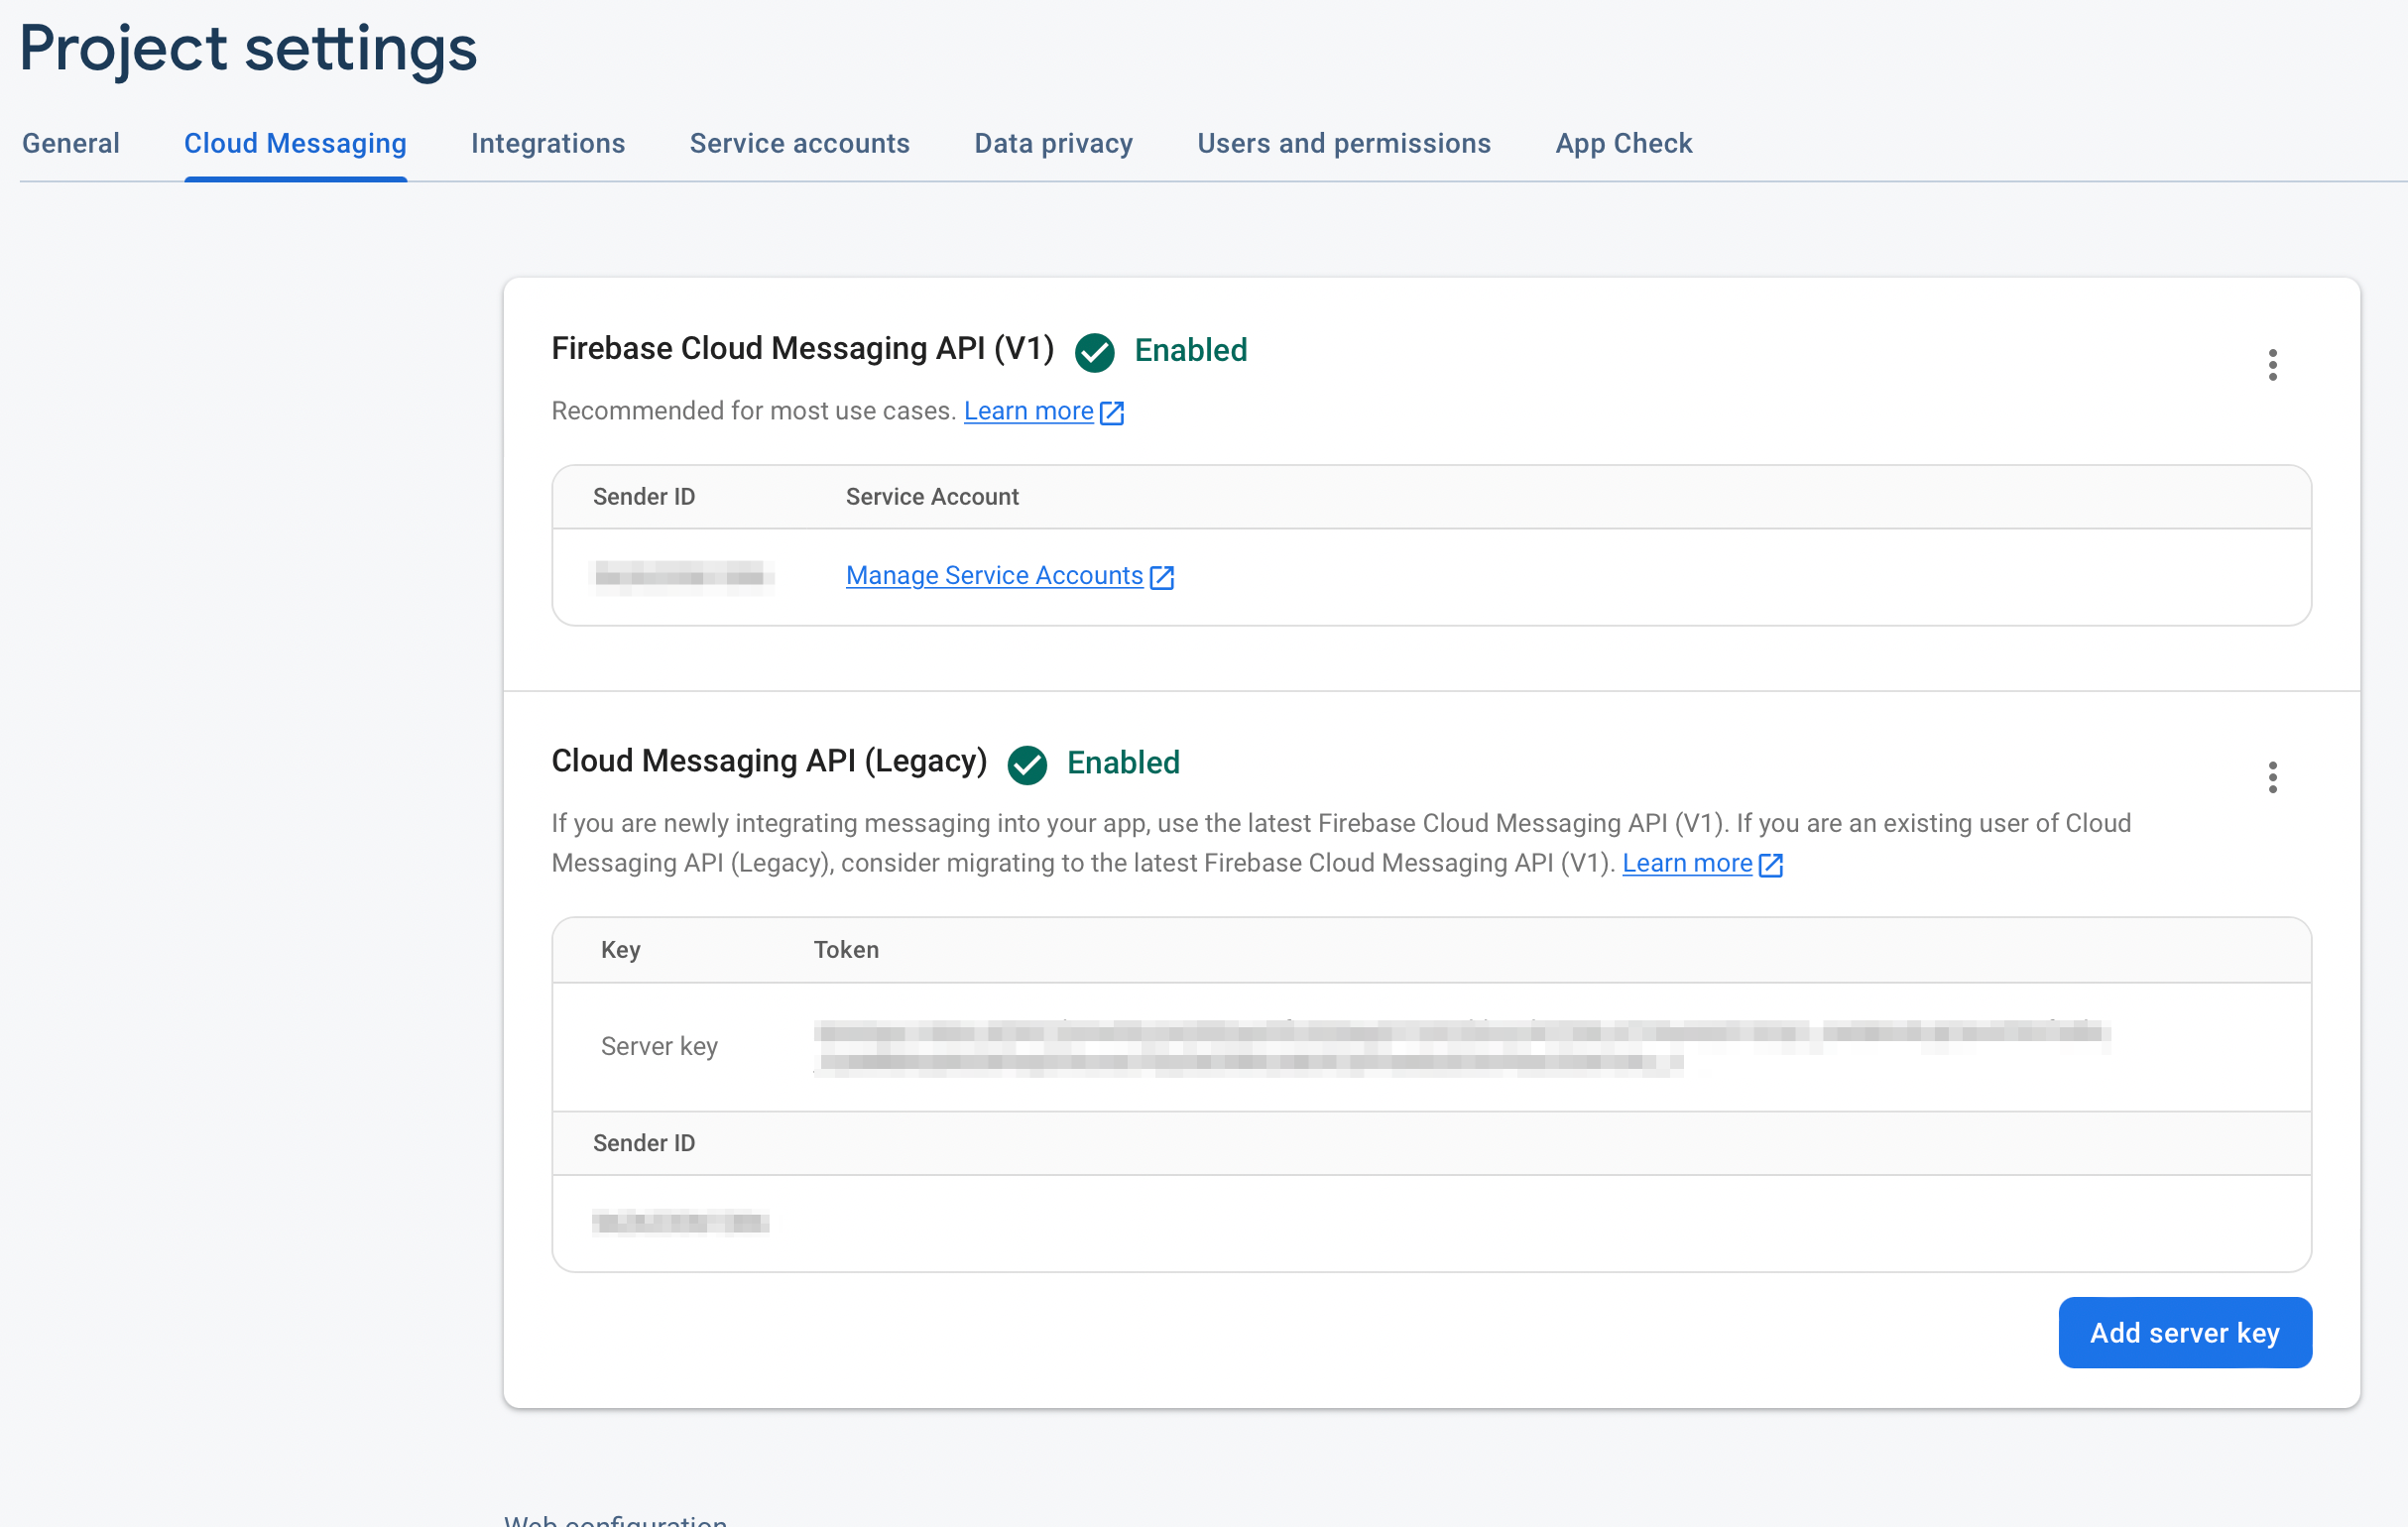
If you already have your project set up in the Firebase Console, then you can go directly to you project's Cloud Messaging settings and find the Server API key there.

To download the google-services.json file, go to your project's General settings.
