- Open a terminal
- Your terminal will always opens to your home folder
- if you type
lsyou will "list" the conents of that folder
- Paste this command into the terminal
git clone https://github.com/penguinrunner/Python-Raspberry-Pi-Scripts.git
- Open the your home folder with the file browser and you will see a folder named
Python-Raspberry-Pi-Scripts - Now you have the project files!
- In a terminal copy and run this command
pip3 install RPi.GPIOpip3 install flask- This just uses Python3's package manager to install some things we need.
- All of the scripts are written for Python3 (not Python2 or Python2.7)
- In the terminal type
cd Python-Raspberry-Pi-Scriptsand you will enter that folder via the terminal- Remember you can type
lsto see all the files in the terminal
- Remember you can type
- From here type
python3 hello_world.pyto run our first script - If you see the output
Hello world from the world of python!then it worked - you can now run the rest of the scripts by typing
python3and then the name of the script!
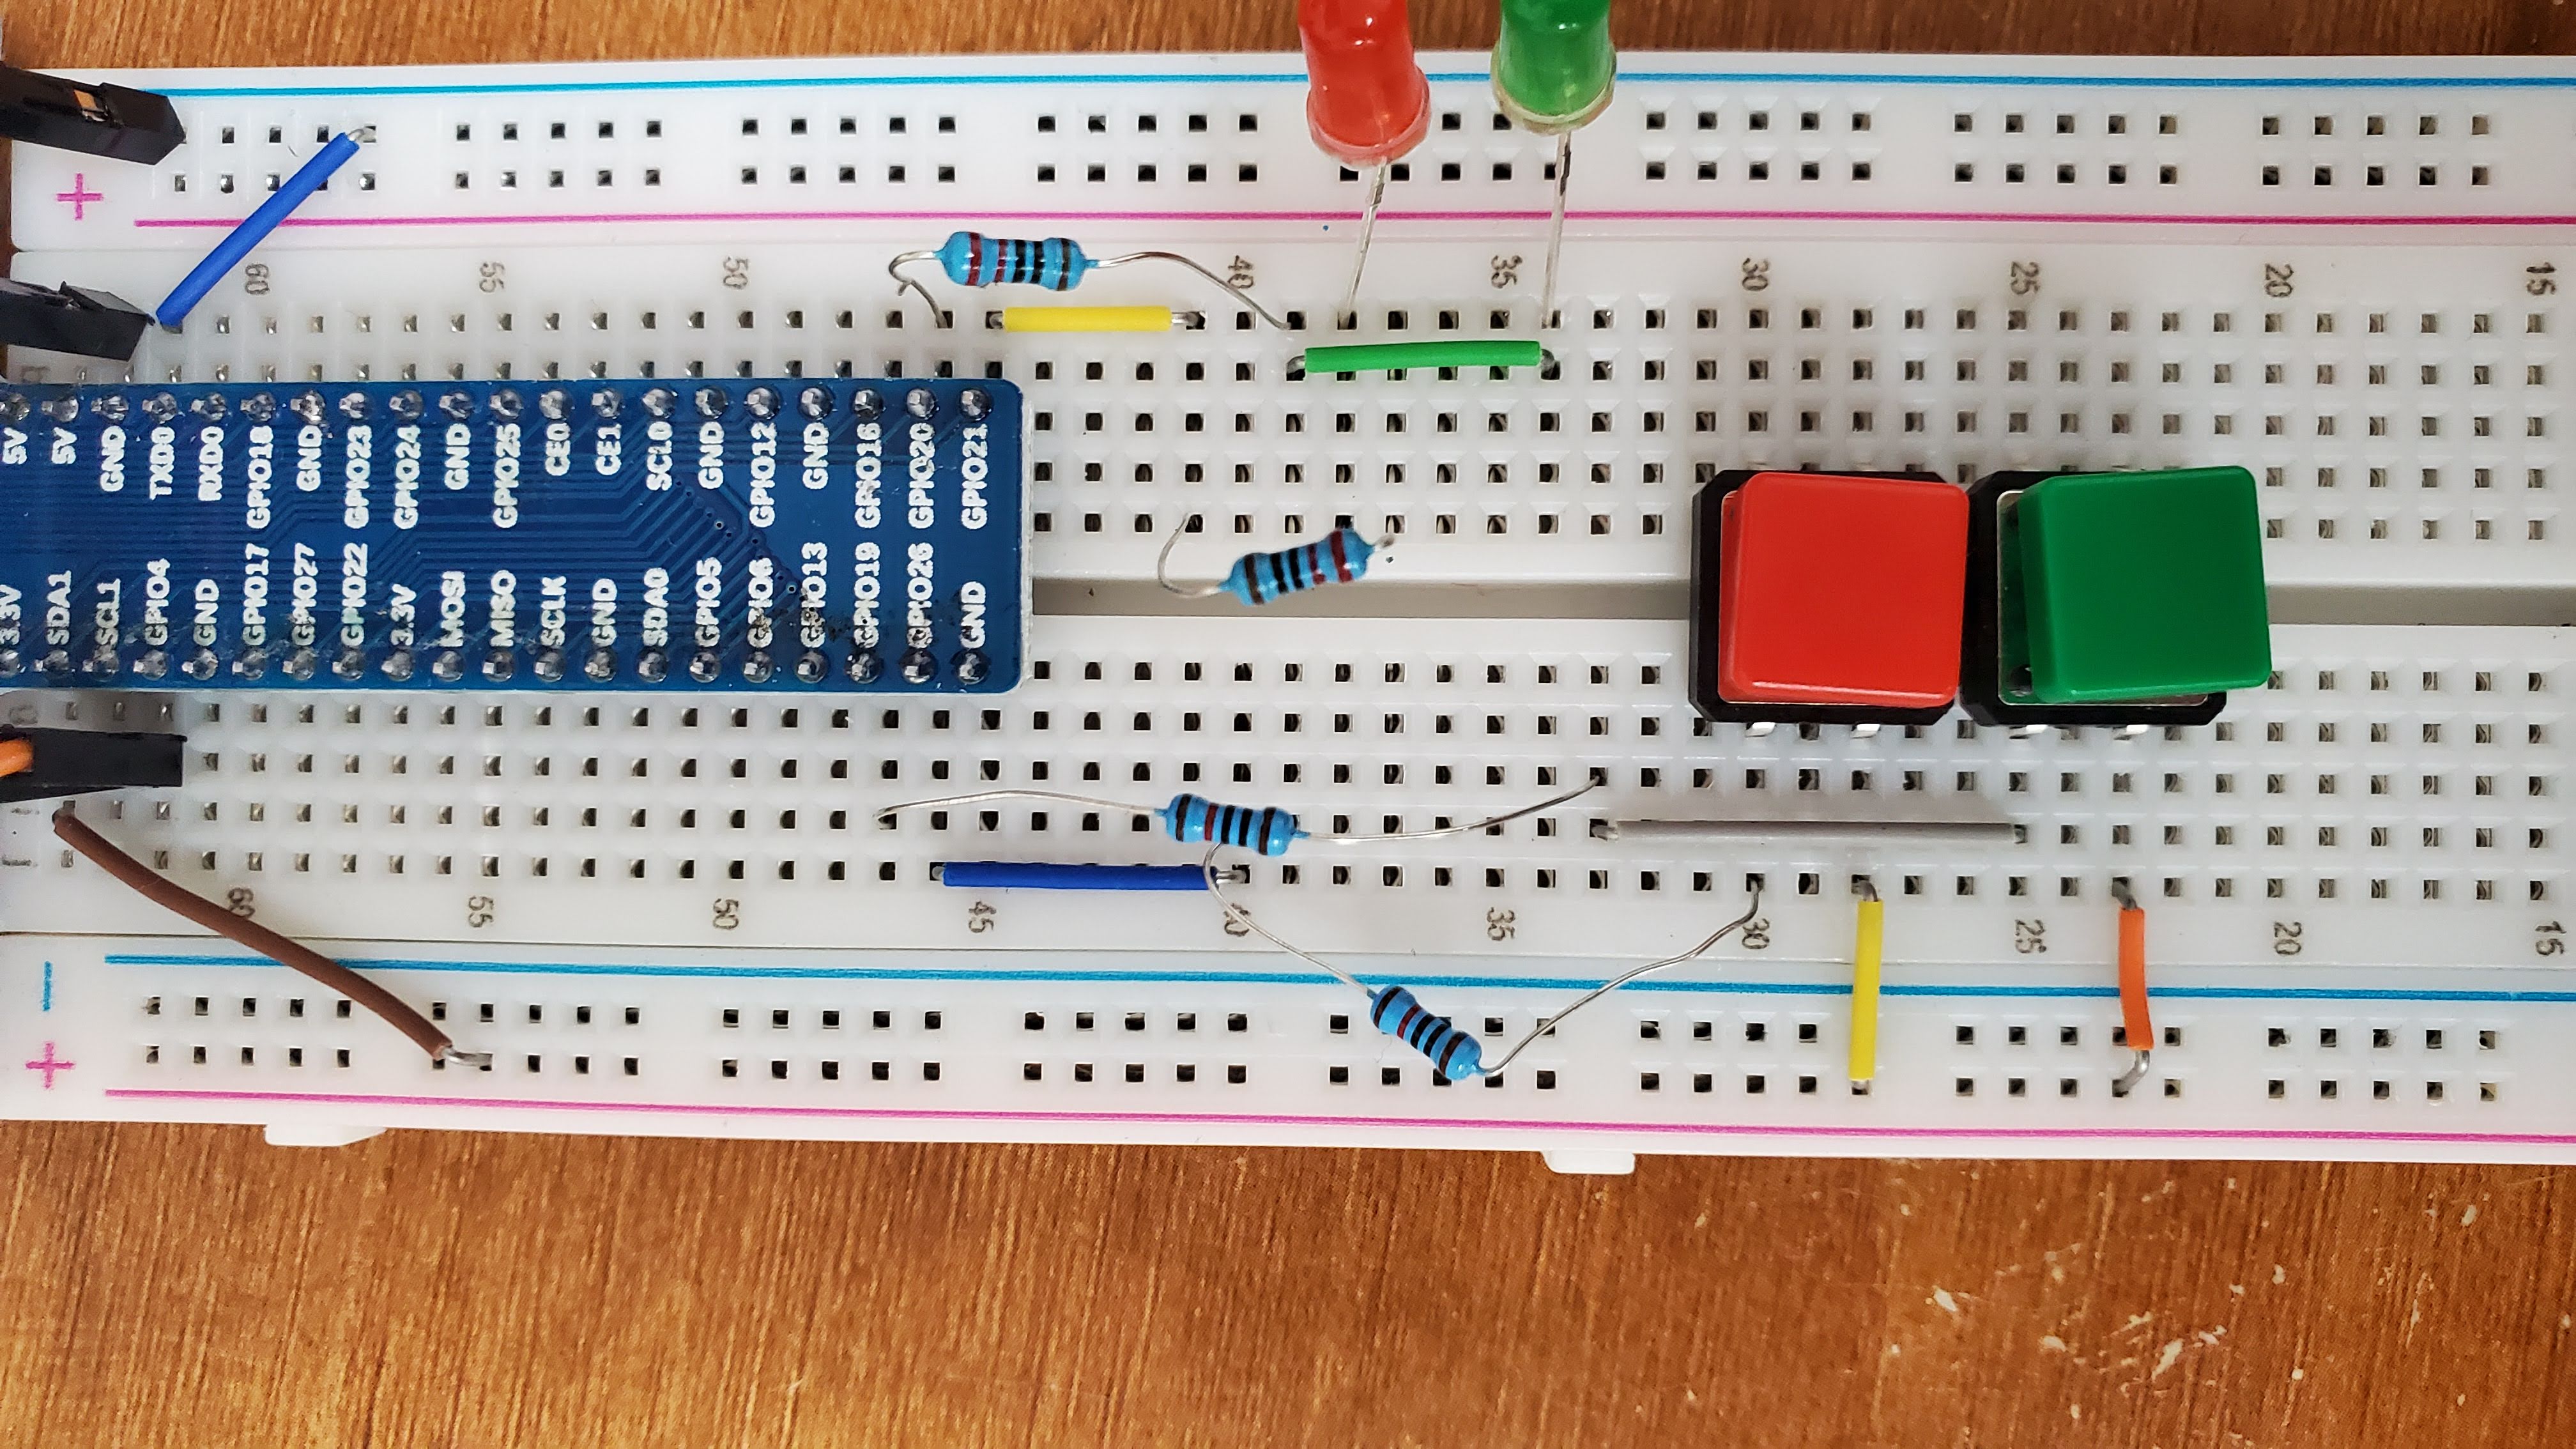
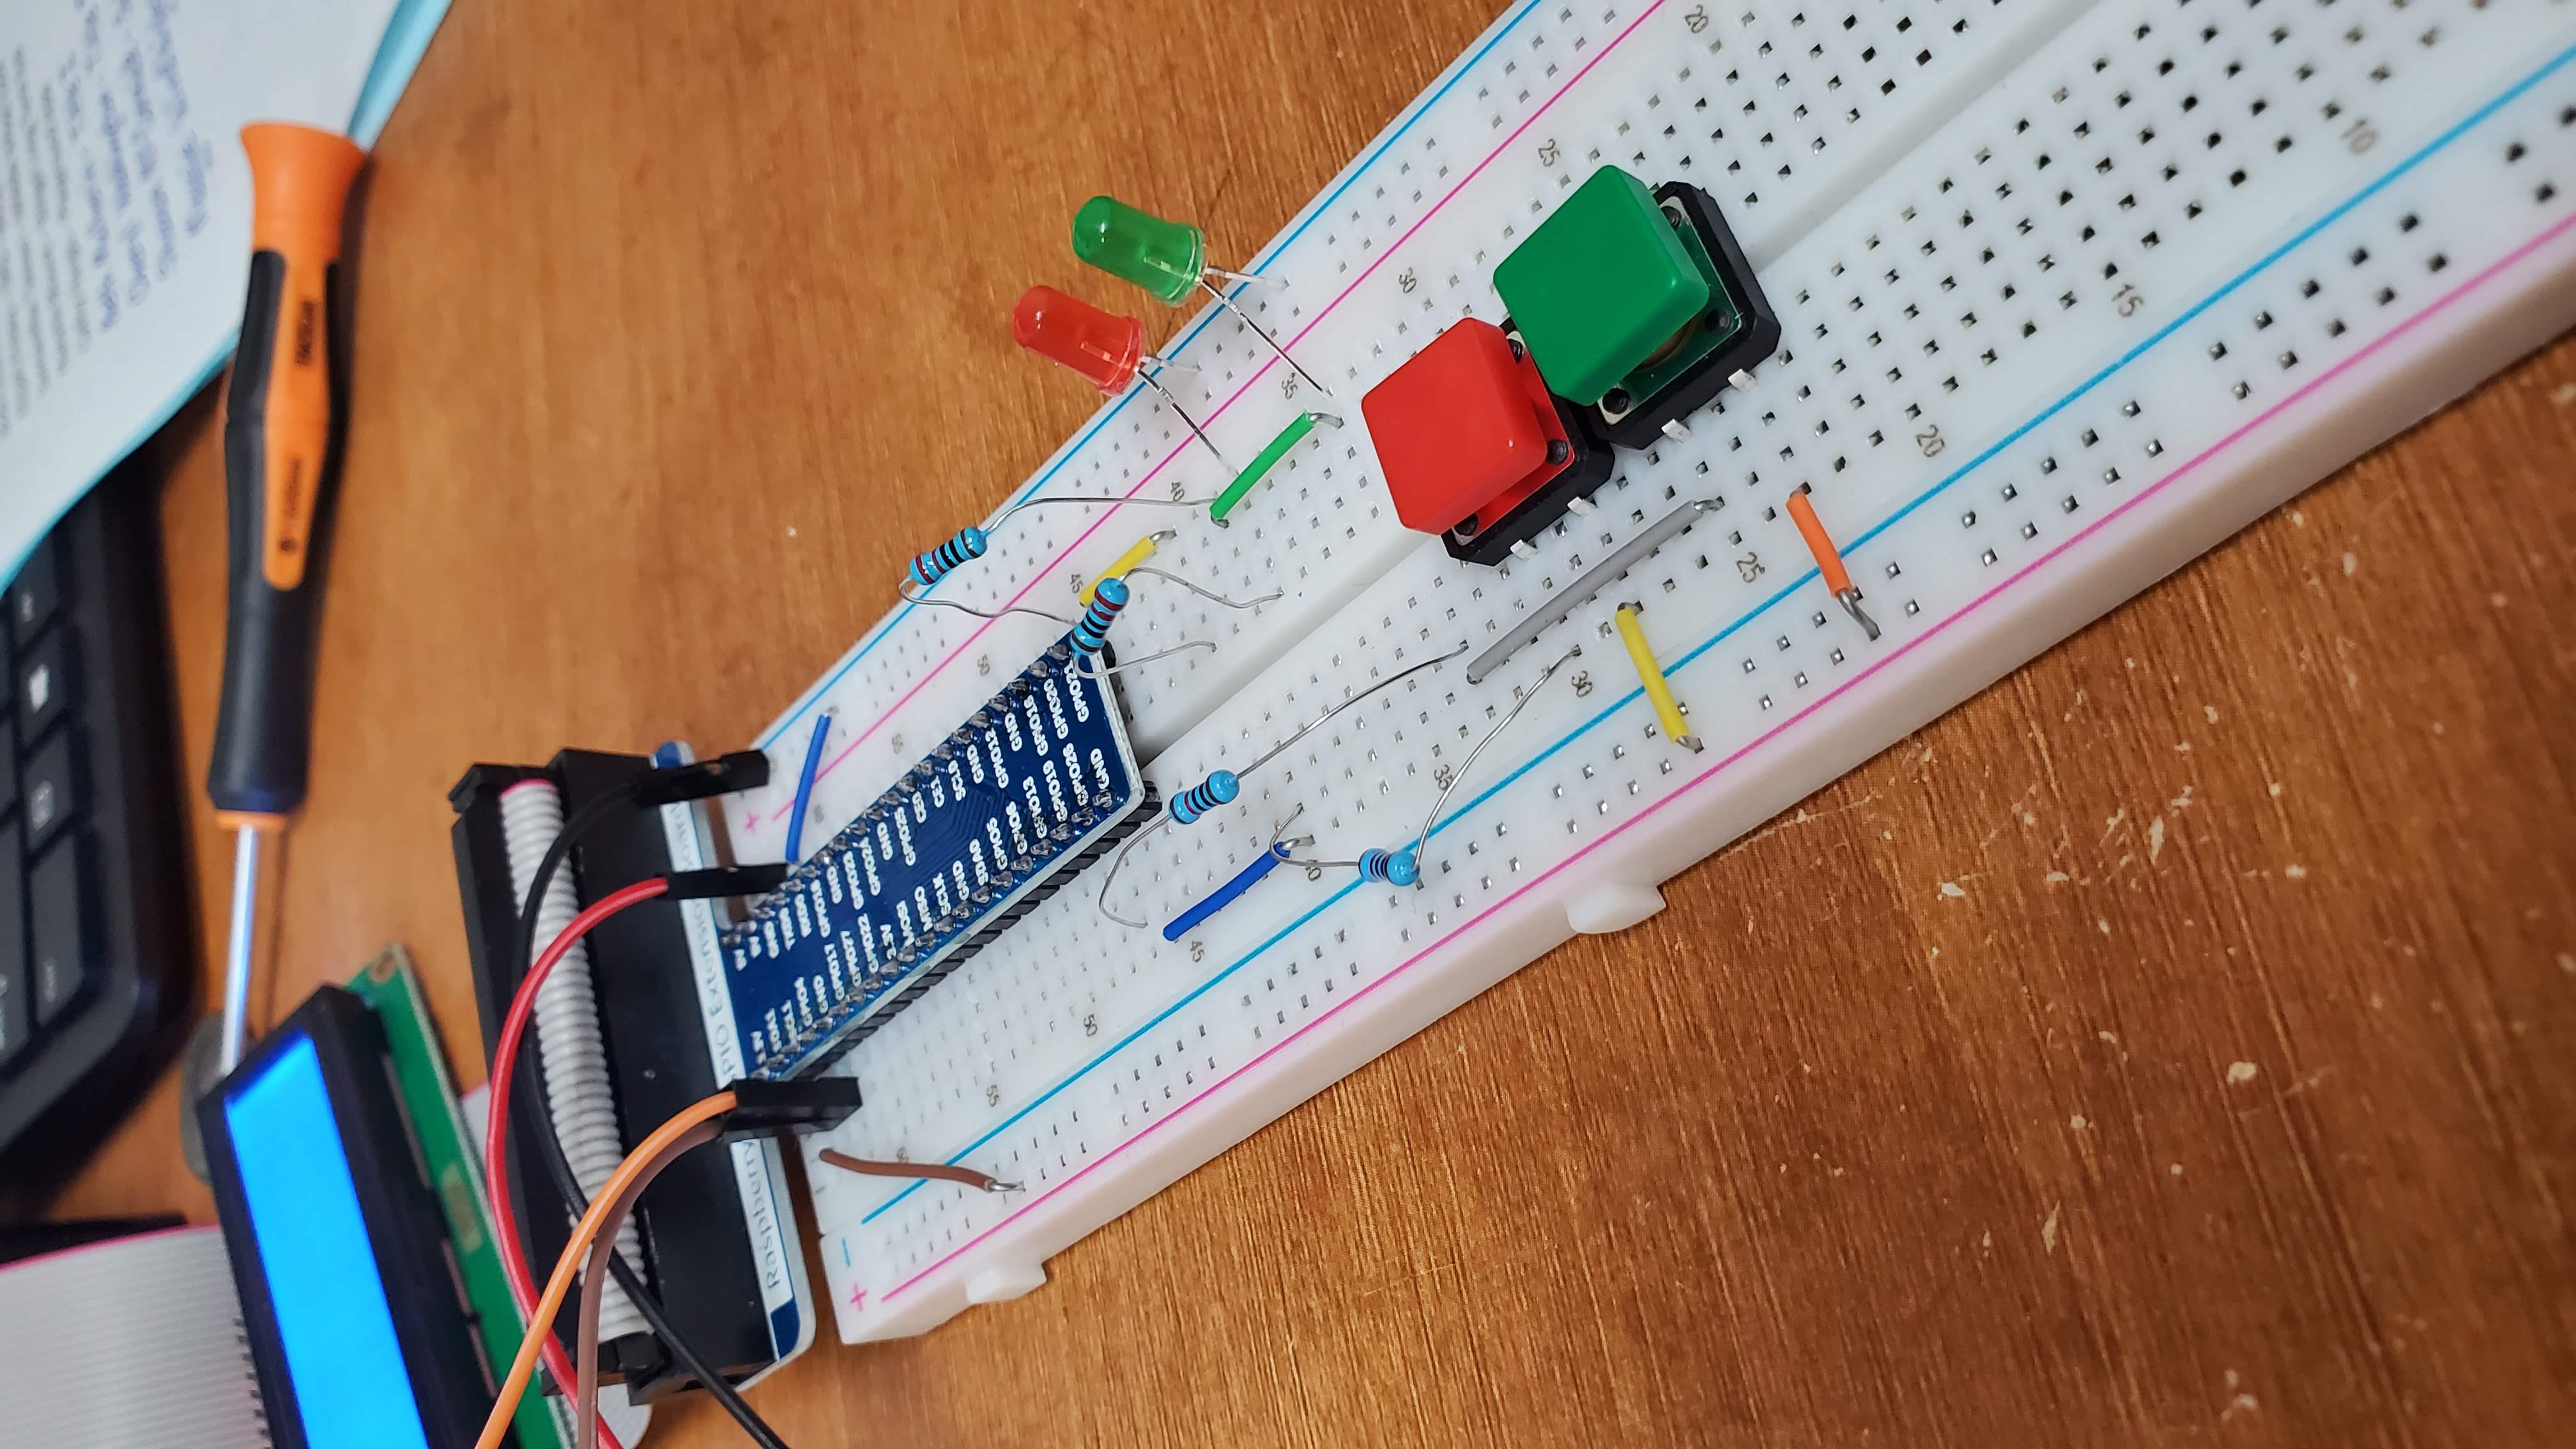
- red_button = 37
- green_button = 35
- red_led = 40
- green_led = 38
- For all LEDs I used a 220 ohm resister between the pin and the led
- For all the buttons I used a 10k ohm resistor between the button and the pin
- 3.3v Was used as the input voltage for the buttons from pin 1
- You can use any GND pin for the negative Rail for the LEDs (Pins 6,9,14,20,25,30,39)
- LCD PINS: 5V, GND, 3 and 6
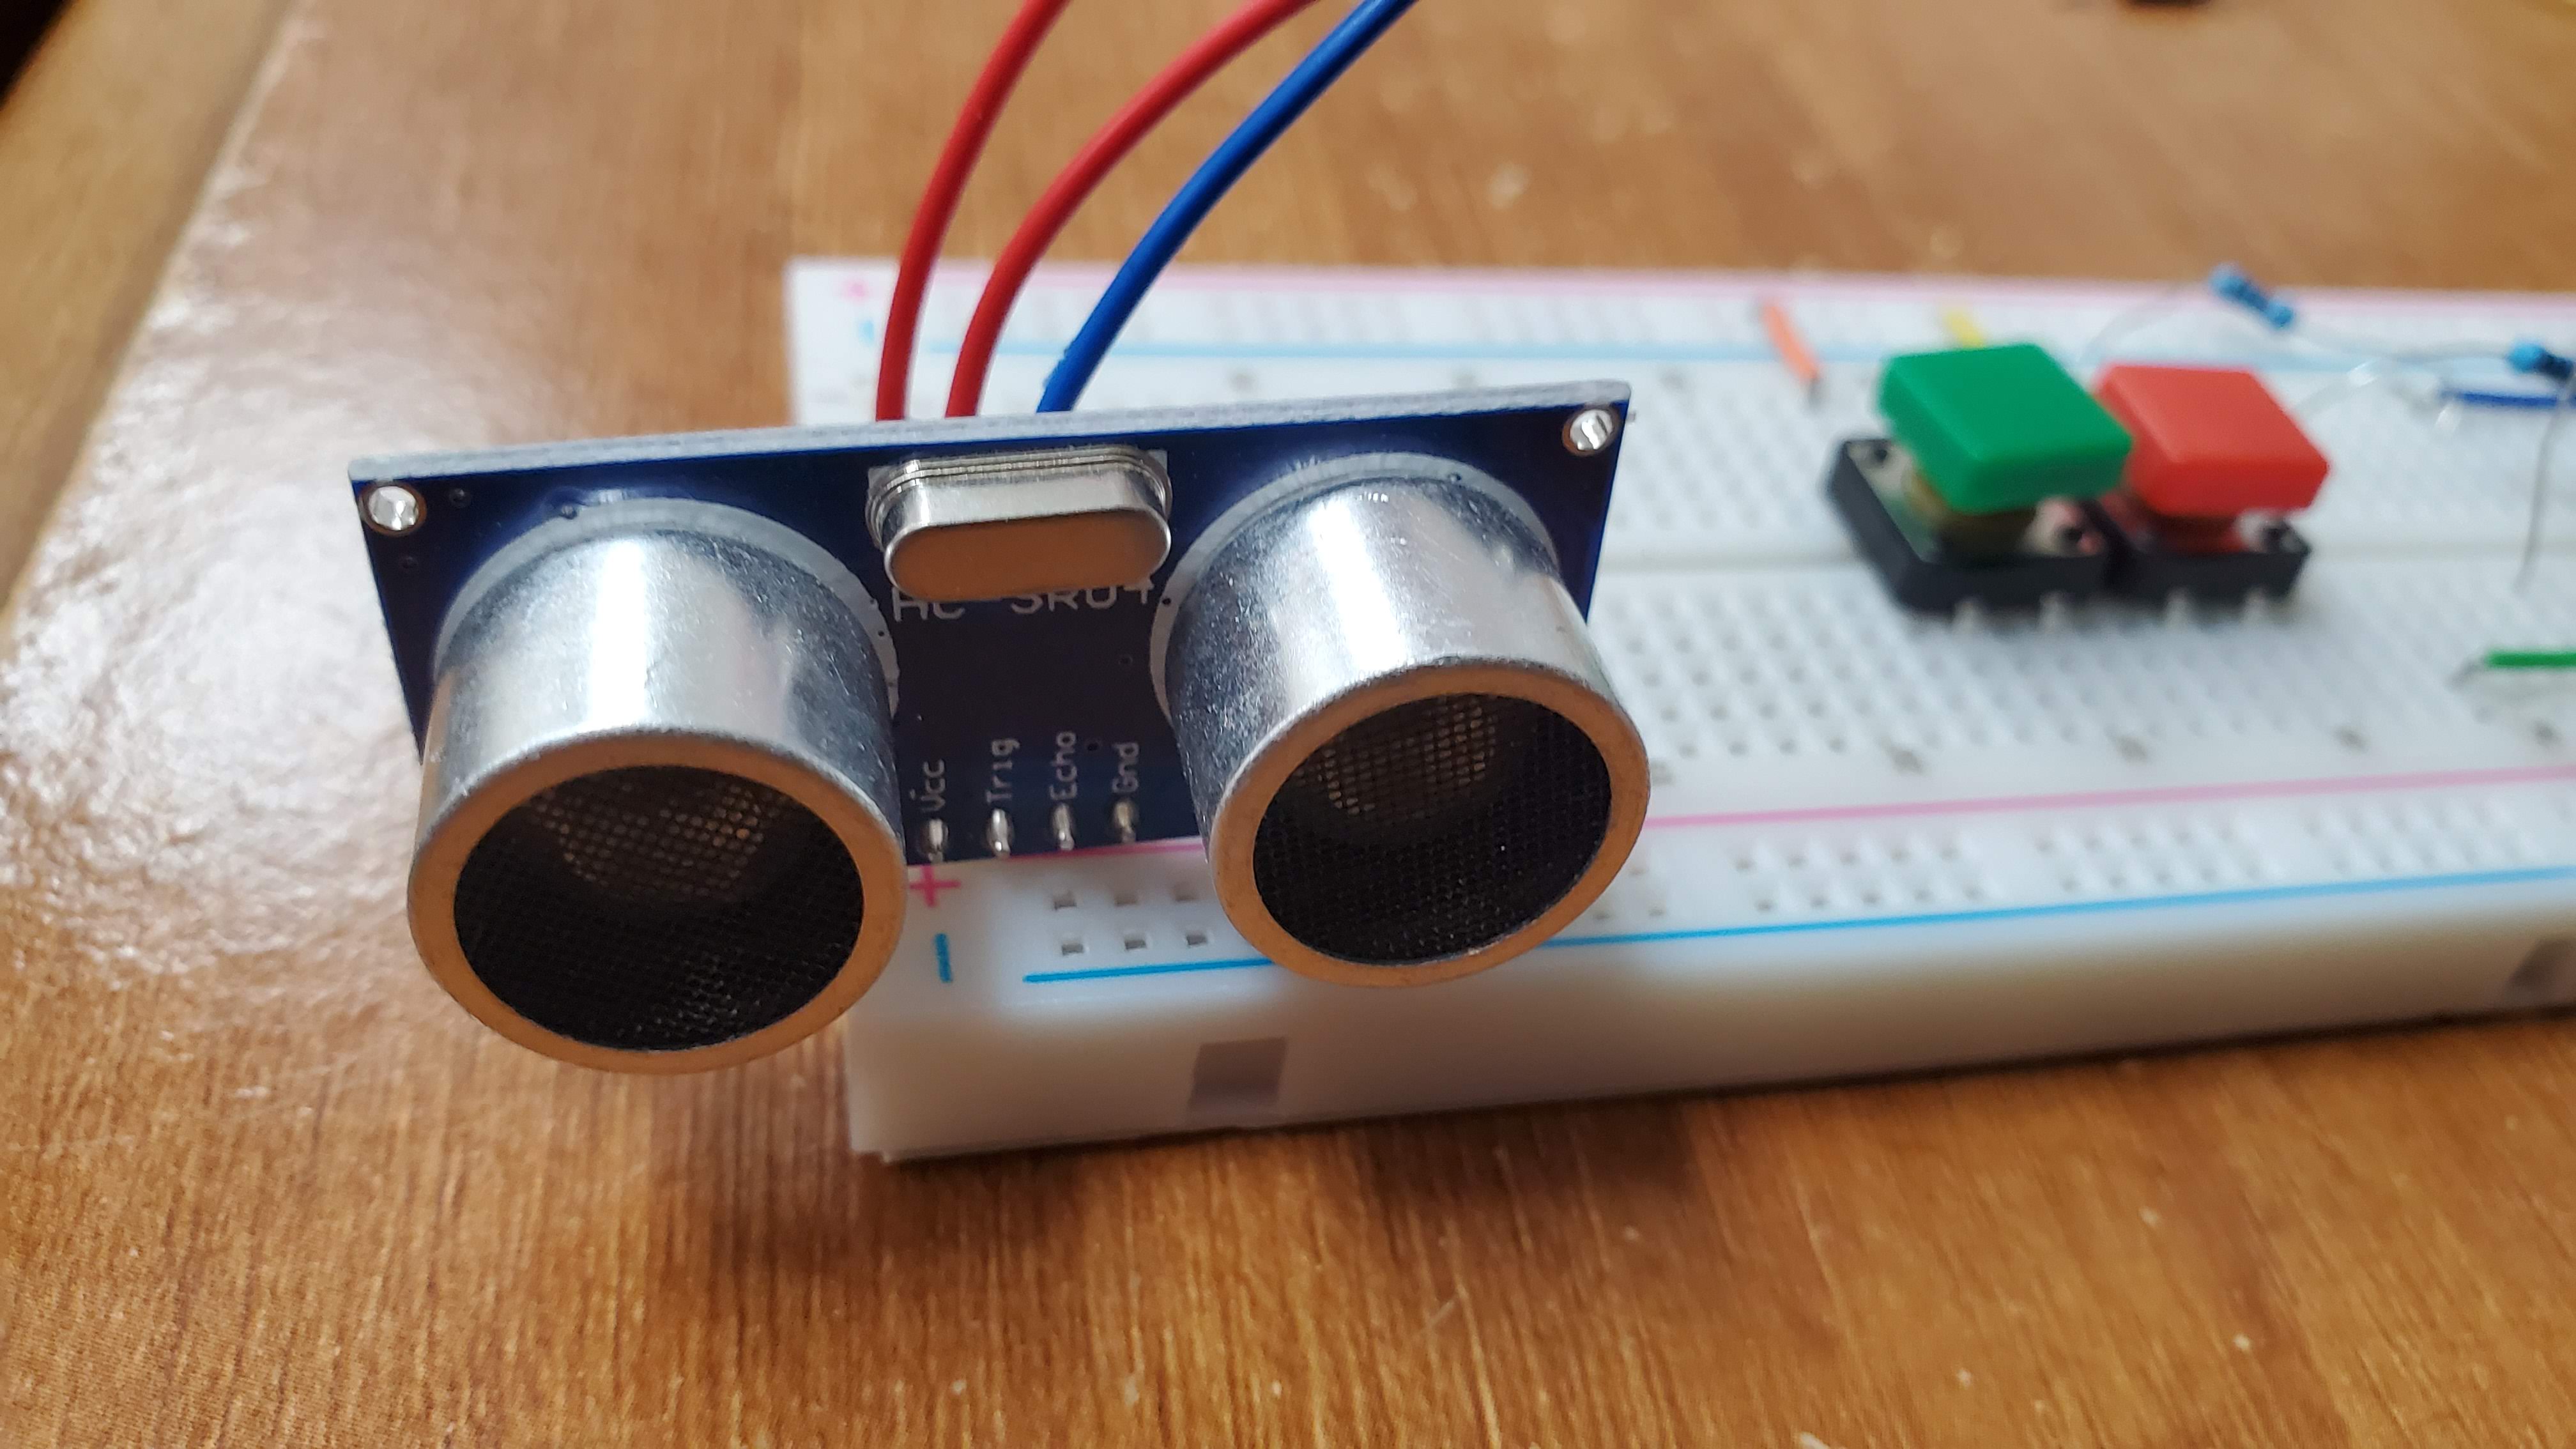
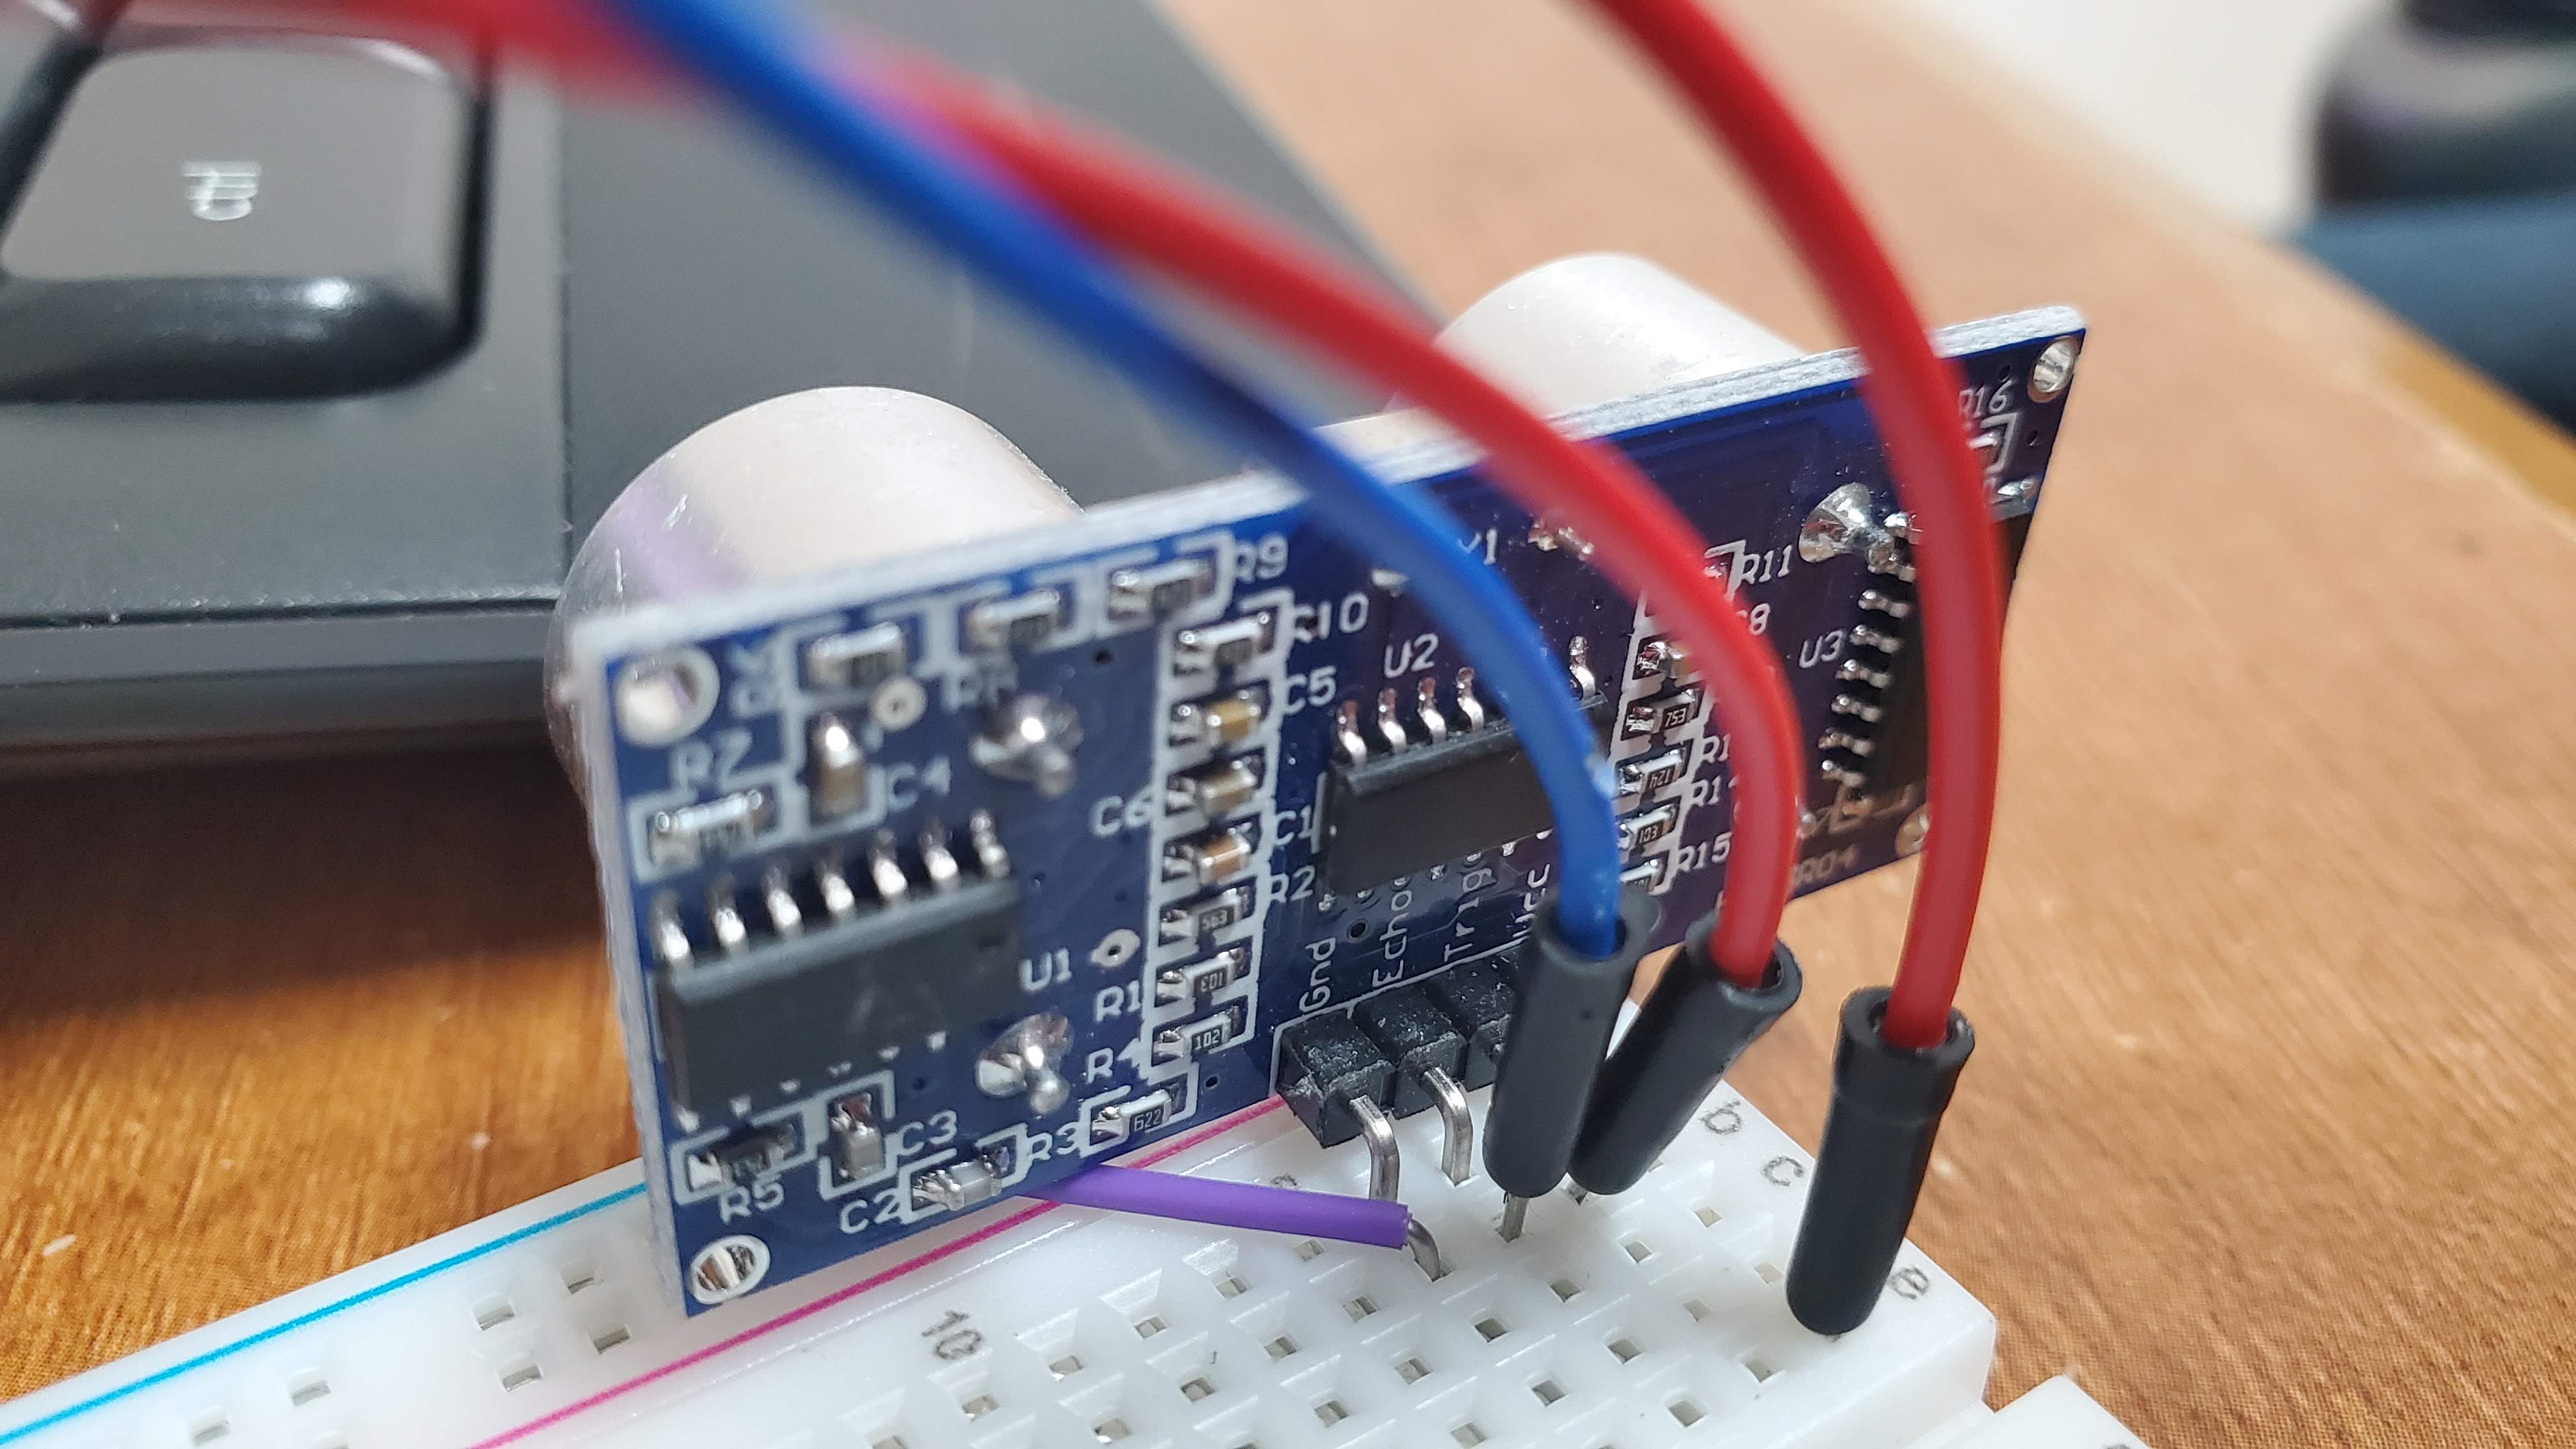
- HC-SR04 Sensor Pins: 5v(vcc), GND, 16 (trig), 18 (echo)
-
Blink Led 1
- General Setup of the script
- Import needed libraries
- Setup pin as an output
- Turn the output on and off
-
Blink Led 2
- General Setup of the script
- Import needed libraries
- Setup pins as an outputs
- Turn the output on and off
- Uses two outputs
-
Button Press 1
- Basics of detecting an input on a GPIO pin
-
Button Press 2
- Basics of detecting an input on a GPIO pin
- Control an output based on the input
-
Button Press 3
- Basics of detecting an input on a GPIO pin
- Control an output based on the input
- Non Blocking code while controlling each input/output
-
Button Press 3
- Basics of detecting an input on a GPIO pin
- Control an output based on the input
- Non Blocking code while controlling each input/output
-
Button Press 4 (Can be skipped)
- Basics of detecting an input on a GPIO pin
- Control an output based on the input
- Non Blocking code while controlling each input/output
- Display which button is pressed on 1602A LCD Display
-
Button Press 5
- Basics of detecting an input on a GPIO pin
- Control an output based on the input
- Non Blocking code while controlling each input/output
- Detect both the Rising and Falling of the input and control an out accordingly
- Measure distance with sound waves
- Calculates distance based on how long a sound wave takes to come back
- Ultrasonic1 and Ultrasonic Freenove are the same file
- One uses functions and the other is simplified into a single loop
- Flask Led 1
- Uses a python Library called "Flask" to create a web server
- Uses "Routes" to decide which function you are asking for
- uses whatever you put after the server address as the route
- EX: 192.168.1.50/home would look for the route "home"
- Has 3 different functions & Routes
- Function 1 "hello_world"
- Just returns a text back to the web browser
- Function 2 "hello_template"
- Returns a preconfigured HTML file back to the browser
- Function 3 "led_control"
- Adds a form to our HTML template
- Lets us send information back to our program
- When our program receives the information, it can do something with it (Like turn the led on or off)
- Also lets us pass dynamic (changing) data to our template
- Function 1 "hello_world"
- Coming Soon
- Coming Soon