Fetching Asset data using the Asset API
This guide shows you how to use the Asset API provided by Predix SDK For iOS to retrieve Asset data from the Predix Asset Service.
Note - This guide does not cover setting up a Asset service, for more information about the service please visit the Predix Asset service documentation
You must have:
- Predix SDK for iOS version 1.1 or higher
- Completed all tasks from our Getting Started Guide
- Completed all tasks from our User Authentication Using Native UI
- Some familiarity with the Predix Asset service
- Knowledge of Xcode's Interface Builder
- Experience in connecting the Xcode Interface Builder elements (IBOutlets and IBActions) to a Swift UIViewController
To allow a user token to access Asset data you will need to ensure that the user being used to authenticate with UAA has the Asset zone.user scope added to the user's groups in UAA. For more information please see our Asset FAQ, Asset Documentation and UAA Documentation.
Open XCode and create a Single View App Xcode
File > New > Project > iOS > Single View App
Then configure the SDK as described in the Getting Started Guide.
NOTE: If you have trouble with the section please visit the Getting Started Guide.
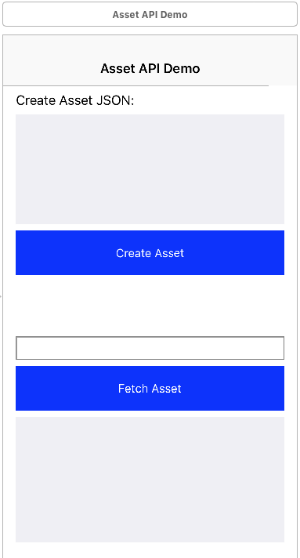
Create a simple view to send the Asset Request and view the Asset response.
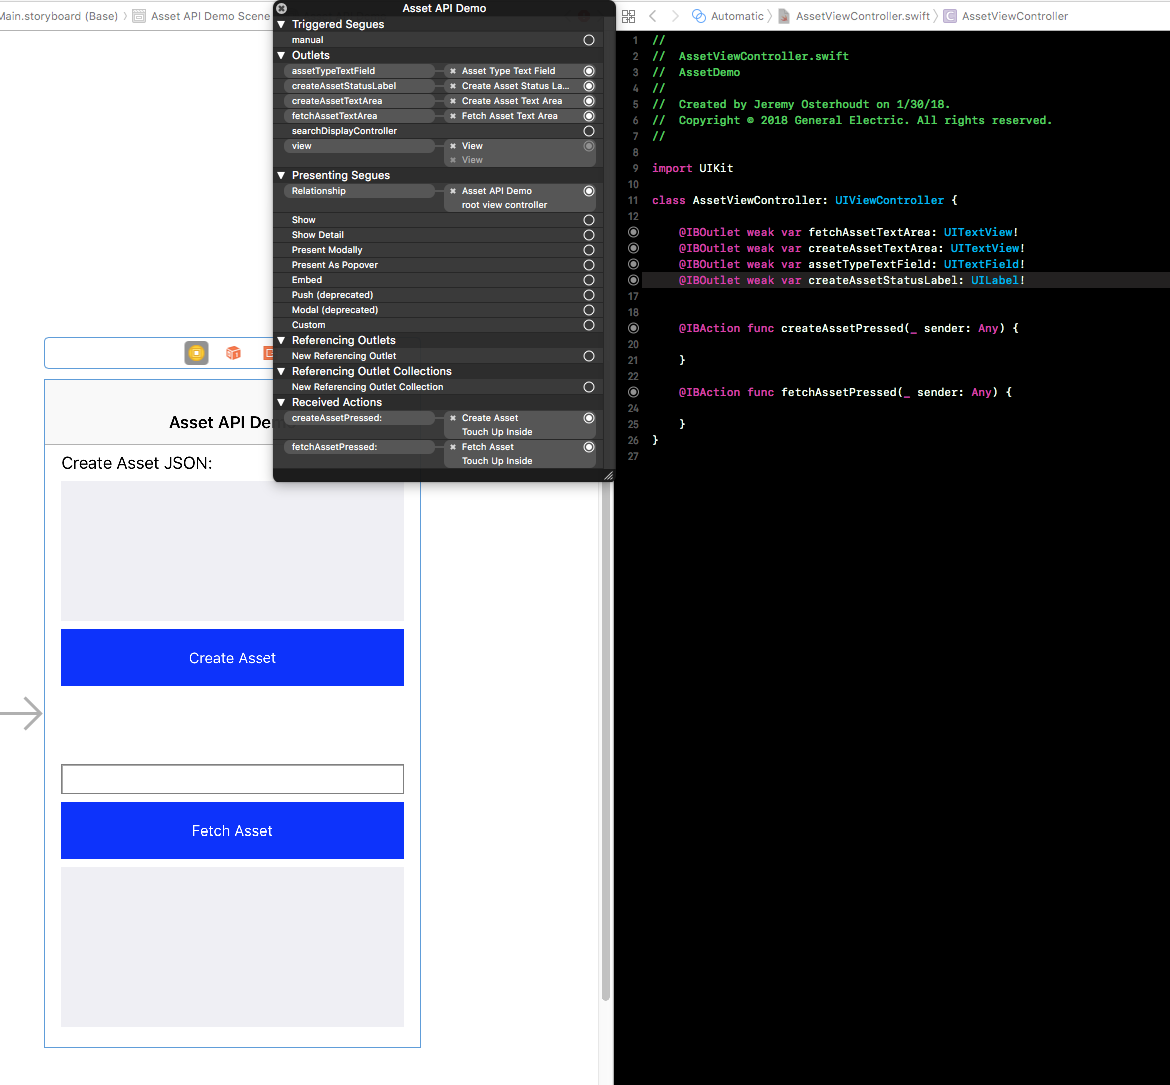
- Open the main Storyboard and modify the view that is present to add a button and a label.
- Wire up the
IBOutletsandIBActions
import UIKit

class AssetViewController: UIViewController {

    @IBOutlet weak var fetchAssetTextArea: UITextView!
    @IBOutlet weak var createAssetTextArea: UITextView!
    @IBOutlet weak var assetTypeTextField: UITextField!
    @IBOutlet weak var createAssetStatusLabel: UILabel!

    @IBAction func createAssetPressed(_ sender: Any) {

    }

    @IBAction func fetchAssetPressed(_ sender: Any) {

    }
}
Now we need to add some code to fetch the Asset data.
- Open the ViewController class and import the
PredixSDKand create a property for the AssetManager.
import UIKit
import PredixSDK

class AssetViewController: UIViewController {

    @IBOutlet weak var fetchAssetTextArea: UITextView!
    @IBOutlet weak var createAssetTextArea: UITextView!
    @IBOutlet weak var assetTypeTextField: UITextField!
    @IBOutlet weak var createAssetStatusLabel: UILabel!
    private var assetManager: AssetManager?
}- Create AssetManagerConfiguration and the AssetManager in the
ViewDidLoadmethod as shown here:
override func viewDidLoad() {
    super.viewDidLoad()

    let configuration = AssetManagerConfiguration(instanceID: "4532487d-70c3-4bb8-889d-6e04e8edadc0")
    assetManager = AssetManager(configuration: configuration)
}- In our
createAssetPressedaction function we need to instruct the AssetManager to create an Asset with a given set of JSON. For this example we use the JSON from the UITextView we created in the StoryBoard.
@IBAction func createAssetPressed(_ sender: Any) {
    createAssetStatusLabel.text = "Attempting to create asset..."
    if let data = createAssetTextArea.text.data(using: String.Encoding.utf8), let rawJson = try? JSONSerialization.jsonObject(with: data, options: JSONSerialization.ReadingOptions(rawValue: 0)), let json = rawJson as? [[String: Any]] {
        assetManager?.createAssets(jsonAssets: json , completionHandler: { (asset, status) in
            DispatchQueue.main.async {
                self.createAssetStatusLabel.text = "Asset Status: \(status)"
            }
        })
    } else {
        createAssetStatusLabel.text = "error, invalid JSON received!"
    }
}
For testing purposes here is a sample string you can use in place of the UITextView if you prefer.
createAssetTextArea.text = """
    [{"coords":{"lat":33.914605000000002,"lng":-117.25337399999999},"uri":"/locomotives/1","installedOn":"01/12/2005",
            "type":"Diesel-electric","manufacturer":"/manufacturers/GE","engine":"/engines/v12-1"
    }]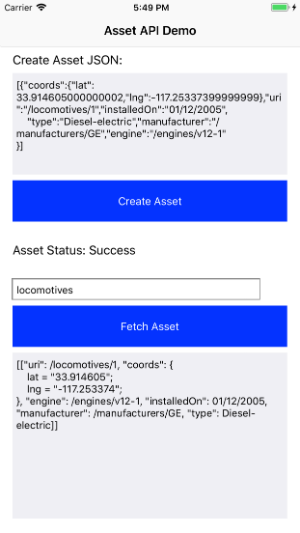
"""- Run the application, log in and press the Create Asset button to see the results, they should look something like the image below.

- In our
fetchAssetPressedaction function we need to instruct the AssetManager to fetch an Asset with an Asset Type. For this example we will take the type from a UITextField we added in our StoryBoard
@IBAction func fetchAssetPressed(_ sender: Any) {
    fetchAssetTextArea.text = "Fetching Asset..."
    assetManager?.fetchAssets(assetType: assetTypeTextField.text ?? "", query: AssetQuery(), completionHandler: { (asset, status) in
        DispatchQueue.main.async {
                self.fetchAssetTextArea.text = asset?.results.description ?? status.description
        }
    })
}- Run the application add an Asset Tag name to the UITextField and then press the Fetch Asset Button to see the results, they should look something like the image below.
- Check out the AssetManager documentation
- See the example project