Setup management cetificate
Management certificate is X.509 certificate that authenticates an application, so it can access Windows Azure management services. Only applications, which posses specified certificate can use management services to start and stop virtual machines or do any other operations on your Azure subscription. This way it is secured, that no one can manipulate virtual machines in your Azure subscription.
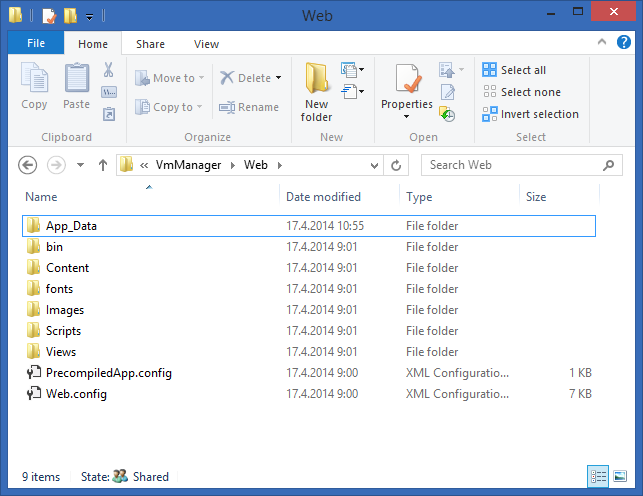
Before starting open folder, where you unzipped deployment package. Open Web folder and create new folder App_Data.
At first you need to create new X.509 certificate. For this, you can use MakeCert.exe tool that is part of Windows SDK. If you don't have it yet, download and install Windows SDK from http://www.microsoft.com/en-us/download/details.aspx?id=8279
Now open command prompt and type:
cd "C:\Program Files (x86)\Microsoft SDKs\Windows\v7.1A\Bin"
MakeCert -n "CN=YourName" -r -pe -ss My
where YourName identifies you or your application.
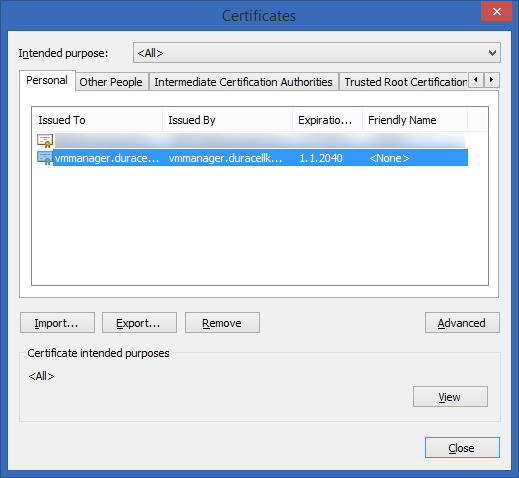
Certificate was created and stored in your personal store.
Now open program CertMgr (you can just type it in the command prompt) and open tab Personal. Certificate with YourName should be in the list.
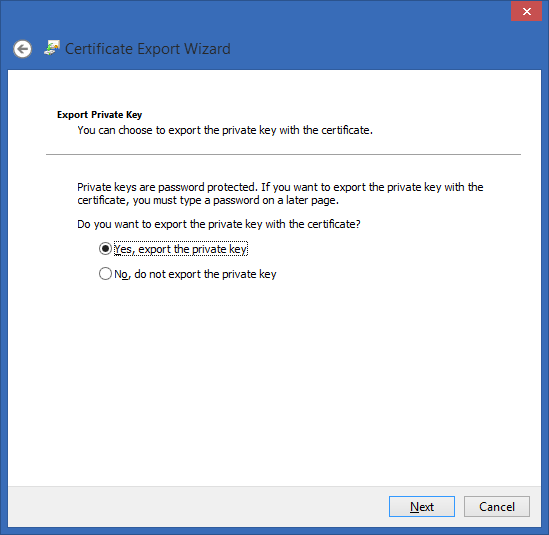
Click Export button. On the next wizard screen select "Yes, export the private key".
On the next page make sure PKCS #12 (.PFX) format is selected and check "Export all extended properties".

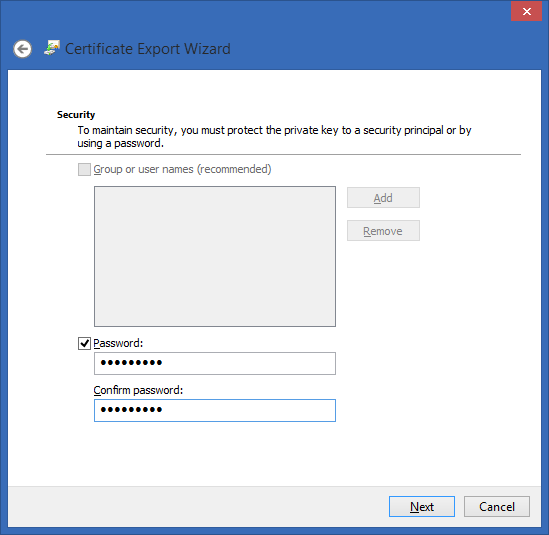
On next page enter password to protect the private key.
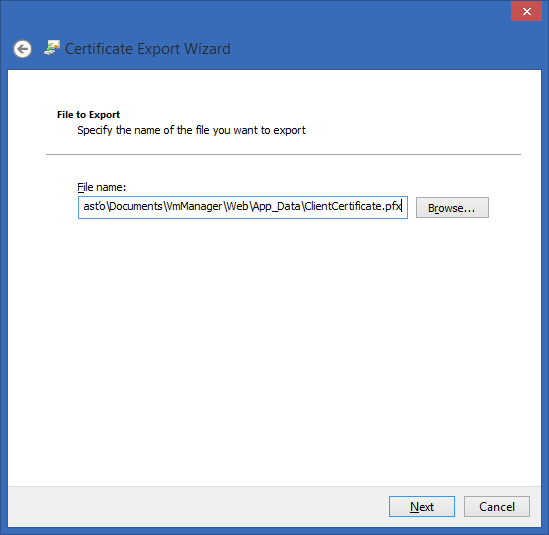
On next page specify file in App_Data folder that you created in first step.
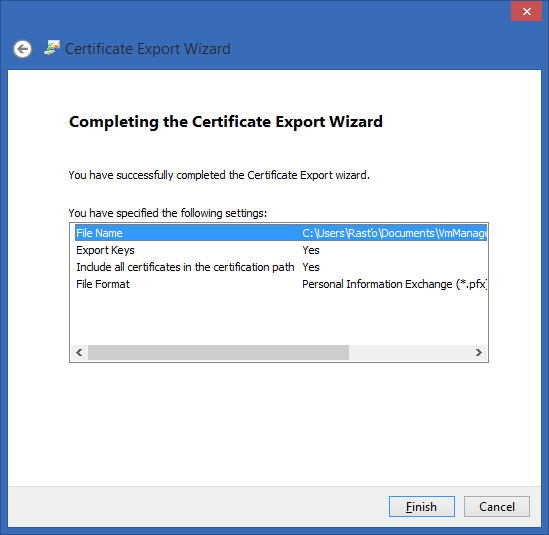
Finish the Export wizard.
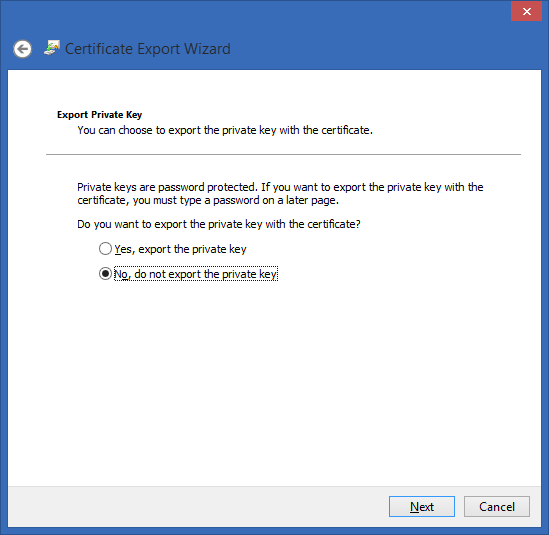
Now you need to export public key certificate that will be uploaded to your Windows Azure subscription. Select your created certificate and click Export again. This time select "No, do not export the private key".
On the next page select "DER encoded binary X.509 (.CER)"

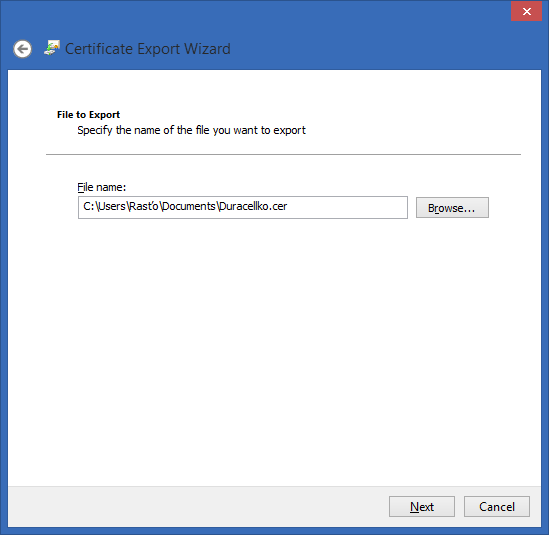
Specify file to save the certificate. The file is not part of the web.
Finish exporting public key certificate.

Now you can remove certificate from your Personal certificate store.
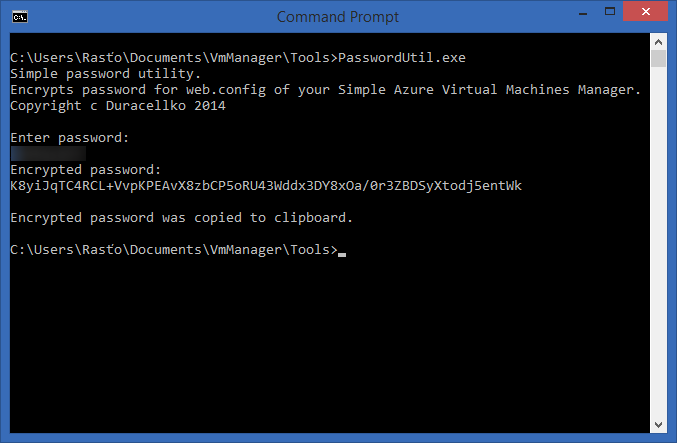
Open Tools folder in deployment package. Run PasswordUtil.exe. Enter password you specified to secure your private key certificate. Encrypted password is generated and saved into clipboard.
Open Web.config file in Web folder of deployment package.
- Find setting WindowsAzureClientCertificatePassword and paste encrypted password into value attribute.
- Find setting WindowsAzureClientCertificate and verify that the path is correct for your private key certificate.
<appSettings>
	...
	<add key="WindowsAzureSubscriptionID" value="{subscription_id}" />
	<add key="WindowsAzureClientCertificate" value="App_Data\ClientCertificate.pfx" />
	<add key="WindowsAzureClientCertificatePassword" value="K8yiJqTC4RCL+VvpKPEAvX8zbCP5oRU43Wddx3DY8xOa/0r3ZBDSyXtodj5entWk"/>
	<add key="ida:FederationMetadataLocation" value="https://login.windows.net/{active_directory_id}/federationmetadata/2007-06/federationmetadata.xml" />
</appSettings>
Save the Web.config.
Last step is to upload certificate to Windows Azure, so that application can manage your virtual machines. Open Windows Azure Management portal. Go to Settings section and select Management Certificate tab.

Click Upload a management certificate or Upload button at bottom bar. Browse for public key certificate file that you exported.


Now, when your management certificate is uploaded, your application can manage virtual machines in your Windows Azure subscription.
Next step is to [Setup Active Directory](Setup Active Directory).