-
Notifications
You must be signed in to change notification settings - Fork 46
ways to improve site
30 ways to improve your website performance with actionable improvements and no fluff explanation
It can be daunting when trying to improve website performance.
Where do you start?
With recommendations changing all the time, how can you make sure that you are not left behind?
With so many areas to improve, where is the best place to concentrate your efforts?
This article breaks down website performance into small tasks.
Each one of the tasks is actionable, we will ask:
- WHY are we improving this aspect of the site
- WHAT to check on the page
- HOW to make the improvement
We will also categorize the impact of fixing each task so that you get the biggest bang for your buck.
- High - A large increase in site speed
- Medium - Depending on the structure of your site this will have a significant speed increase
- Low - Small increase but worth looking at. It all adds up.
There is no fluff here. All the improvements are actionable and you can increase your site speed today!
We only need a single tool to investigate the improvements on your site.
Google Chrome Developer Tools.
To access these tools open Chrome and navigate to your site. Right-click the page and choose the “Inspect” option.
You now have developer tools open, let's improve your site!
Here is the checklist of improvements we are going to make:
As you can see we have a lot to get through.
Once you have performed these tasks a few times, it will feel like second nature.
At a high level there are three principles we are following:
- Page assets should be as small as possible (Known as Page Weight).
- Download only the assets we need to show the page (Async Loading).
- Download assets we need in advance (Pre-loading)
All 30 improvements fall into one or more of these three principles.
Simple, right?
Before we get started one word on monitoring.
Before we start improving the site we need to track performance.
If we neglect this step it will be hard for you to learn what has worked and what has had little affect.
The principle we need to follow is:
Improve, then measure.
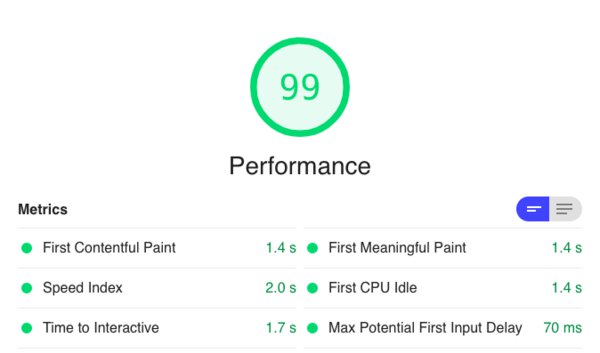
To measure your site I would recommend that you use the Google Lighthouse tool.
In the article Benchmark Websites, I show you how you can use a Google Sheet to track the performance.
The Google Sheet tracks the performance daily so you can see how your site speed improves over time.
You can also use PageSpeed Insights or WebPageTest.org if you prefer.
Now we have monitoring in place lets dive into the improvements.
When optimizing a new site start with images.
They are the number one cause of website performance issues.
They also account for over 60% of pages total page weight.
Luckily, there are lots we can do to improve them.
Impact: High
You can compress images without losing quality.
A photo taken with a camera will be a large file and we can use compression to reduce the file size.
By selecting the correct compression type, we can reduce image size by up to 90%.
To check if compression could improve the images on your site, use the Dev Tools and select the network tab.
You can filter by “Img” and it will show you the images downloaded. In the size column, it will show the resource file size and the downloaded file size. It's the resource file size we are looking at.
If you see files that are larger than 100kb it's time to try compression.
Follow these rules when deciding on the type of compression to use:
- If the image is a JPEG and larger than 100kb compress again using JPEG.
- If the image is a PNG and it has no transparency then use a compressed JPEG.
- If the image is a PNG is transparent then use WebP and fallback to an optimized PNG.
A great tool to use for image compression is Squoosh.
It allows you to see a before and after using a slider as above.
Impact: Medium
If you are showing square images, make sure that the image you download is also square.
In other words, keep the aspect ratio the same.
Why download a rectangle image but then display a square. You are downloading more pixels than needed.
This adds to the download size and it will slow down the display of the image.
Look through the images on the site. Can you see anywhere the display ratio is different from the image ratio?
Look for image cropping within CSS like this:
img {
  object-fit: cover;
}
This is a sign that images are being cropped.
Using the resize tool from Squoosh we can take an image and change the aspect ratio.
Impact: Low
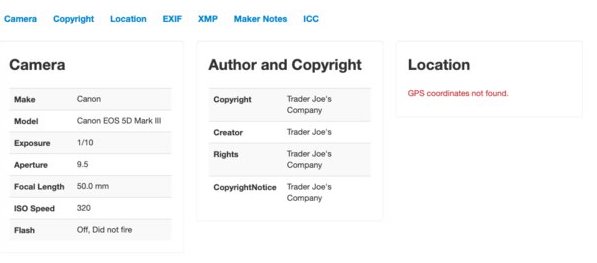
When we take a photo the image contains metadata. Data such as the camera specification and even the location of the photo.
This can all add weight to the image and is not needed by your customers.
To check if your images have this, use an online image metadata tool like metapicz to see.
Enter the image URL into the tool and it will return any metadata held within the image.
Many image compression tools such as Squoosh will remove the metadata when compressing.
Impact: High
Lazy loading is the technique of loading images only when they become visible to the user.
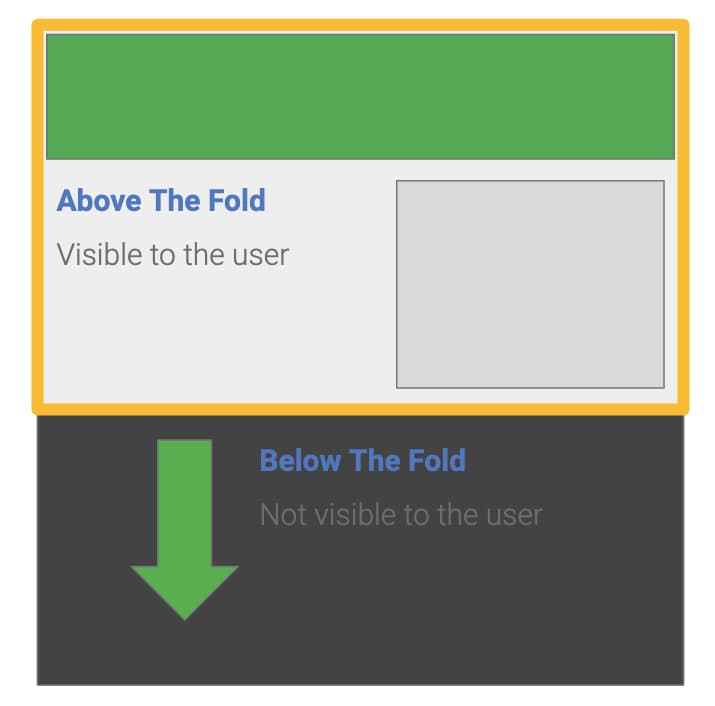
If you have below-the-fold images, you should consider lazy loading them.
This means that the initial page can load quicker as it only downloads the images at the top of the page.
To see if your page has enabled lazy loading open Dev Tools and clear the network tab.
Start to scroll the page.
If there are network requests for images as you scroll down, then lazy loading is in use.
Native lazy loading is the simplest way to take advantage of this technique. There is a free Wordpress plugin from Google you can add to your site.
If you are not using Wordpress then use the loading attribute on your images, like this:
<img src="cat.jpg" loading="lazy" alt="Awesome Cat!">
Native lazy loading is only supported by Chrome as of 2019 but this will improve over time.
There are many Javascript implementations that you can try.
Impact: Low
There are many different size devices in use today. Mobile, tablet, and desktop all working at different resolutions with different screen sizes.
There are also retina displays that have 2x or 3x the pixels.
To support these devices we want to show a nice clear image. We do not want to have blurry images that negatively affect the user experience. We should provide different images for each resolution.
Check to see if there are any picture tags in the HTML. You are then looking for different sources of the same image.
It can help to search for “srcset” in the markup.
To support different resolutions we need to create images at various widths. It's common to see 3 widths for mobile, tablet and desktop.
Use the <picture> tag to add images at different widths:
<picture>
  <source media="(max-width: 799px)" srcset="cat-480w.jpg">
  <source media="(min-width: 800px)" srcset="cat-800w.jpg">
  <img src="cat-800w.jpg" alt="Cat">
</picture>
Impact: Low
Vector graphics are images that do not lose quality when they get resized.
In the last improvement, we created many different versions of an image so that it can scale to the user's device.
With vector graphics like SVG, we can scale a single image without losing quality.
As we zoom in on the peach stone above we lose no quality, the image stays clear.
This works for logos, graphics, and icons that are on your page.
Look for any images in the network tab that you can convert to SVG. These will be sprite sheets, logos, and any graphics.
Unfortunately, it does not work for Photos.
You can save in most vector graphics packages to SVG format.
Make sure that you add server-side compression to any SVG files. See more on this improvement later on in the list.
When we optimize the HTML, we are making sure that we reduce the file size and load the assets efficiently.
Impact: Medium
The first principle was:
Page assets should be as small as possible.
The smaller the HTML file is, the faster it will download to the browser.
There is a knock-on effect as the faster the HTML downloads the quicker the assets can start downloading.
Often, we minify CSS and Javascript but rarely do I see HTML minified.
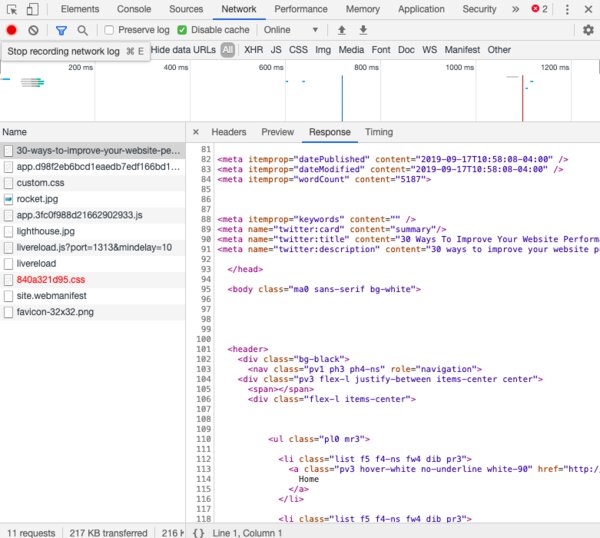
To see if your site has a minified HTML file, open up Chrome Developer Tools and select the network tab.
After, refreshing the page click on the first row. This will be the HTML.
Click on the response tab and look to see if there are spaces and indentations.
If there are then the file is not minified.
Let's look at how we can minify it.
We can use a tool such as an HTML minifier to make the file smaller.
There are many options to choose from, some of the important ones we will dig into in more detail next.
For an initial idea of what this looks like accept the defaults for now.
You should see that it has removed all the spaces and indentations.
Impact: Low
We often include markup in our HTML such as:
The markup above is the same as this:
Notice the missing ="true".
There is no need for the extra ="true" and this text is redundant.
It is safe to remove all these default true values from your HTML.
To check if your site has this open Dev Tools and click on the “Elements” tab.
This will show the HTML and you can perform a search for “true”.
If you find some you can remove them.
Most HTML minifiers will have an option to remove these values.
The HTML minifier tool we mentioned above has a “Collapse boolean attributes” option. To remove the “true” values check this checkbox.
Impact: Low
Comments are often found in HTML.
They are there to help a developer or technical stack-holder understand the markup.
These comments are not useful to your customer.
There is no need for them on a production website and so you can remove them.
When looking at the HTML file in Dev Tools, look for any green highlighted text.
<!---I am a Comment! --->
If you find some these are comments and you can remove them.
The HTML minifier can remove these comments for us.
There is a section in the options called “Remove comments”. Check this to remove all comments from the file.
Impact: Low
There are many defaults in HTML 5 that make some markup redundant.
It is important to be aware of these defaults so that you know what to remove.
In Dev Tools click the “Elements” tab and search for “text/javascript” and “text/css”.
Which will return results like this:
<script type="text/javascript"></script>
This would tell the browser that we were going to load a script tag and run Javascript.
This is no longer required.
Now all browsers by default will assume that a script tag is loading Javascript.
Replace the above code with:
Again, using an HTML minifier there is an option labeled “HTML5”. Check this when minifying and it will remove these attributes.
Impact: Medium (depending on the amount of CSS and Javascript inlined)
If the HTML file has Javascript or CSS within the HTML file (called “inline”). For example:
<style>
  .background {
    border: none !important;
    margin: 0px !important;
    padding: 0px !important;
    width: 1px !important;
    min-width: 100% !important;
    overflow: hidden !important;
    display: block !important;
    visibility: hidden !important;
    position: fixed !important;
    height: 1px !important;
    pointer-events: none !important;
    user-select: none !important;
  }
</stlye>
We can run minify this reducing it to:
<style>.background{border:none!important;margin:0!important;padding:0!important;width:1px!important;min-width:100%!important;overflow:hidden!important;display:block!important;visibility:hidden!important;position:fixed!important;height:1px!important;pointer-events:none!important;user-select:none!important}</stlye>
Making the file size smaller.
In the Dev Tools open the “Network” tab and locate the HTML file and click on the “Response”. Search for the “style” or “script” tag in the HTML, if there is CSS or Javascript written inline.
If there is, check to see if it has whitespace and indentations. If it does we can minify it.
We can use our old friend HTML minifier. Make sure you select the options “Minify CSS” and “Minify Javascript”.
Impact: High
When a webpage is loading it loads in sequential order. So if you have the following markup:
<script src="cats.js"></script>
<link rel="stylesheet" href="cats.css"/>
The browser will download the script first. Then block the page from loading before it starts to download the CSS.
Since we need the CSS to show the final page, it is better to load the CSS first which will decrease rendering time.
Search for Script and stylesheet in your HTML. You can view this in the “Network” tab of Chrome Dev Tools, ensure that they are in the correct order.
Reorder the tags so that all required CSS loads before the javascript:
<link rel="stylesheet" href="cats.css"/>
<script src="cats.js"></script>
Impact: High
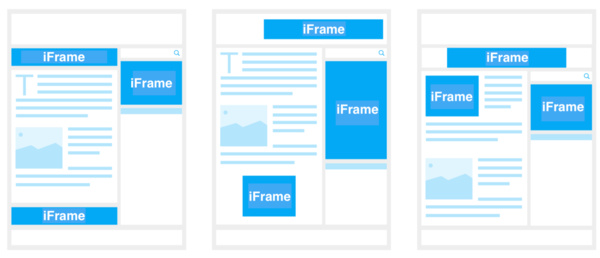
As iFrames are actually pages inside pages there use can decrease the performance of a site.
The more iFrames you add, the slower the site will be.
To locate the iFrames, use Developer tools click the “Elements” tab.
This will show the HTML markup from here you can perform a find and search for “iframe”.
Assess the iFrames and consider whether an API call makes more sense.
Impact: Low
We can also pre-load files in advance.
When a customer lands on your site and the page has finished downloading. We have the chance to pre-load assets that we need later on.
Check for images, fonts, CSS or javascript that you need later on in the customer journey and prefetch it.
For example, you may have a font used on the next page. Well, you can load it before the user clicks the next link using the prefetch link tag:
<link rel="prefetch" href="/assets/fonts/font.woff2">
The Javascript ecosystem has exploded in the last few years. With frameworks like React, Angular and Vue proving popular with developers.
Javascript is becoming a very important aspect of modern web application performance.
We must ensure that we keep javascript files small and only load what the page needs when it needs it.
Let’s take a look at some improvements.
Impact: Medium
Like with HTML we can minify Javascript. We can take a larger Javascript file and reduce it to a much smaller one. All without affecting how the Javascript works.
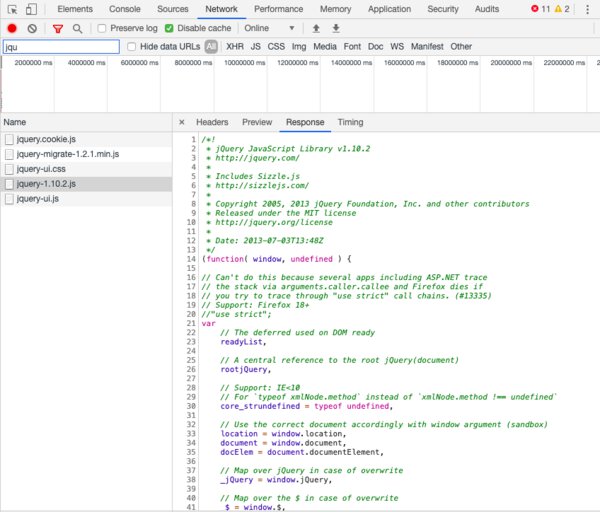
We can use Dev Tools to look for minified Javascript. Look at the response in the network tab and make sure the file has no comments or indentations.
It is common to see sites loading JQuery directly from JQuery.com without adding .min to the file.
The .min version is the minified version of JQuery and can save many KB's:
- The original JQuery file is 273KB.
- The minified version is 93KB.
So check the site to make sure that the minified file is being loaded.
If there is not a minified version of a Javascript file then you can create one using UglifyJS.
Impact: Medium
When you have a <script> tag on the page it will cause the page to stop loading.
The browser will then request the file and download it.
Once downloaded it will execute the Javascript, and then continue with the rest of the HTML.
This can have a huge impact on page loading times.
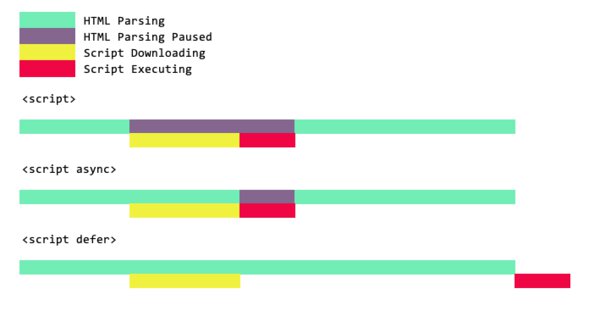
To stop this blocking there are two attributes you can use async and defer.
When using these attributes the Javascript file downloads without blocking the page.
With async, it will execute the Javascript as soon as it has finished downloading.
With defer, it will download the script and once the HTML has rendered it will execute the Javascript.
You can look at the HTML file in the “Elements” tab of the Dev Tools.
Look for where the script tags are being loaded.
Do they have the async or defer keywords.
Once you have found a script on the page, you need to decide to use either the defer or async tags.
If the script has no other dependencies and does not need the rendered HTML then use the async attribute.
If the script requires other scripts to run such as jQuery and needs rendered HTML then use defer.
Sometimes you need one file to load before another. If you use the async attribute then there is no guaranteed order.
If you use defer then they will execute in order.
<script defer src="JS/jquery-3.1.1.min.js"></script>
<script defer src="JS/my.js"></script>
Impact: Medium
Often frameworks get bloated over time.
When they do, developers work on a lighter faster version.
JQuery is a good example. Many JQuery alternatives are smaller in size.
Look for frameworks used by the website.
Then research to see if a newer, faster, smaller alternative is available.
For JQuery, consider using the smaller alternative Cash.
Impact: Low
If you are using third party frameworks, make sure that you are keeping the versions up-to-date.
There are performance and security improvements in the latest updates.
Find all the third-party Javascript files on the site and see if a newer version is available.
A good place to visit is NPM. On this site, you can search for a framework and look at the latest version number.
CSS files can keep growing over time and often it can be difficult to know if certain classes are still in use.
It’s important to review the CSS for this reason.
Impact: Medium
As we have with Javascript and HTML we can minify CSS.
Checking for minified CSS in Dev Tools is the same as how we checked the Javascript.
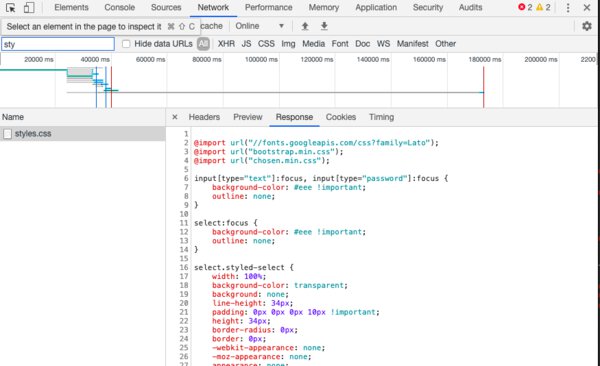
Open the network tab and look for CSS files. Click on the response tab and see if the file has indentations and comments removed.
If you find an un-minified CSS file then use an online tool such as CSSNano to reduce the file size.
Impact: Low
There is often CSS in the stylesheet that is no longer used by the page.
This is common as the site evolves.
You should remove all unused CSS to reduce the file size.
It can be almost impossible to look at a CSS file and figure out if the styles are in use.
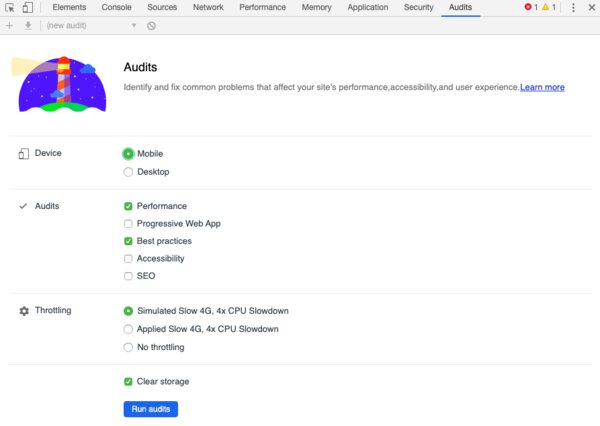
A simpler way is to perform a Lighthouse Audit.
To do this in Chrome Developer Tools open the Audit tab and run a “Performance” Audit.
This will flag the “Remove unused CSS” opportunity if your site would benefit.
We can remove unused CSS using the online tool UnCSS.
Load the HTML and the CSS into this tool and it will strip out all the CSS that is not needed.
One word of caution, sometimes the CSS appears on another page so be careful not to remove CSS that you need later.
Impact: Medium
We can also load only the critical CSS to render the visible above-the-fold content.
This is the CSS that renders the initial part of the page that the user sees before they start scrolling.
To check if critical CSS is being loaded on the site, look at the HTML and see if there are styles inline in the head.
If there is, check to see if they affect the first part of the visible page.
We can also use UnCSS to extract the CSS needed for the above the fold content. To do this select the HTML that is above the fold and insert it into the tool.
Then add the CSS styles.
Once you hit “UnCSS my styles” you have the critical CSS and you can insert this inline to the HTML.
To do this add the critical CSS to a <style> tag in the <head> section of your HTML.
Add the remaining CSS to a stylesheet using a <link> tag and add preload. We will look at this next.
Impact: Medium
Once you have extracted the above-the-fold CSS so that it appears inline. You still need to load the rest of the CSS.
Don't just add the stylesheet straight back into the page as this could delay and block the page from rendering.
Check if there are any <link> tags in the HTML that have preload enabled.
To preload the css and to stop it from blocking the rendering, change this:
<link rel="stylesheet" href="styles.min.css">
To this:
<link rel="preload" href="styles.min.css" as="style" onload="this.rel='stylesheet'">
Impact: Low
OK, so I know I said add inline CSS for above-the-fold CSS. This is about all other CSS.
Especially, any inline CSS added to the <body>.
Remove this and add it to an external CSS file using preload. This will make the HTML smaller and speed up the download of the file.
Look in the “Network” tab and at the HTML file for any inline CSS.
Extract the existing CSS and save as a file, then replace the <style> tag with a <link> tag.
Fonts are growing in size. We need to optimize them so that they do not slow the rendering of the page.
Impact: Medium
Google says that WOFF2 can provide 30% extra compression on WOFF. So make sure that you are using it.
To check that the font is WOFF2 use the network tab and check the font file extension.
WOFF2 is not supported by all browsers, so you will need to fall back to WOFF and TTF.
To do this in your CSS use a @font-face:
@font-face {
  font-family: 'MyWebFont';
  src: url('webfont.woff2') format('woff2'),
       url('webfont.woff') format('woff'),
       url('webfont.ttf') format('truetype');
}
and then we can use it in CSS styles like so:
body {
  font-family: 'MyWebFont', Fallback, sans-serif;
}
Impact: Low
Often fonts (and sometimes other assets) are on a different server to the HTML.
When this happens the browser needs to do a DNS lookup of the font domain name.
To reduce the time it takes to do this lookup we can perform the DNS lookup before the CSS loads the font.
Making the initial connection faster.
To do this on the “Elements” tab search for “preconnect” in the HTML.
Have a look to see if there are any <link> tags that have the DNS domain name of the location of the fonts.
To enable pre-connect, add the following code to the head of the page:
<link rel="preconnect" href="https://fonts.gstatic.com" crossorigin>
Remember to replace the URL above with the URL location of your fonts.
Here we are making changes to how the server sends the files to the browser.
A good metric to track here is TTFB or Time To First Byte. This is the metric that tracks the speed at which the files returned from the server.
We want to aim for this to be under 1.3 seconds.
To test this look at the network tab click on the HTML file and go to the timing tab.
You will see a statistic for TTFB if it is below 1.3 seconds on a Fast 3G connection you have passed.
If not, let's look at some improvements we can make.
Impact: High
Enabling compression on your server can have a big impact on how fast the page loads.
The server will compress the file before sending it to the browser. Making the file smaller as it travels over the internet.
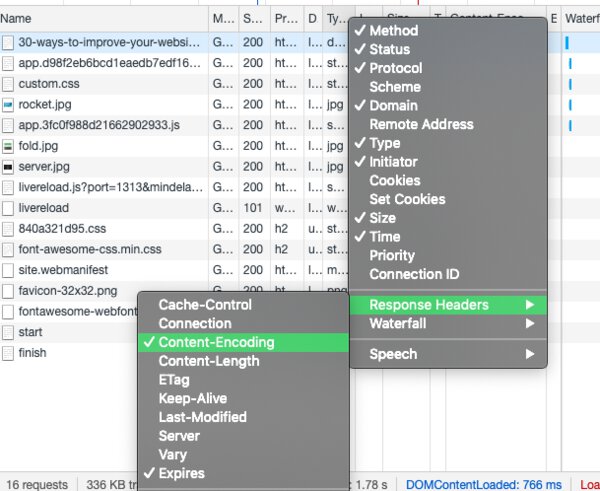
To view if there is compression you can take a look at the content-encoding header in the Network tab.
If you see a value of gzip or br then the file is being compressed.
If not, then you have no compression and should turn it on!
How you turn compression on is specific to your server setup.
Here are a few links to some common servers to get you started:
Also, remember that you only want to compress text files. So do not add compression to raster images as this may make them slower.
Add compression to the following file types:
- HTML
- CSS
- Javascript
- SVG's
- JSON
- XML
Impact: Medium
The fastest files to load are files that we have cached.
To stop the browser from requesting the file again you can tell it to cache any assets.
Once it has an asset cached it can check the date on the asset (known as the expiry).
If the expiry is in the future then the browser will use the local file.
If the expiry date has elapsed then the browser will fetch a new copy of the file.
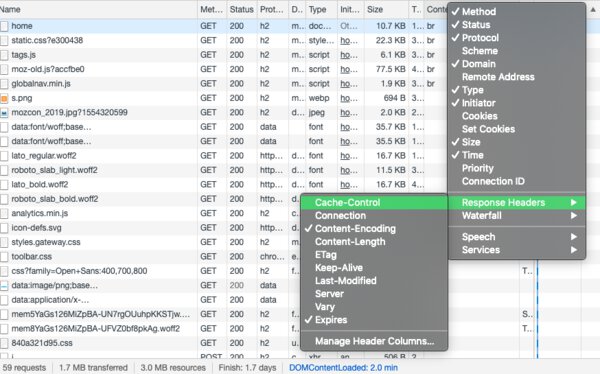
To control this we can set the cache-control HTTP header, which you can check in the network tab for any of your files.
You will need to add this HTTP header to the list of columns so that you can see it.
The value is the number of seconds that you should keep the file for before it has expired.
When setting a cache on your server I would stick to the following rules:
- Cache images for a year.
- Cache CSS and Javascript for a month.
- Do not cache HTML.
Impact: Low
If you do have HTTPS enabled on your site, browsers will display that your site is insecure.
That is not the only reason to enable HTTPS. GeoLocation, push notifications and service workers do not work without HTTPS.
There is also a performance boost if you register your site with the Google HSTS preload.
To check if you have HTTPS enabled open Chrome and look for the padlock next to the URL.
If you don’t see it, you may see the “Not Secure” text instead.
There is no excuse!
You can get a free SSL certificate from Let's Encrypt.
Check with your host and see if they can add it.
Impact: Low
HTTP/2 (h2) changes how we transfer files.
Instead of each request setting up a connection, they share a single connection. All assets from the same source then reuse this connection instead of establishing a new one.
The goal of the h2 project was to reduce page load times by 50%.
This changes the advice on some of the above improvements. Loading many files can be faster than one large big file. When enabling h2 it's important to test the changes you make.
To check if the site is using HTTP/2 we can look in the network tab and add the “Protocol” column.
This will show “h2” if we have HTTP/2 enabled on the server.
Not every server supports h2, check with your hosting provider to enable h2.
Impact: Low
Cookies add extra data to every request sent to your server.
This extra data will slowdown each request.
Try to keep these cookies to at least below 20.
To check this have a look at the network tab and click on the headers tab. You need to find the “cookie” header in the request, like this:
Review why you are using the cookies and see if you can remove them or reduce the content of the cookies.
We have outlined 30 website performance improvements you can make to your site.
The important take-away is that there is no one silver bullet when it comes to web performance.
Instead, there is a coming together of many different improvements.
Before you rush off and make all the improvements. Make sure to measure your site speed and track with Lighthouse overtime.
Use the Google Sheet track your website performance every day and make sure that the changes you are making are improving the site.
Concentrate on these improvements and your site will be super fast.
How fast should a Web page load?
A recent report looked at website performance and how this affected conversion. They found that conversion rate decreased as the page load time went up. For example, a 3 second load time on mobile would cut conversion rate in half, down to 1%. Let's look at what we can do to speed up your website.
How can I speed up my website?
There are many factors to address when speeding up a site. Here we break down 30 actionable improvements that you can make to your site.
How can I make my website load pictures faster?
To make images faster you need to make them smaller in file size. We need to optimize the image so that you do not lose image quality. There are rules you need to follow to optimize the images.
What is the most common mistake which is slowing down website's loading speed?
There are many mistakes in your HTML, CSS, Javascript, Fonts and Server configuration. To boost your website loading speed we breakdown 30 actionable improvements you can make to boost website loading speed.
