-
Notifications
You must be signed in to change notification settings - Fork 11
Development Environment
MOM-CA is a so called XRX platform. XRX is an acronym for XForms, REST and XQuery and is the name for a web application architecture using languages from the XML technology stack from front to back. As an XRX application, MOM-CA is mainly written in XQuery and XForms and makes also use of other XML technologies such as XSLT and XML Schema. Some less parts of the software lie beyond the expressiveness of XML languages and are thus written in JavaScript and Java.
One development environment dealing with all these markup, scripting and programming languages is the Eclipse IDE, which is used for MOM-CA development as yet. MOM-CA development is currently only possible on a Linux computer.
Install the Eclipse IDE on your Linux computer. Eclipse is available as a standard package on most Linux distributions. On Ubuntu, for example, install Eclipse via the Ubuntu Software Center or via a terminal using the following command:
sudo apt-get install eclipse
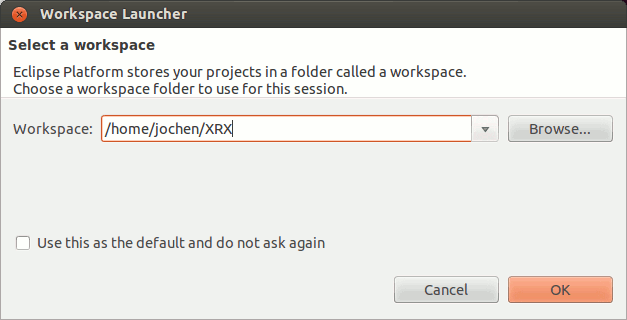
Open Eclipse. A dialog appears where you are asked to open a so called workspace. Choose a new workspace, e.g. /home/jochen/XRX, and press the OK button.
Open a terminal and move into the new created workspace /home/jochen/XRX. Install MOM-CA into the workspace as described in the MOM-CA installation guide.
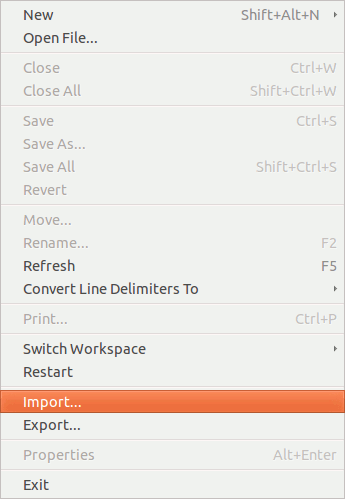
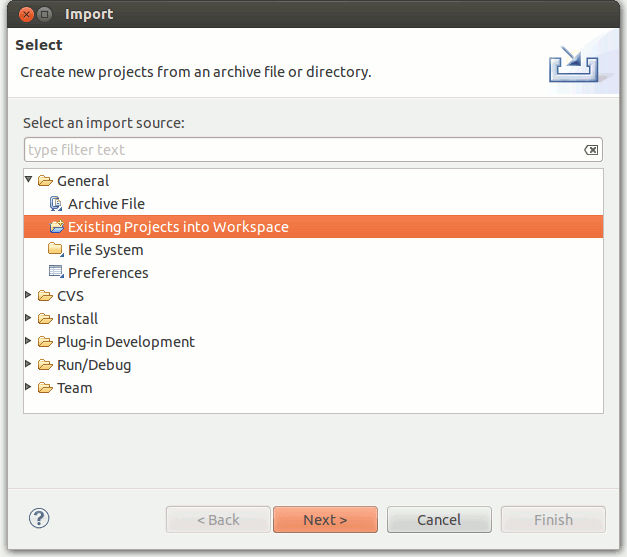
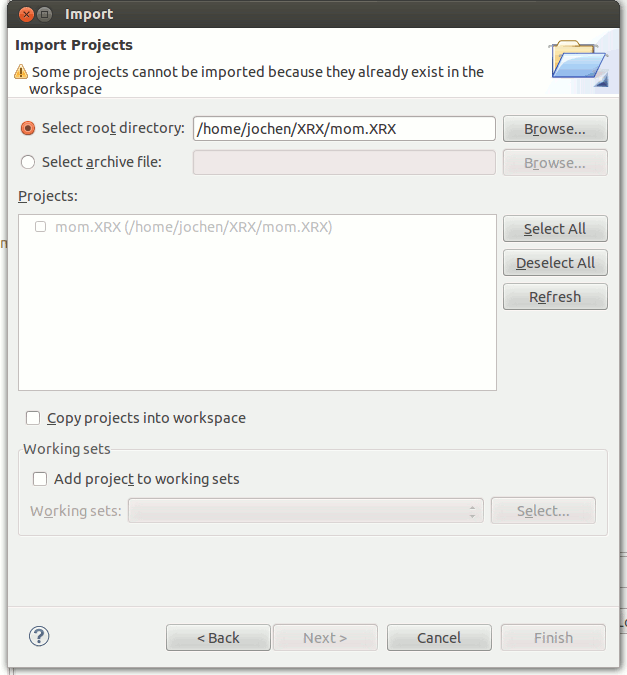
Select File > Import... > General > Existing Projects into Workspace > Next > Browse... > Finish > to import the MOM-CA source code into the workspace.
The XQuery Development Toolkit (XQDT) Eclipse plugin has to be manually installed to support XQuery syntax highlighting.
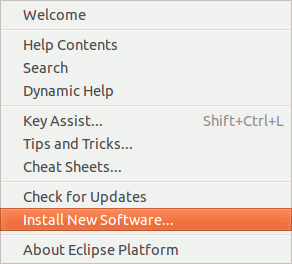
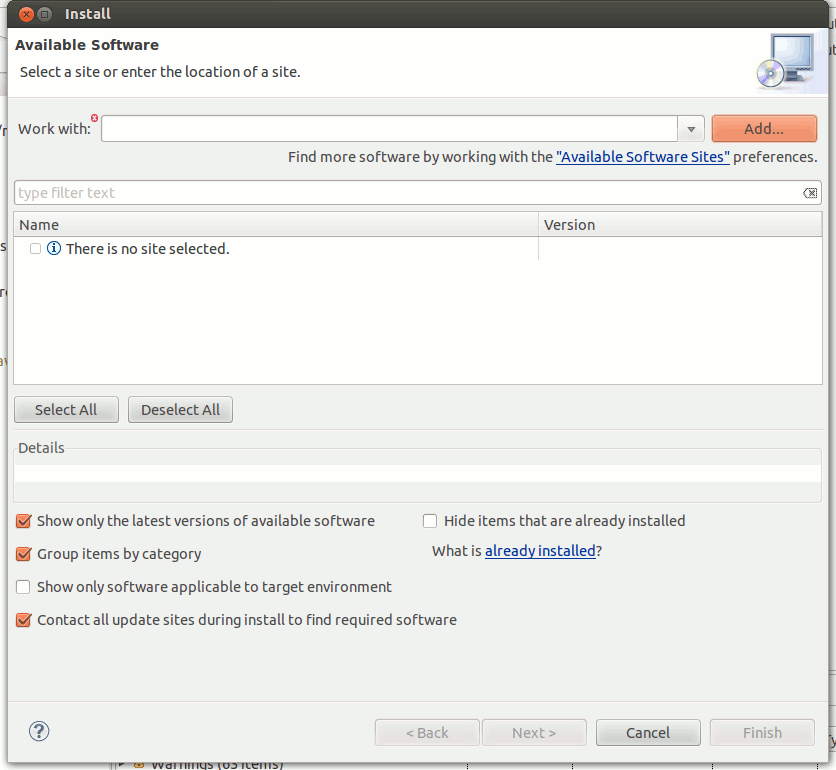
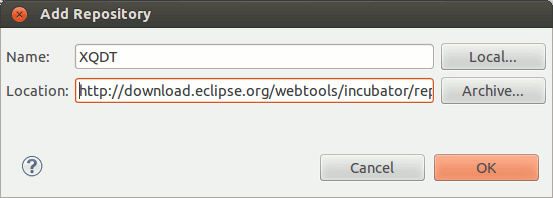
Select Help > Install New Software... > Add... > and specify the plugin name XQDT and the URL of the plugin repository: http://download.eclipse.org/webtools/incubator/repository/xquery/milestones/.
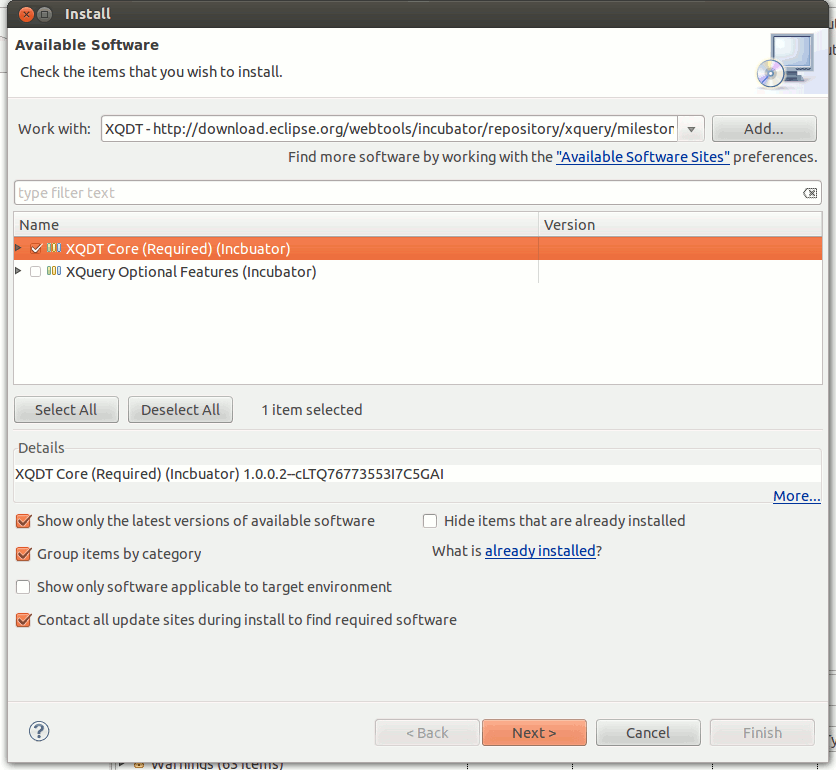
Select the XQDT Core > package only and follow the further instructions provided by the installation wizard.
Please be aware, that when you are using Eclipse Kepler you might have to install the DLTK version 3 from the indigo repository at http://download.eclipse.org/releases/indigo.
Also the web development tools for XML, XML Schema, XSLT and JavaScript development have to be installed manually.


Select Help > Install new Software... > and choose the [Indigo Update Site - http://download.eclipse.org/releases/indigo/](Indigo Update Site - http://download.eclipse.org/releases/indigo/) repository directly from the select-box.
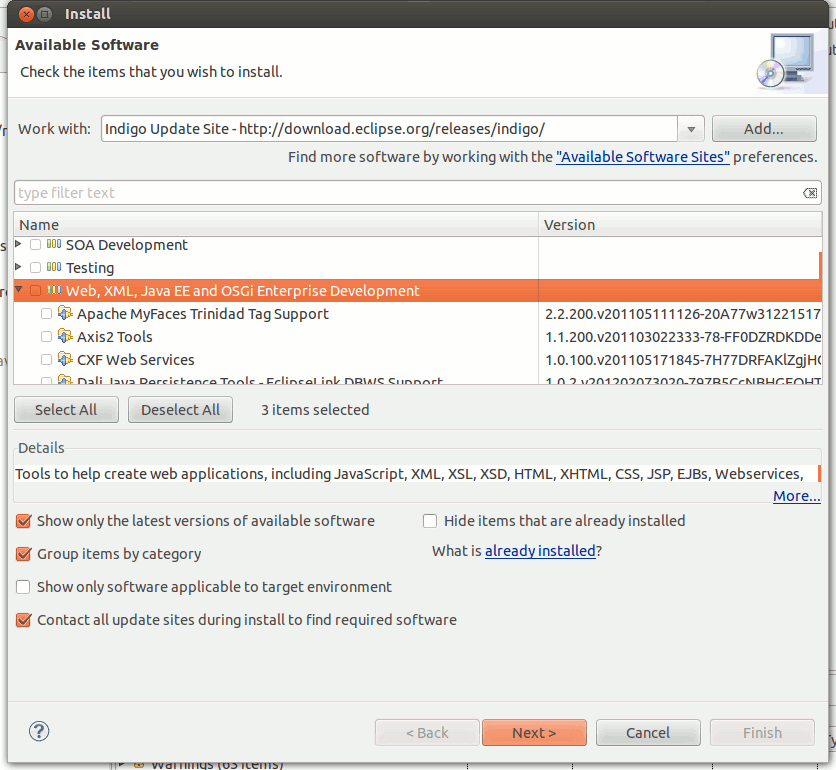
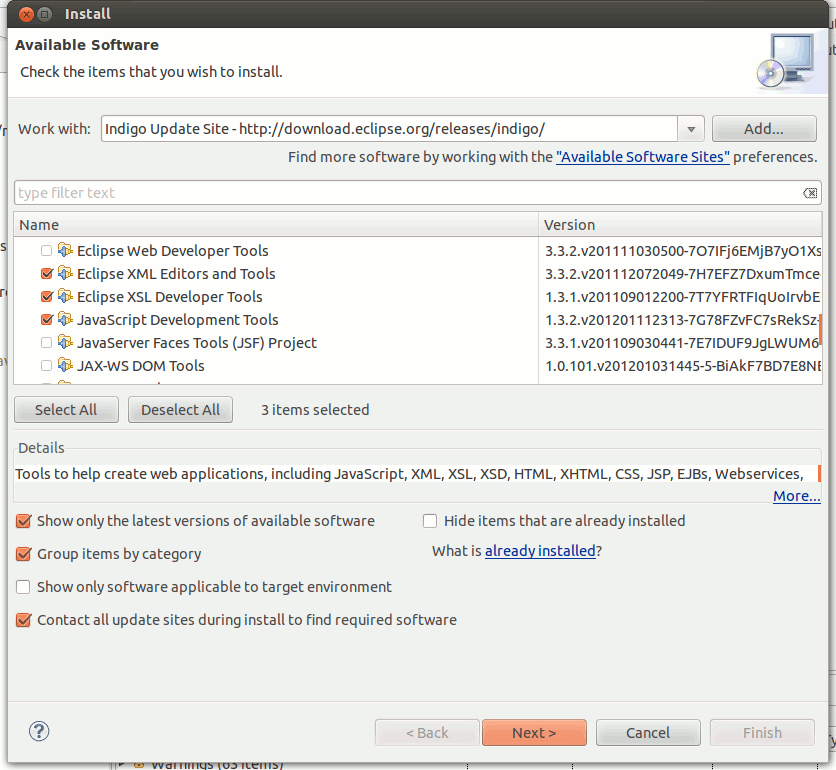
Select Web, XML, Java EE and OSGi Enterprise Development > (Eclipse XML Editors and Tools, Eclipse XSL Developer Tools, JavaScript Development Tools) > and follow the further instructions provided by the installation wizard.
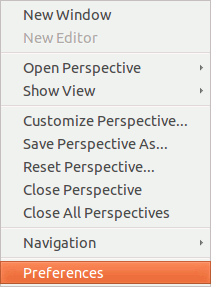
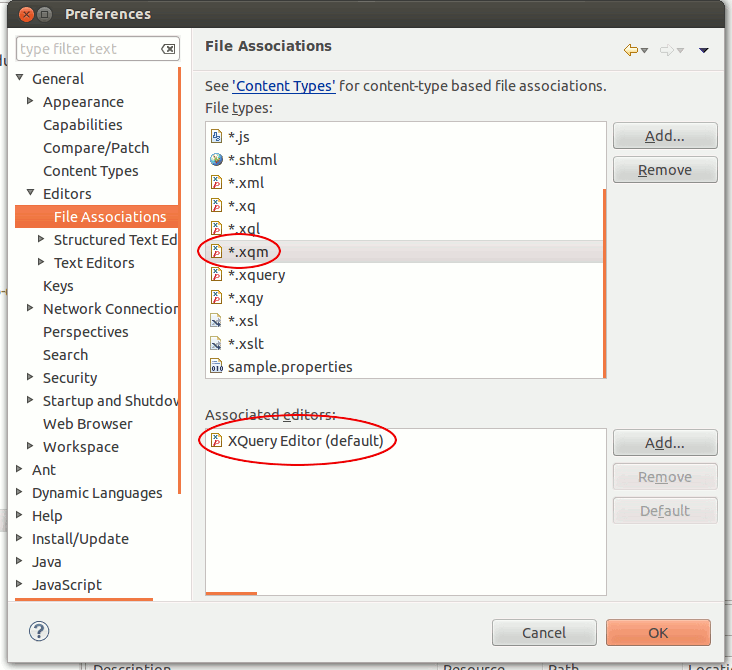
- Select Window > Preferences > General > Editors > File Associations >.
- Select the upper Add... > button and add a new file type *.xqm.
- Select the lower Add... > button and associate the XQuery Editor with the *.xqm file type.
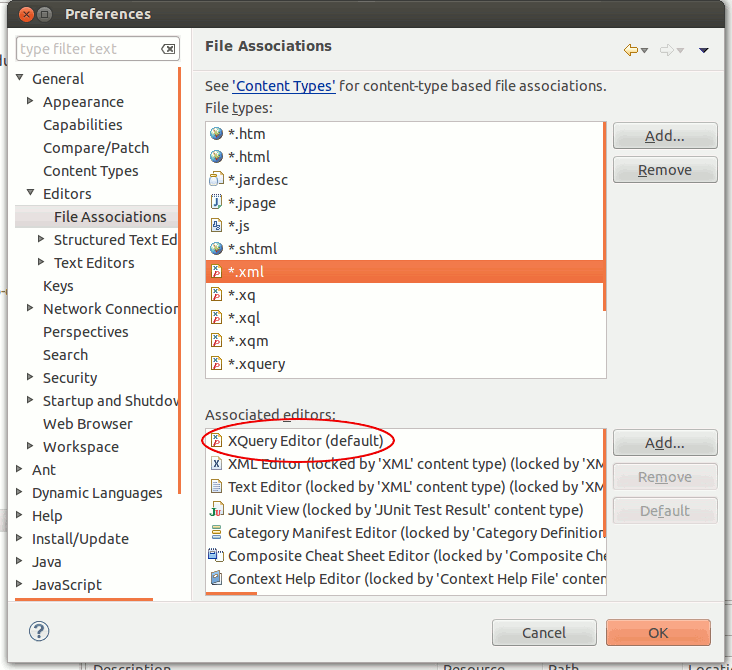
Since the MOM-CA software often uses XQuery snippets inside XML files it may be useful to also set the XQuery Editor as the default editor for XML documents to have the XQuery code parts highlighted in the right way. Highlighting an XML document with an XQuery editor works correctly since an XML document is also a valid XQuery document according to the XQuery specification.
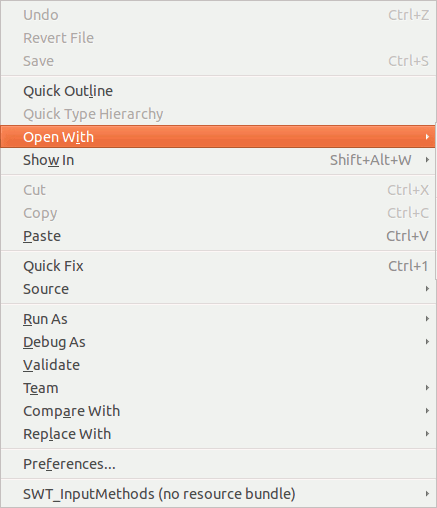
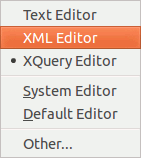
One can later switch between the XQuery Editor and the XML Editor with a right click (context menu) on an XML file if desired.

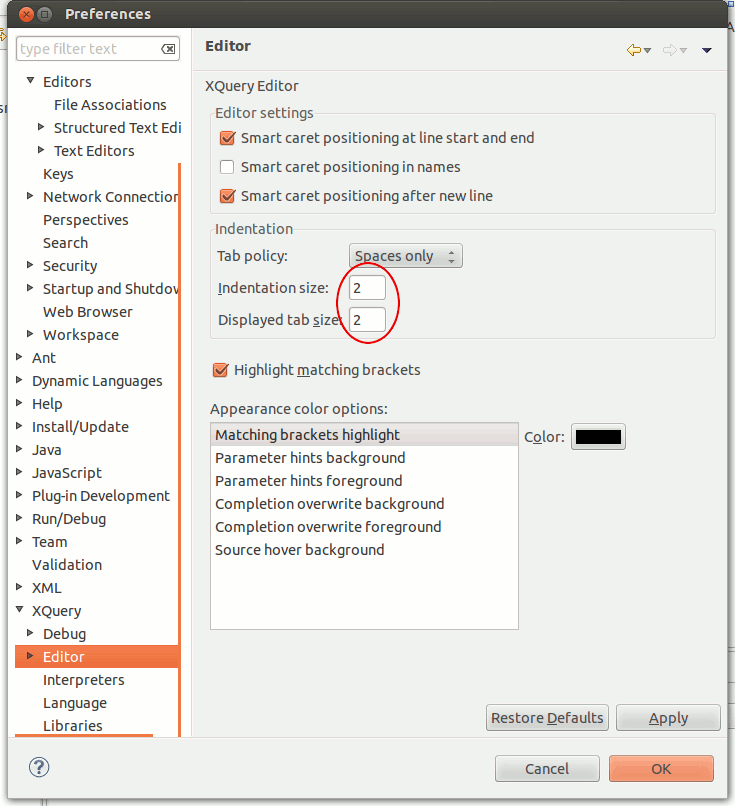
Select Window > Preferences > XQuery > Editor > and choose a value of 2 for the Indentation size as well as for the Displayed tab size. It is important that all MOM-CA developers use the same tab size (spaces only and size 2). Otherwise the github code diff view is not working in the right way.

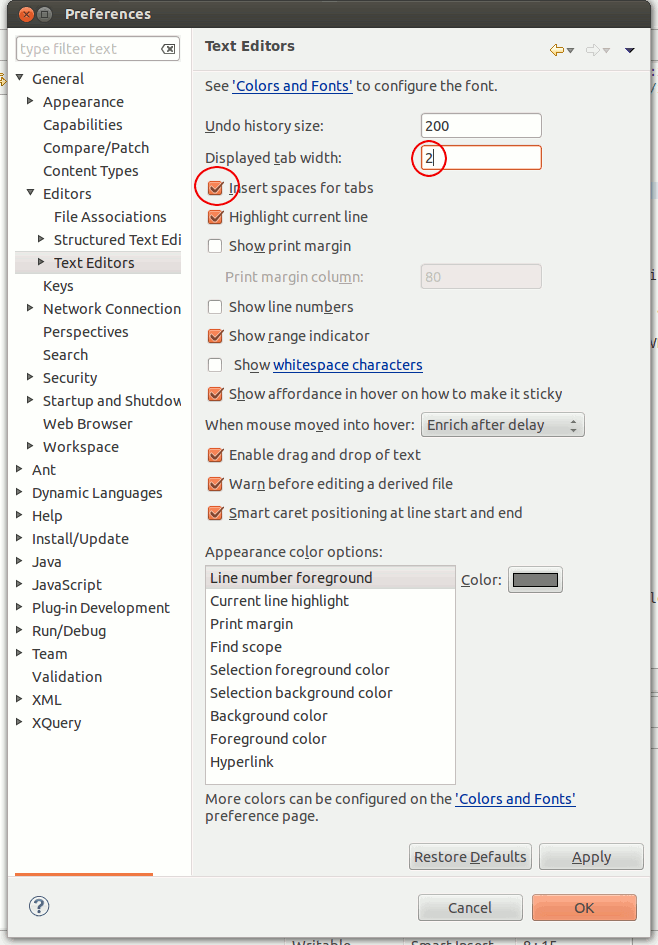
Select Window > Preferences > General > Editors > Text Editors > and choose a value of 2 for Displayed tab width and select the Insert spaces for tabs option. It is important that all MOM-CA developers use the same tab size (spaces only and size 2). Otherwise the github code diff view is not working in the right way.
"The EGit plug-in can be installed into every Eclipse IDE installation. Usually EGit supports the last two Eclipse releases.
Most Eclipse 4.2 and Eclipse 4.3 downloads from Eclipse.org contain EGit in their default configuration. In this case no additional installation is required.
If the EGit plug-in is missing in your Eclipse installation, you can install it via the Eclipse installation manager. Start this manager via the Help → Install new Software menu entry.
EGit can be installed from the following URL: http://download.eclipse.org/egit/updates" Lars VOGEL: Git version control with Eclipse (Egit)Tutorial. on: http://www.vogella.com/tutorials/EclipseGit/article.html [2014-11-07]. Follow the tutorial to learn more about configuration and use.